CORNWALL RAILWAY GALLERY MAIN LINE - Buckshead tunnel to St Austell Including St Austell Goods
Credits, Many thanks to all contributors - please see a list on the home page.
Members and general visitors to the CRS site will be interested in visiting http://www.railmaponline.com From the opening page a full map of the UK can be accessed which can then be enlarged to show every railway line in the UK. Not just today's network but lines from the past have been overlaid. As you zoom in sidings and even tramways become visible.
A valuable tip from Guy Vincent.
A valuable tip from Guy Vincent.
If you do not see what you require
Go to the Links page and select Cornwall Centre, then on their home page select 'Cornwall Image Bank'. There is a selection of photographs by John Vaughan, Arthur Trevan, George Ellis and others.
You could always visit the Cornwall Centre at Alma Place, Redruth. Very near the station.
You could always visit the Cornwall Centre at Alma Place, Redruth. Very near the station.
N.B Click on picture to obtain an enlargement and further details
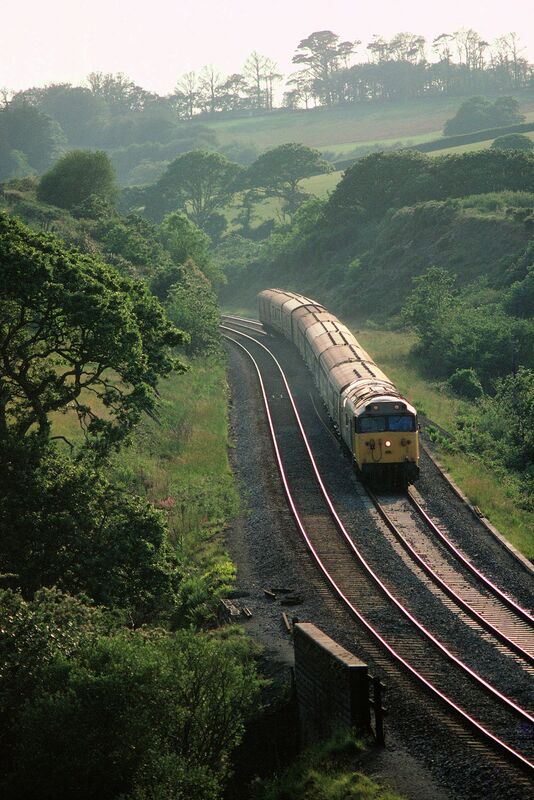
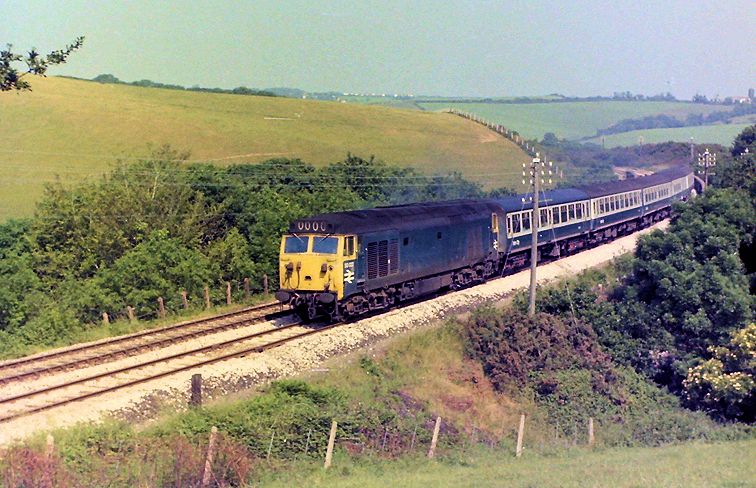
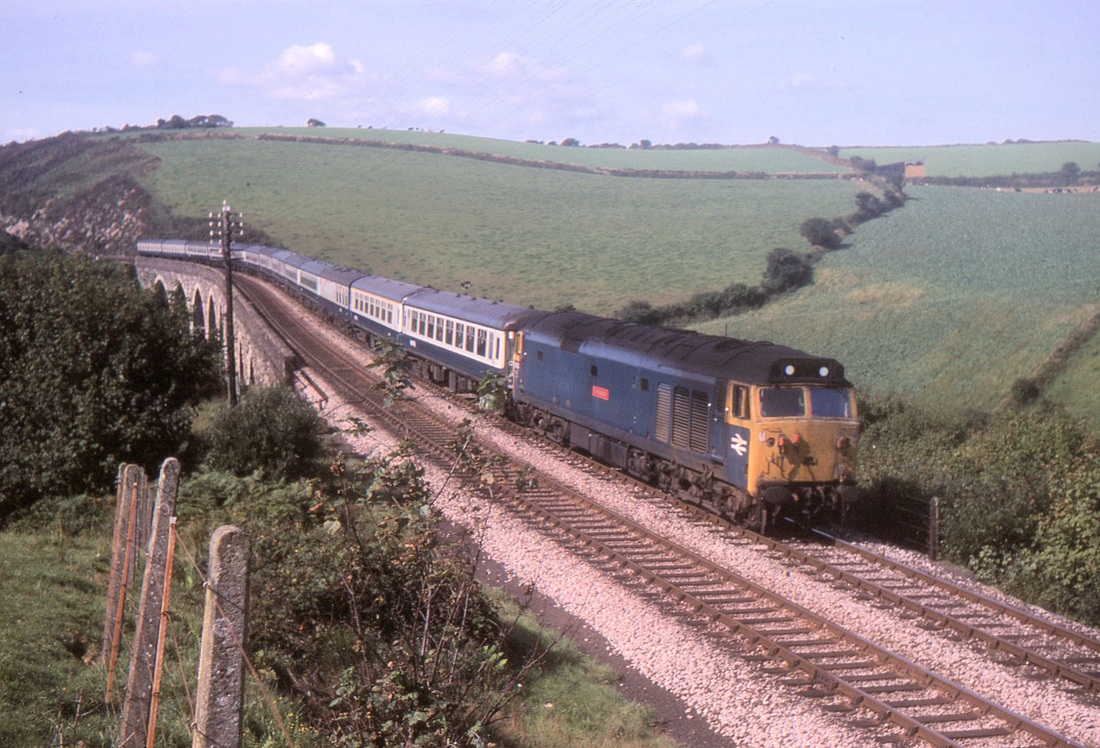
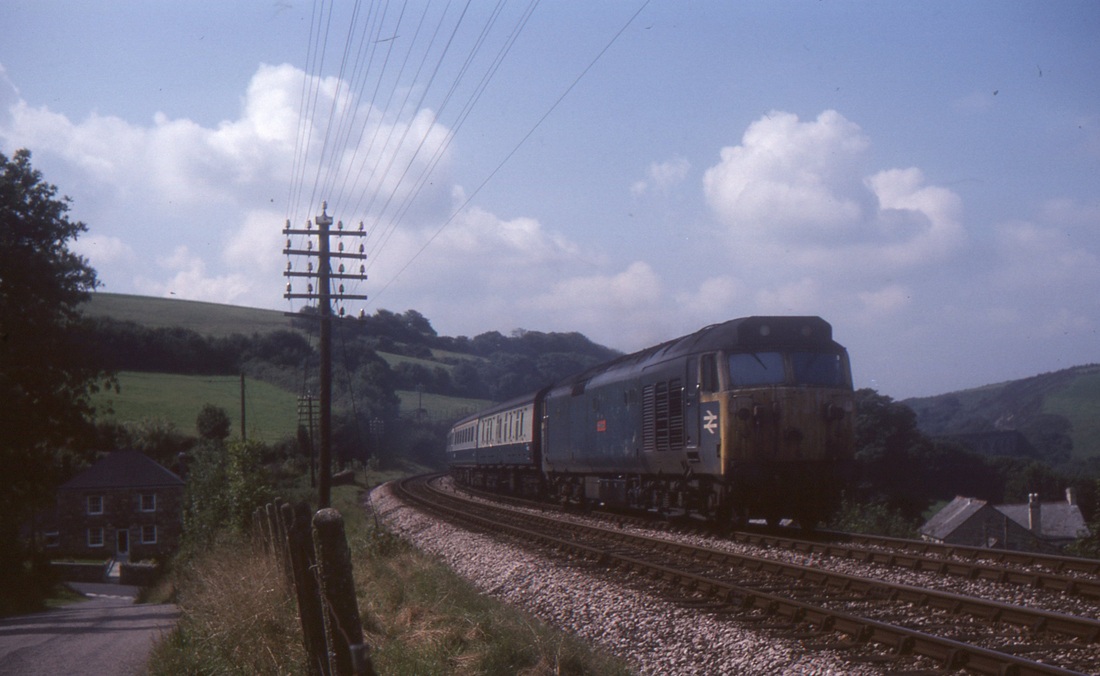
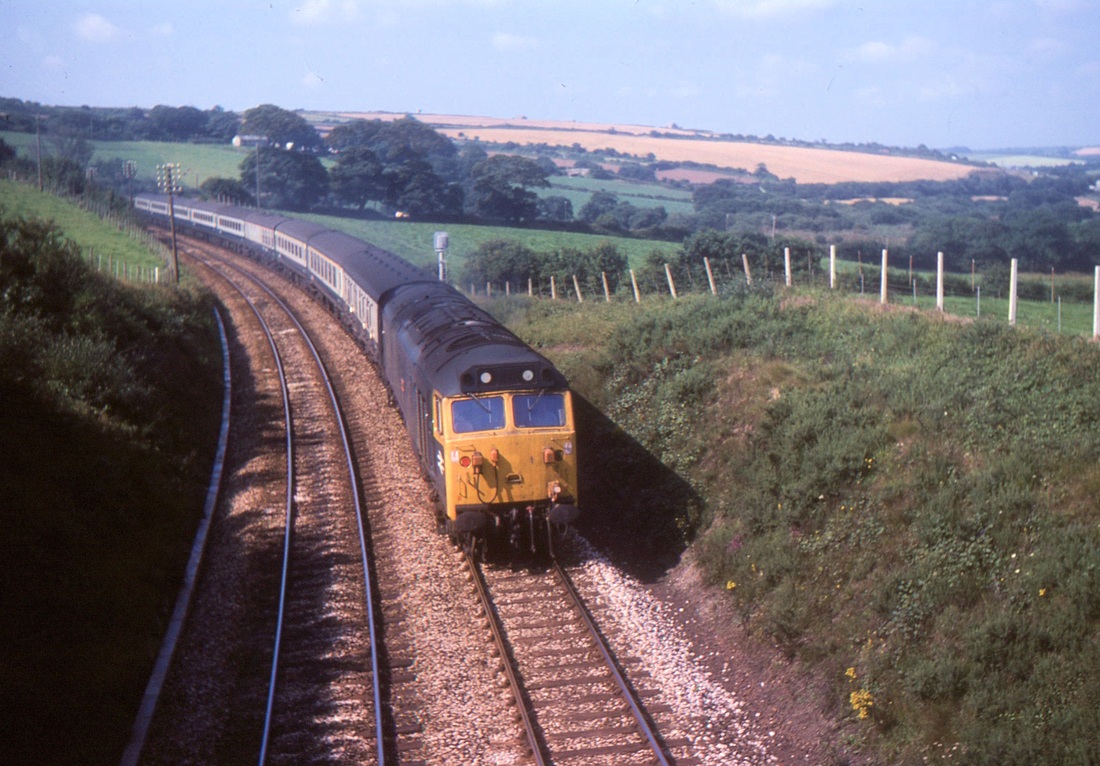
A lush 'green scene' as 50050 'Fearless' powers an up passenger train east of Buckshead Tunnel, Truro. Copyright Nick Trudgian.
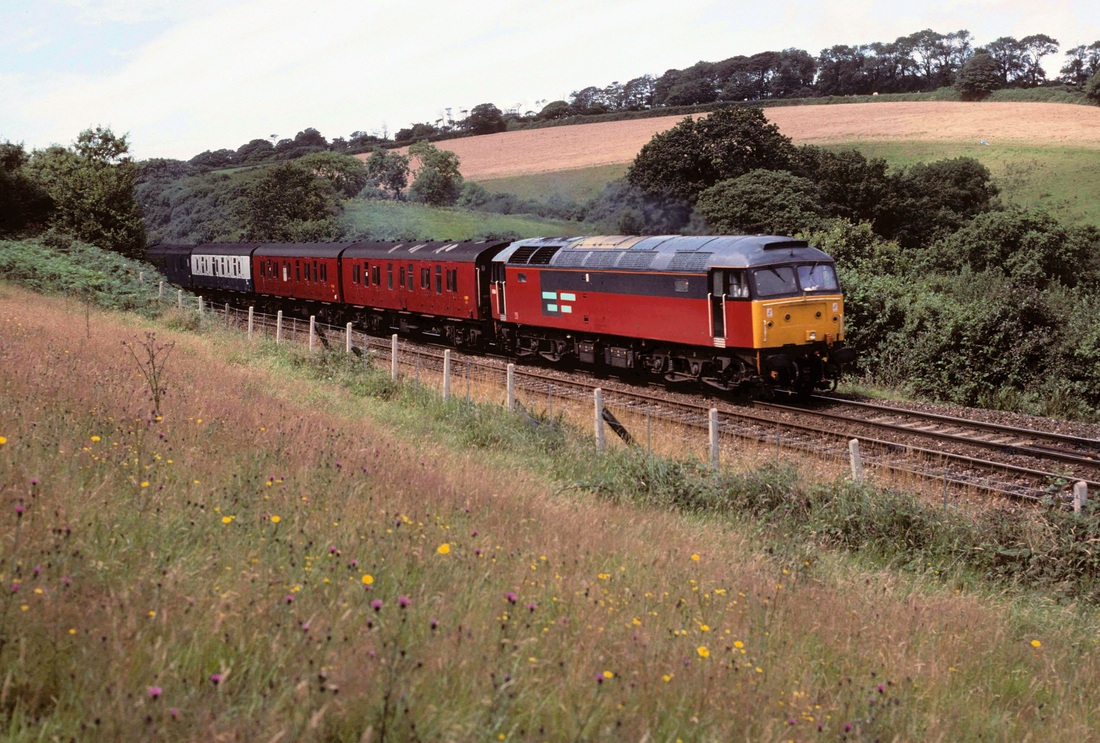
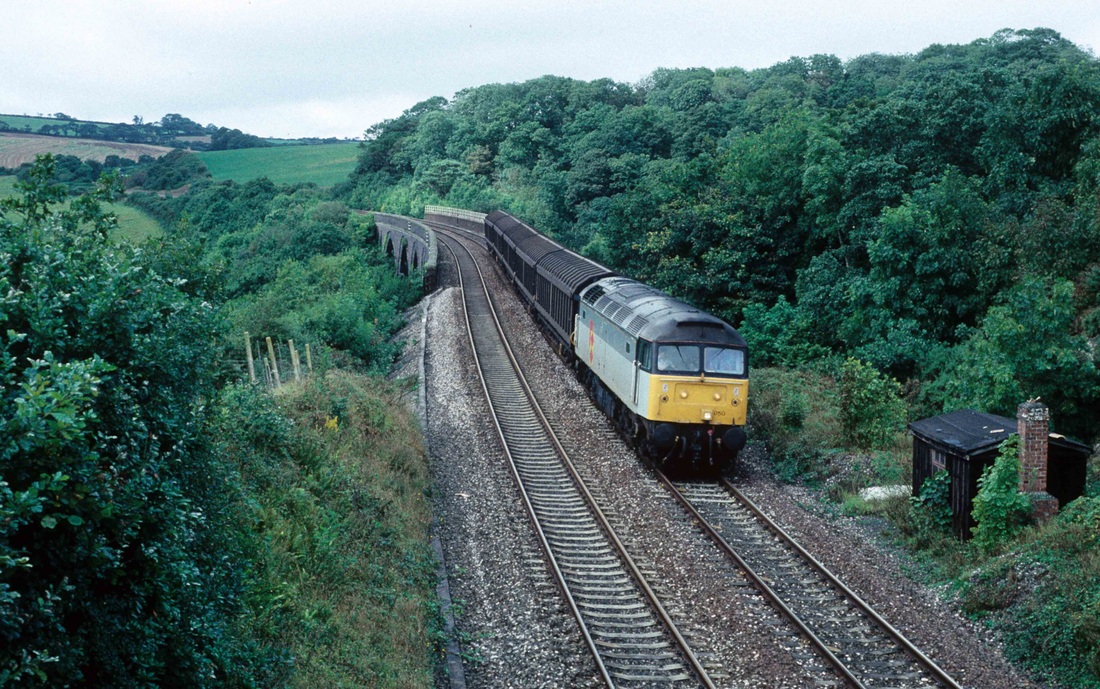
47644 heads a vans train east out of Buckshead tunnel on the 30th August 1993. Copyright Roger Geach

A rare location! This is the line between Buckshead and Polperro tunnels. Here we see 50 035 Ark Royal on a down service in this very isolated bit of country accessed via Tregurra Lane. In the distance can be seen the entrance to Polperro tunnel. 26th June 79 Copyright Mike Roach
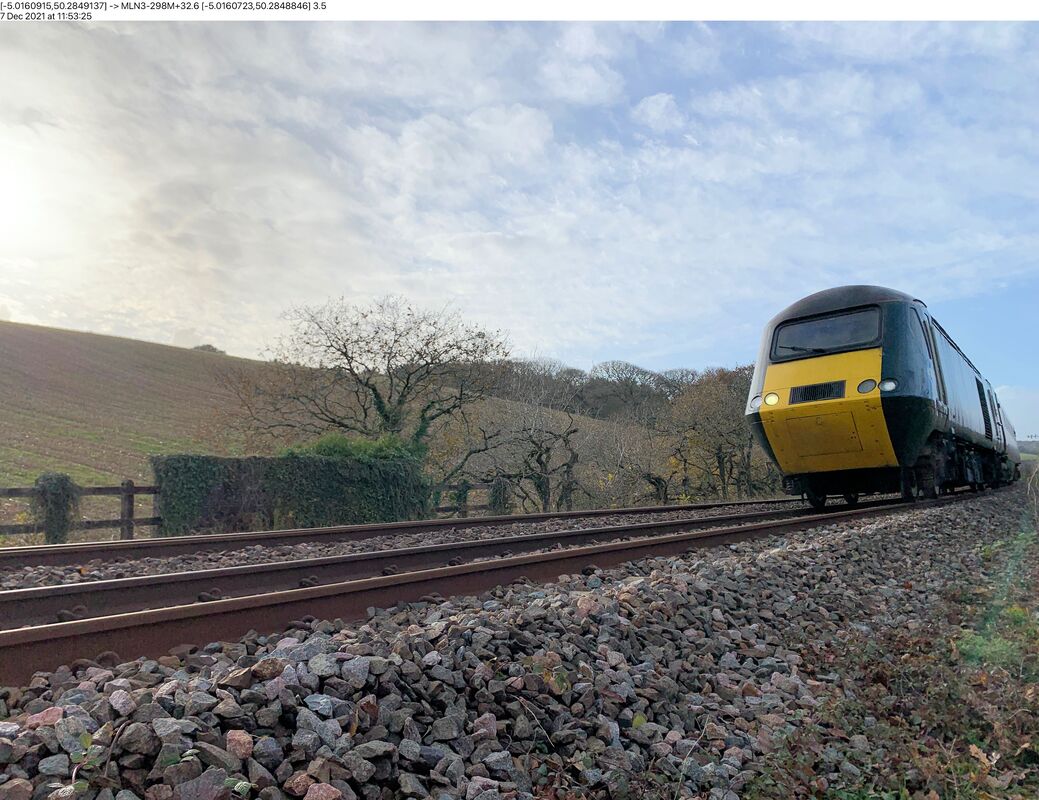
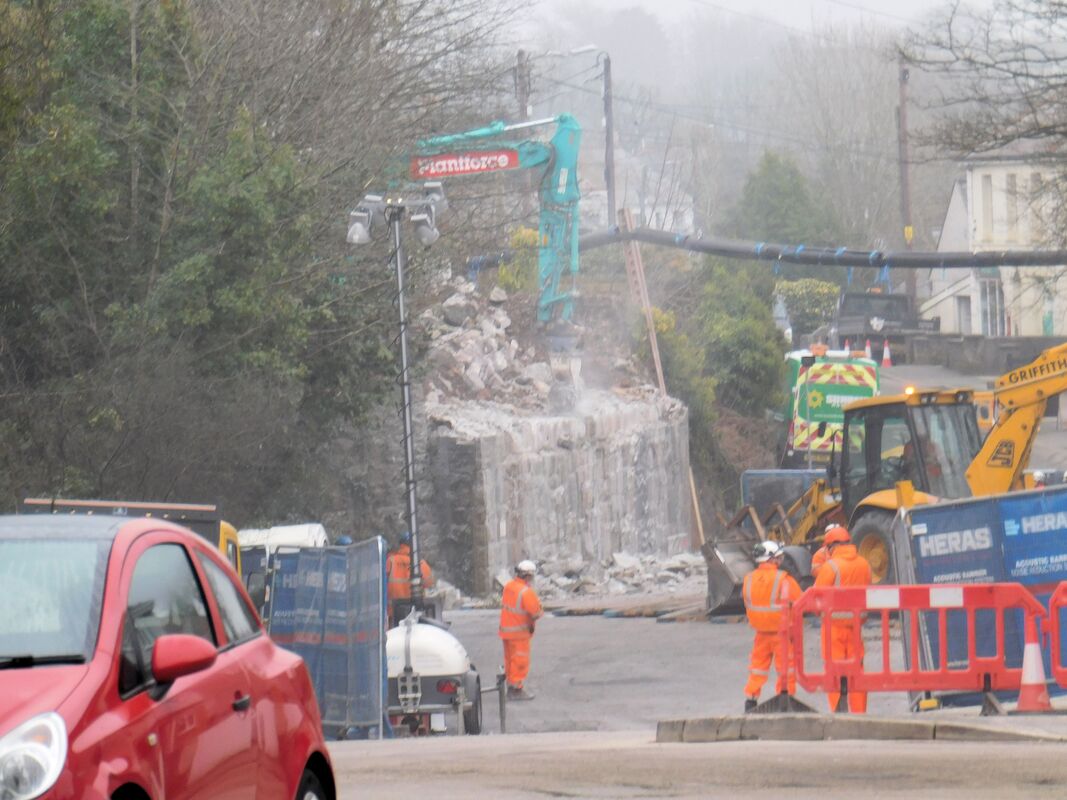
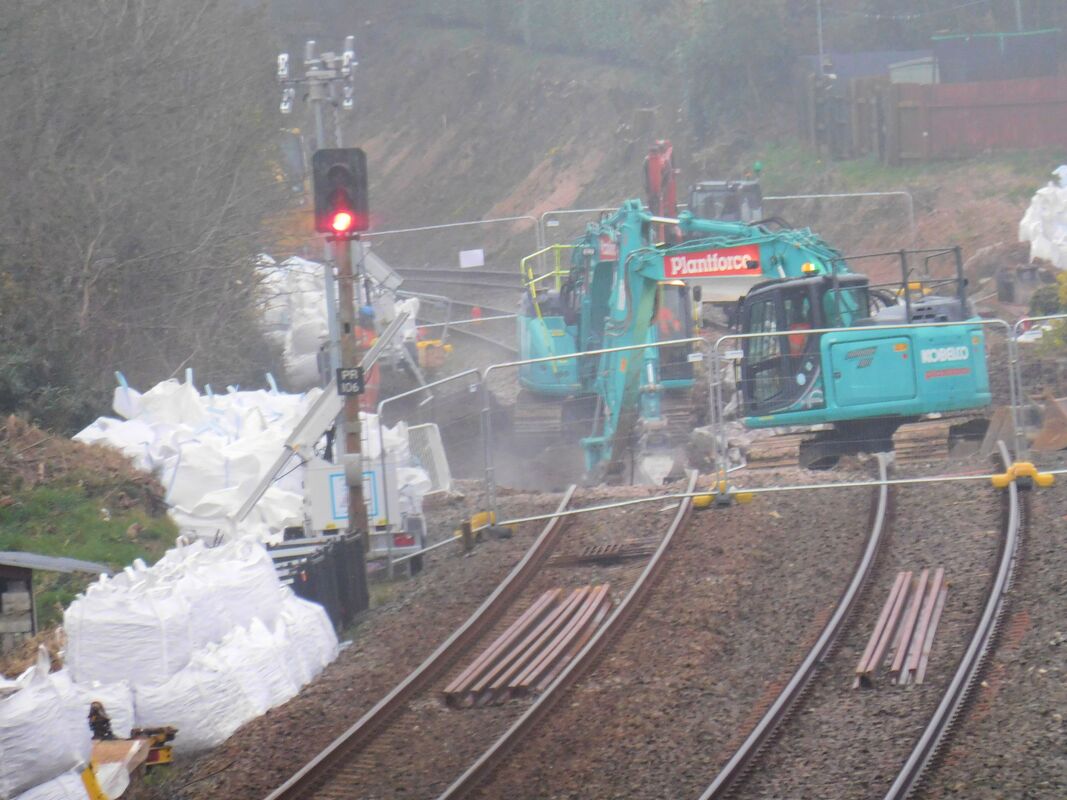
Polperrow Tunnel 1 West Cutting. 7th December 2021 Copyright Mark Howells
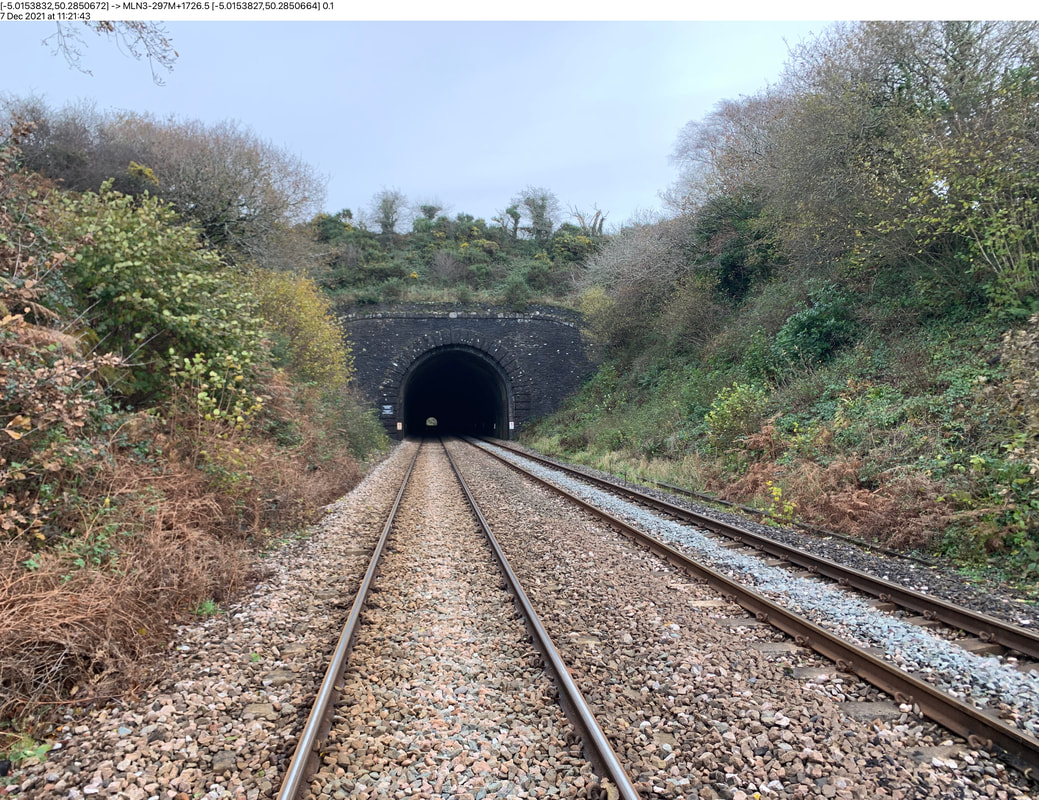
Polperrow Tunnel 2 West Cutting. 7th December 2021 Copyright Mark Howells
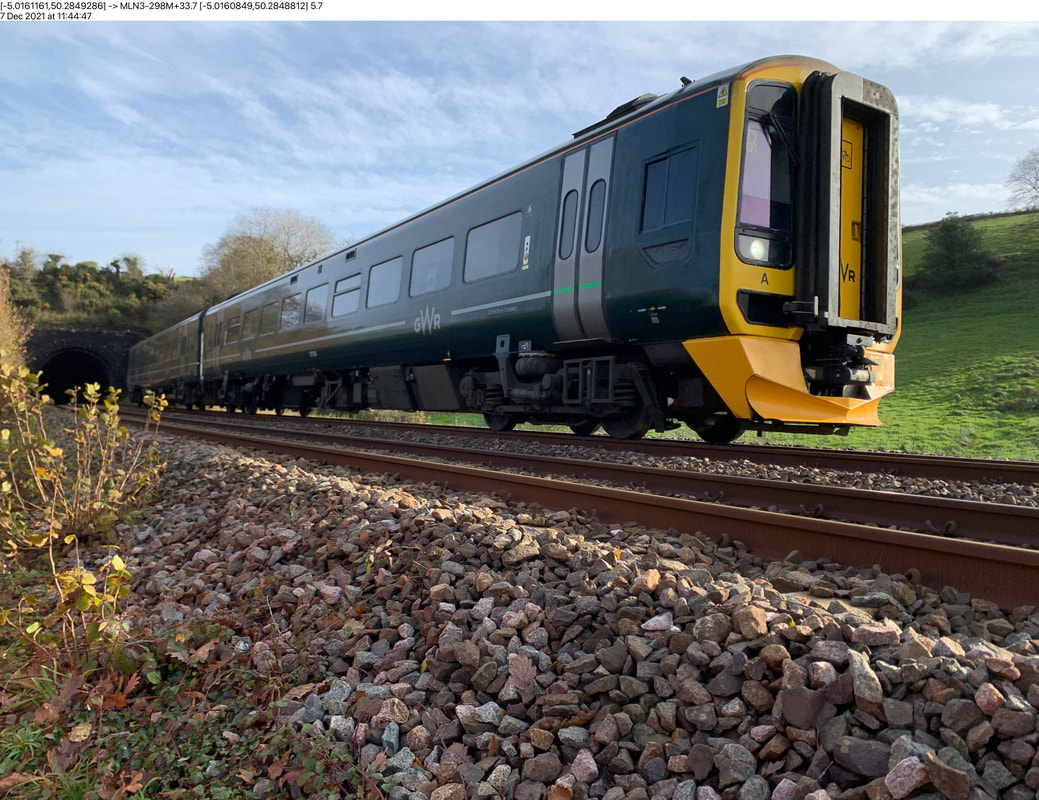
Polperrow Tunnel 3 West Cutting. 7th December 2021 Copyright Mark Howells
50022 later Anson on the Down Cornish Riviera Express nr Polperro tunnel 24th June 76 Copyright Neil Phillips
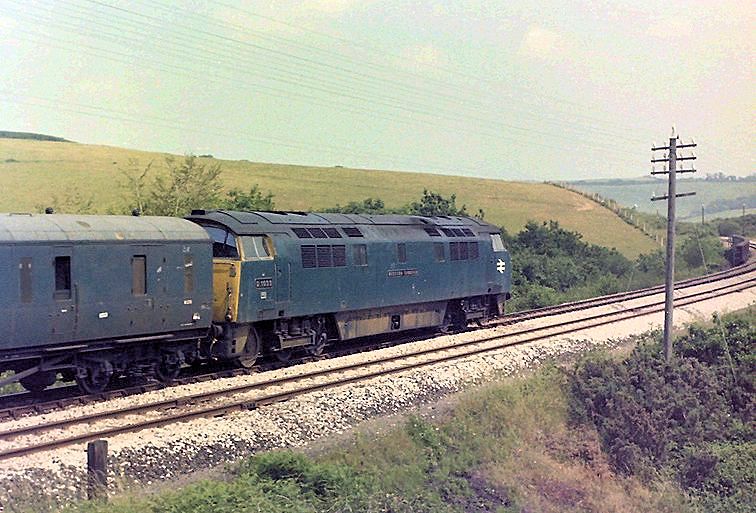
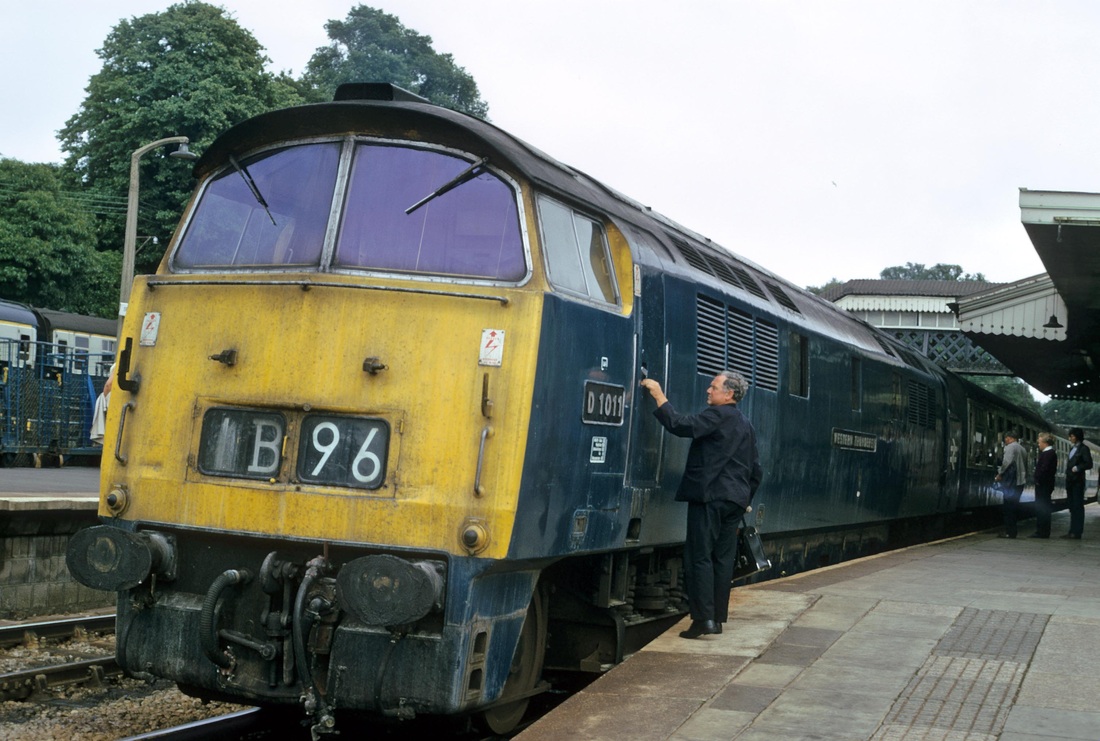
D1033 Western Trooper on an up parcels nr Tresillian. 24th June 1976 Copyright Neil Phillips
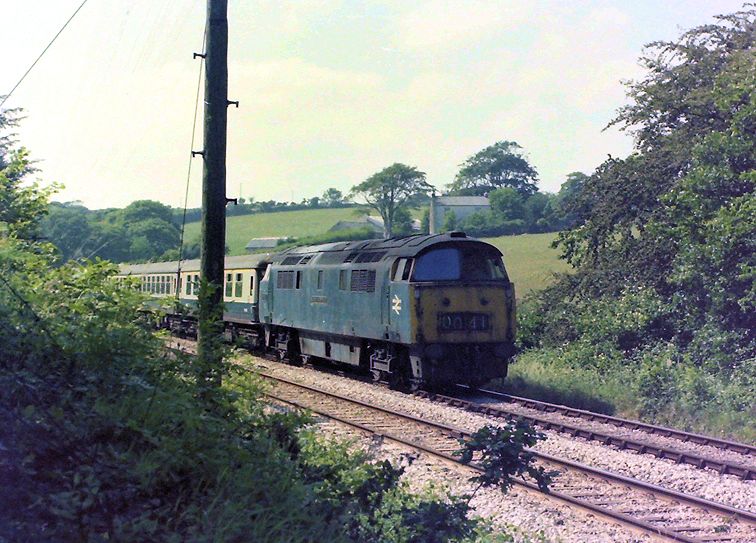
D1041 Western Prince nr Tresillian with a Penzance to Paddington train 24th June 1976 Copyright Neil Phillips
Tresillian, An uknown Western. Probus church in the background 10th April 1973 Copyright Sid Sponheimer
Tregagle Viaduct 297miles 7 chains

1070 Western Gauntlet crossing Tregagle viaduct near Tresillian 10th April 1973 Copyright Sid Sponheimer .
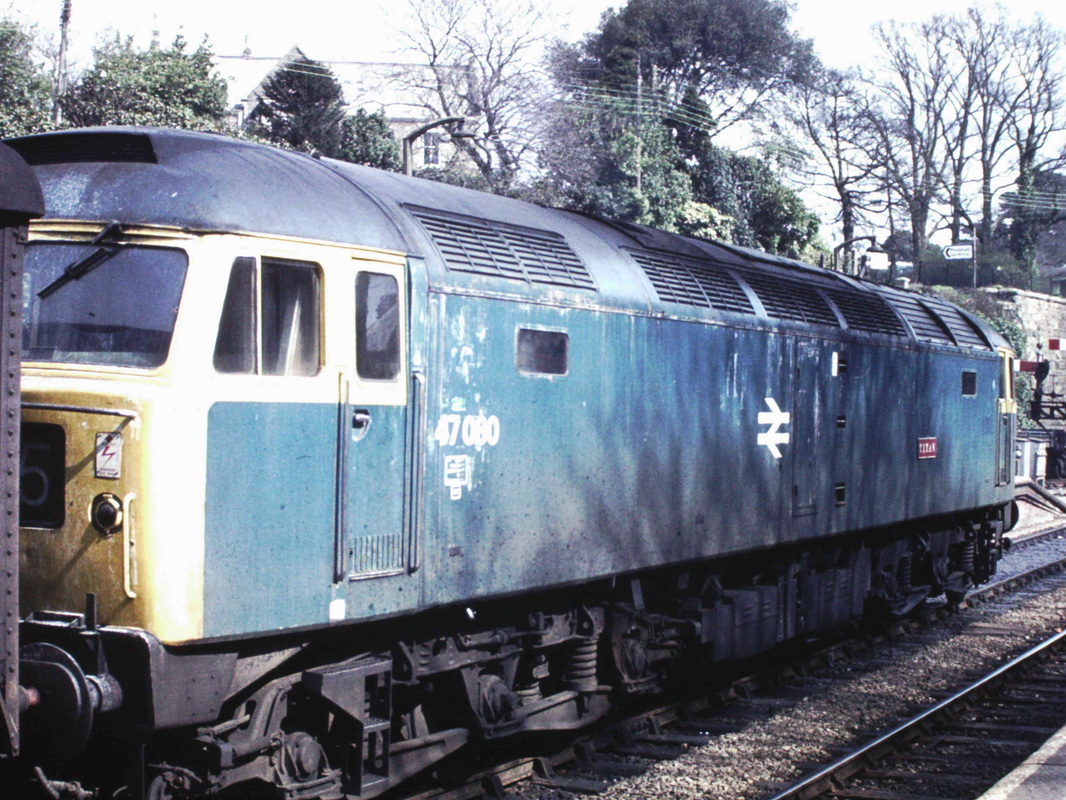
47050 on the Truro to Incenalton has just crossed Tegeagle_vidauct nr Probus. The entrance to Polperro tunnel is just out of sight in the distance. This service that used to run up to the early 90s. 16th September 91 Copyright Roger Geach
Probus Signal Box Memories of the Late Cyril Hitchens
Probus signal box was at the limit of my area from Penzance on the main line. It was situated on the Truro side of Probus & Ladock Platform/Halt and was used to break the section between Grampound Road and Truro East. It had 10 levers, 3 running signals on the up main, the same on the down, 2 points and 2 discs for the rarely used crossover. Although small it had the usual interior fittings in common with other Cornish boxes, but one feature set it apart-it was single storey at ground level.
Following the closure of the halt in 1957 all trains passed at speed and the signalman's view was of rapidly rotating wheels and flashing pistons and rods of Castles, Counties, Halls, Granges etc. only a few feet away. Indeed, the windows were protected from flying ballast by stout wire mesh. I recall that before closure, very few trains stopped at the platform and the major traffic was not of the human variety-but of rabbits, many boxes of which were loaded into the guards vans of local passenger trains.
Possibly because of its isolation and undemanding operation the box was the centre of a strange situation late in its existence. In the winter months the regular late turn signalman frequently reported to the District Inspector at St. Blazey that he could hear someone or something knocking on the roof during his shift. This was reported so often that the D. I. decided to investigate. He sent two relief signalmen there (one was me) to hide in the bushes on the railway bank during the evening to see what they could find out. This exercise was repeated on several occasions, but nothing was ever seen or heard. It proved to be one of my more unusual duties during my railway career!
This had no bearing on the crossover being taken out of use and the box closing during the early 1960s.
N.B. Probus Box and crossover (296 - 46) was sited exactly a mile west of Probus and Ladock Halt. (295 - 47).
A visit to Probus Signal Box by Roy Hart
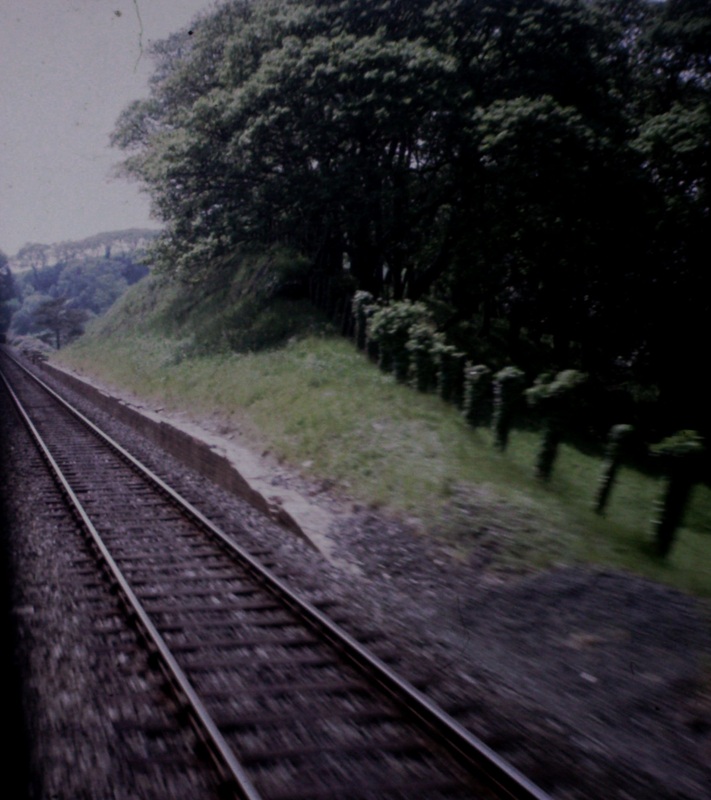
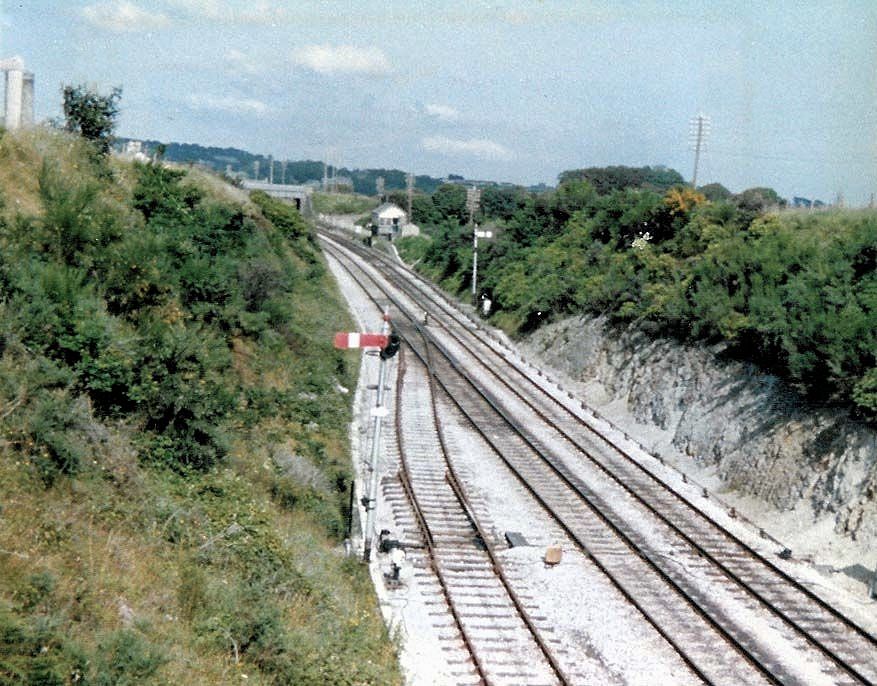
Reading the late Cyril Hitchens' piece about Probus reminded me about a visit I made to Probus box in 1964: the box was reached up a quiet farm track, then down a path along the cutting. It was a ground-level wooden structure, on the outside of a curve, so the signalman's eyes were at wheel level of trains.
The story began in the 1890s, when the Great Western resolved to double the Cornish main line. The problem was not the widened earthworks, but the viaducts. Between St Austell and Truro were 9 viaducts: St Austell, Gover, Coombe, Fal, Probus, Tregarne, Tregeagle, Truro and Carvedras. Probus was to be replaced by an embankment, the others by wider, masonry structures.This made traffic management difficult, with Grampound Road the only passing place. At Probus was a small box, Probus siding. It lay to the west of the later Probus Halt. The long single line section from Grampound to Truro was a difficulty and Probus siding had just a small loop with no room for expansion, so the box was closed and a new, long crossing loop installed, with a box at each end: Probus East and Probus West. With the completion of doubling in the area in 1896, Probus West remained as a break- section box: Probus.
Probus box was an example of the old-time railway: in 1964 I found the signalman ensconsed in an armchair with the two resident cats. The box had four signals only by then. The frame was the original from the 19th century. So low was the structure that ballast was thrown up like bullets by passing trains.
This quaint little spot was obliterated in 1965. Today it is possible to spot the notch in the cutting near the overbridge where the box once stood.
Further information on Probus Signal Boxes
Having read the ‘Headlines’ item about Probus, I decided to look in the relevant Register from the Signalling Record Society, and based on the information gleaned from it.....
1. The box from Probus Siding went to Yealmpton. As the latter had a large frame (23 levers rather than 11), then I would guess that only the superstructure was re-used.
2. Probus East had come second-hand from Bristol (exact location unknown).
3. Probus West was constructed using the top from the former box at St Brides (in South Wales) and the lever-frame from Tresulgan (though it is not known whether East or West there).
Many thanks to Chris Osment (Rail West) for this information.
Probus and Ladock
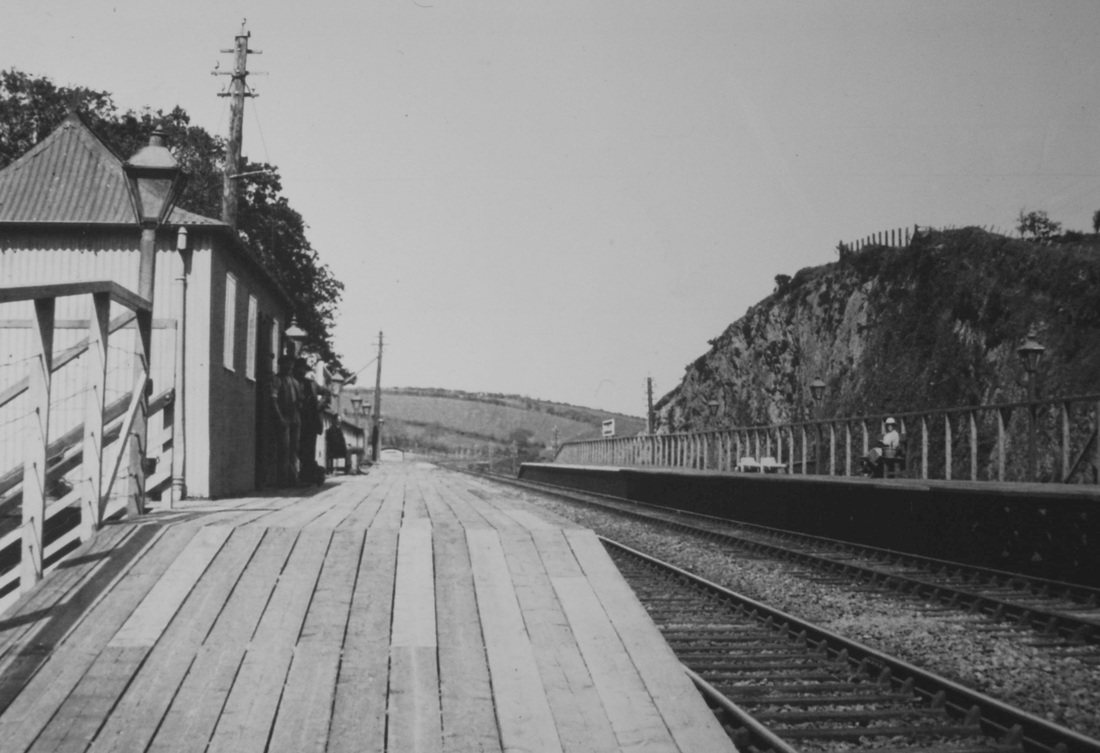
Probus and Ladock. From the Peter Butt Collection. Although the majority of the station was of timber construction the original platform faces in brick still remain. Copyright
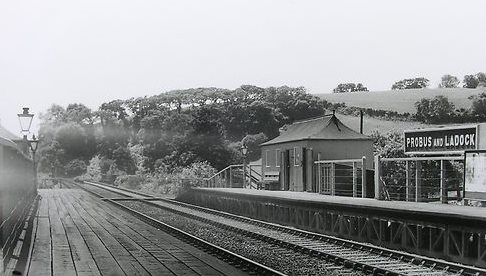
Probus and Ladock which was very remote from the villages its was purported to serve. It closed 2nd December 1957 Courtesy the Alan Harris Collection. Copyright
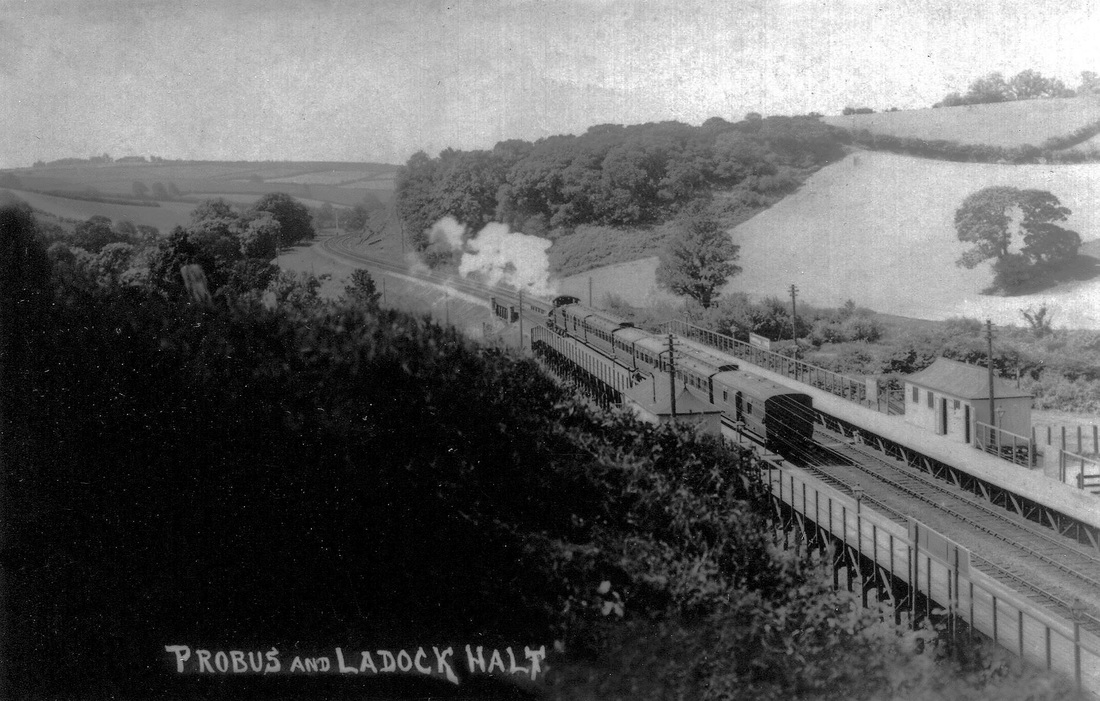
A most interesting picture from an unknown source of a down train departing from Probus & Ladock Platform (As it seems to be known, rather than Halt). This view taken from the field overlooking the station. From the Alan Harris Collection.
Grampound Road
Station closed 5 Oct 1964, goods traffic had previously been withdrawn on 1 June.
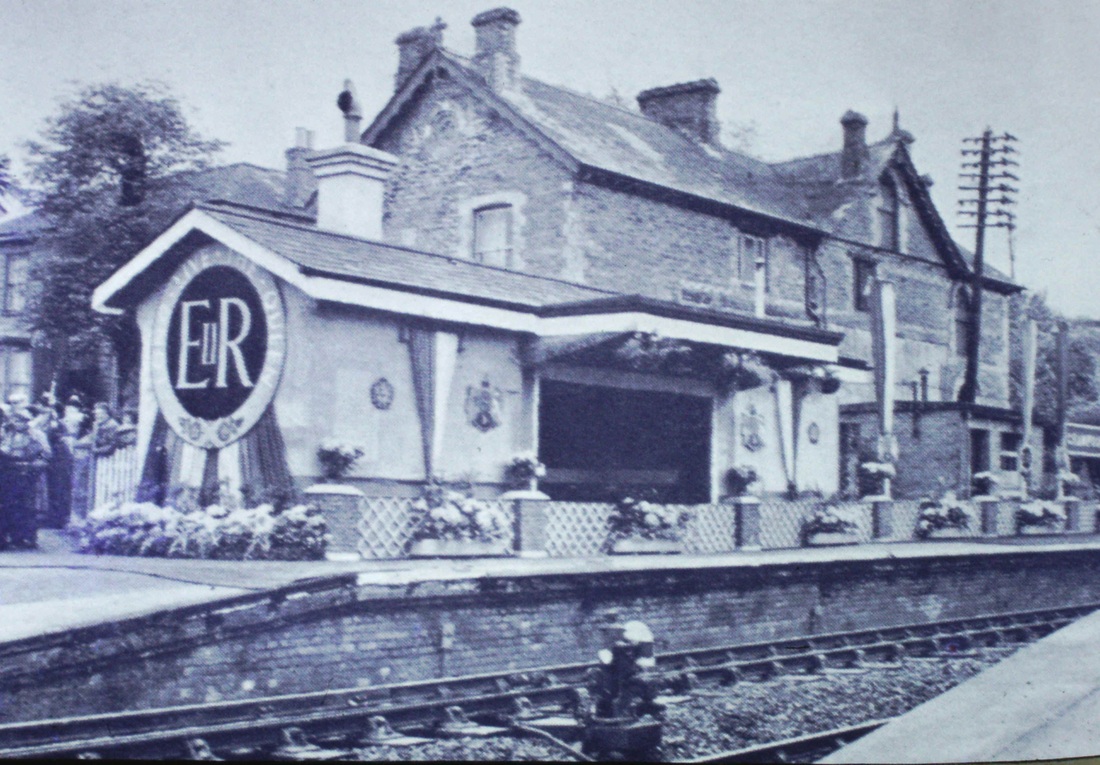
Grampound Road station decorated for the Queens visit on the 8th May 1956 Copyright - from the Roger Winnen Collection. Date advice from Vic Smith.
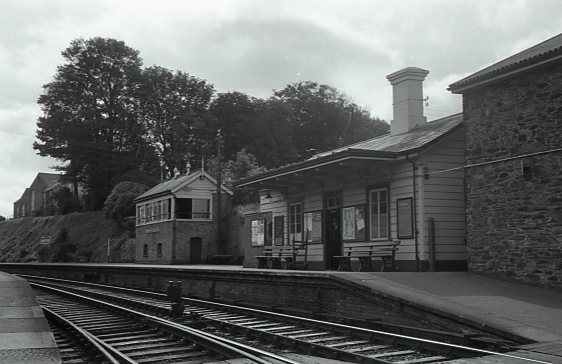
Grampound Road 5th September 1964 Copyright Mike Roach
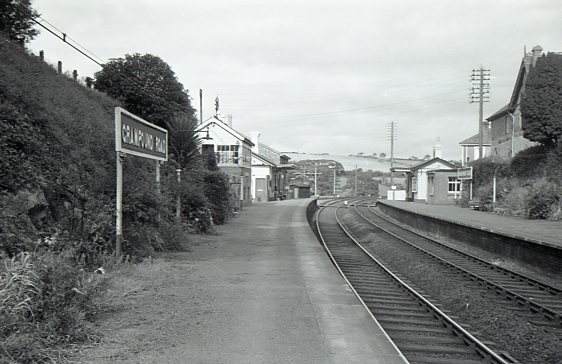
Grampound Road 5th September 1964 Copyright Mike Roach


Cutting from the Guy Vincent Collection
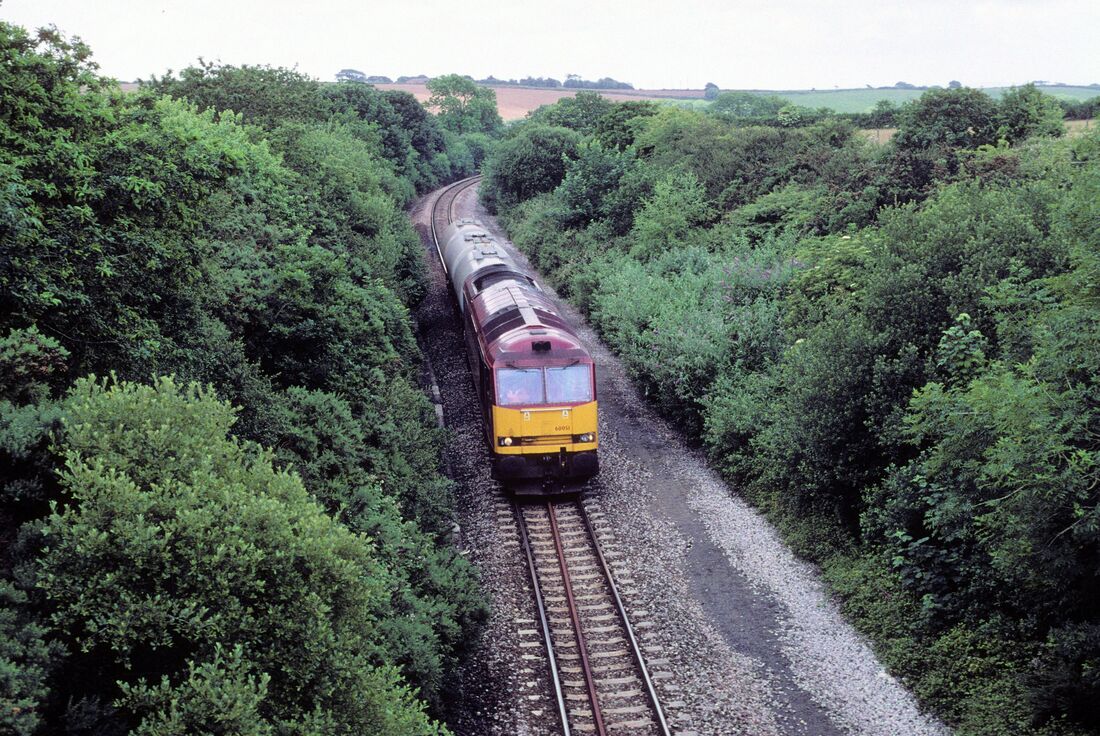
60051 with the Long Rock to St Blazey tanks. Seen at Grampound Road 30th June 2003. Copyright Roger Geach - you'd scarcely know this was formerly double track, reduced to single and now doubled once more.
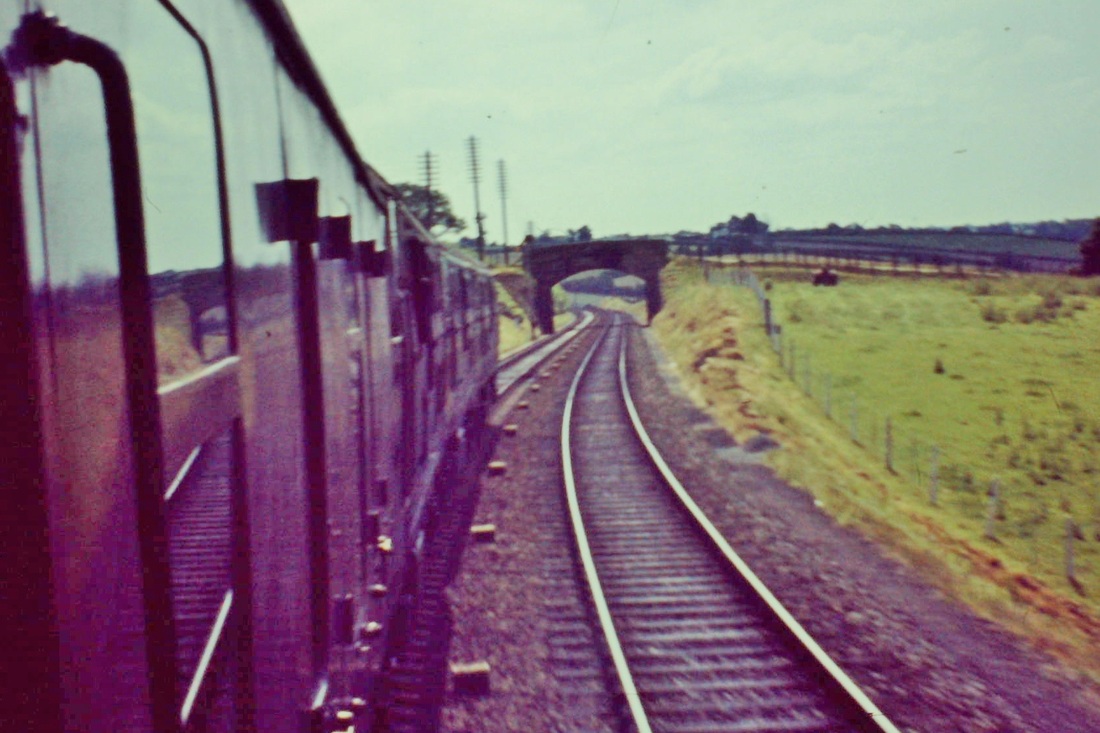
Trenoweth Safety in numbers - a triple headed class 22 train 63xx X 3 about to pass under the bridge at Trenoweth , east of Grampound Road station site. Copyright Sid Sponheimer
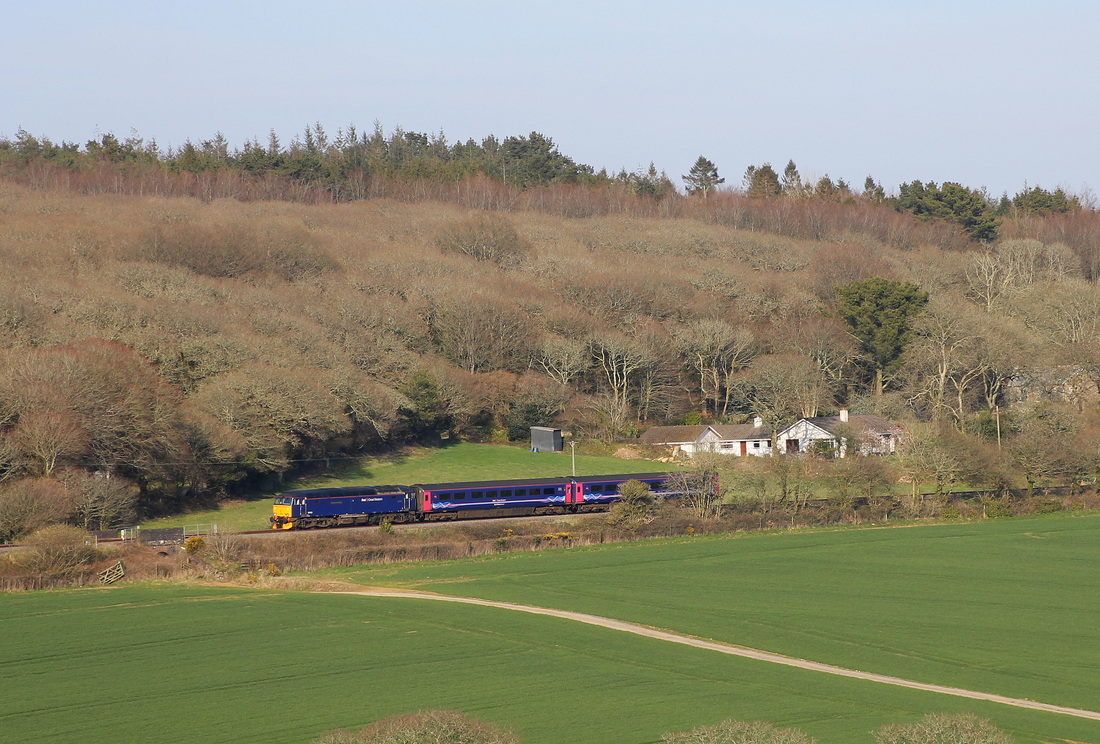
57 602 climbs in beautiful sunlight past the farm at Trenoweth. This picture taken from private property with the farmers permission. The bridge in the previous picture is just off to the right. 7th April 2015. Copyright Craig Munday.
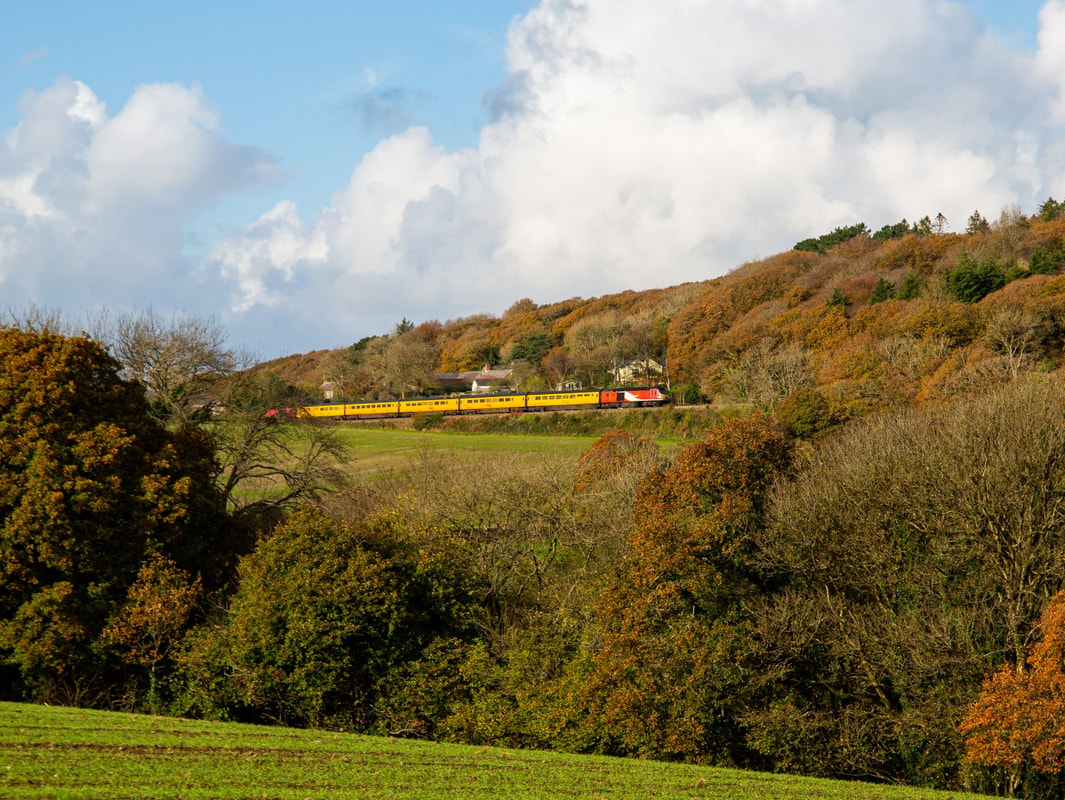
1Q18 NMT Trenowth 18th November 2022. Copyright Craig Munday
Bodinnick Siding and signalbox
Information from Roy Hart Dear Keith,
In response to the enquiry today: Bodinnick siding was provided by the Cornwall Railway to serve an iron mine, on the up side, between Fal and Coombe viaducts. The mine was owned by two brothers, who signed the private siding agreement. The siding disappeared in the 1880s, but the box stood (used by pw or bridge gangs, one assumes) until the late 1950s. A photograph appeared in one of the rail picturebooks published by Bradford Barton in about 1975. (Cornwall's Railways - a pictorial survey) Page 54. The caption describes it as a disused box near Gwinear Road (Barton's books often contained such errors). The building was known to local railwaymen as the 'glasshouse'. I doubt of Bodinnick was a signal box in the modern sense, but facts are hard to come by. The line was broad gauge, single track, of course.
Roy Hart
Information supplied by Chris Jenkin
I found an online reference to it here: http://www.s-r-s.org.uk/railref/ref-gw.php#334
indicating it to have been 3 miles west of Burngullow Jn and almost 2 east of Grampound
Road. Chris Jenkin
Dear Keith, That is all really helpful, I was really pleased to see a photograph of the signal box, I have copies of the 1800 maps http://maps.nls.uk/view/101438918 http://maps.nls.uk/view/101438915 These show the broad gauge lines of the Cornwall railway and the standard gauge of the GWR respectively. The signal box is shown too. I will keep you up to date if I find more details. There are some aerial photographs of the Iron Age fort too at English Heritage (Resugga). They aren't accessible here at present, but there is some detail that an expert might have better knowledge as to what is what. I have also found newspaper cuttings about the tramway and a further proposed line in the area, I will send them if you think they could be of interest to anyone. Thank you for all the updates, once again, I really enjoy the website and spend hours reading and reviewing the items. It gives me a great deal of pleasure! Kind regards, Michael Dowrick
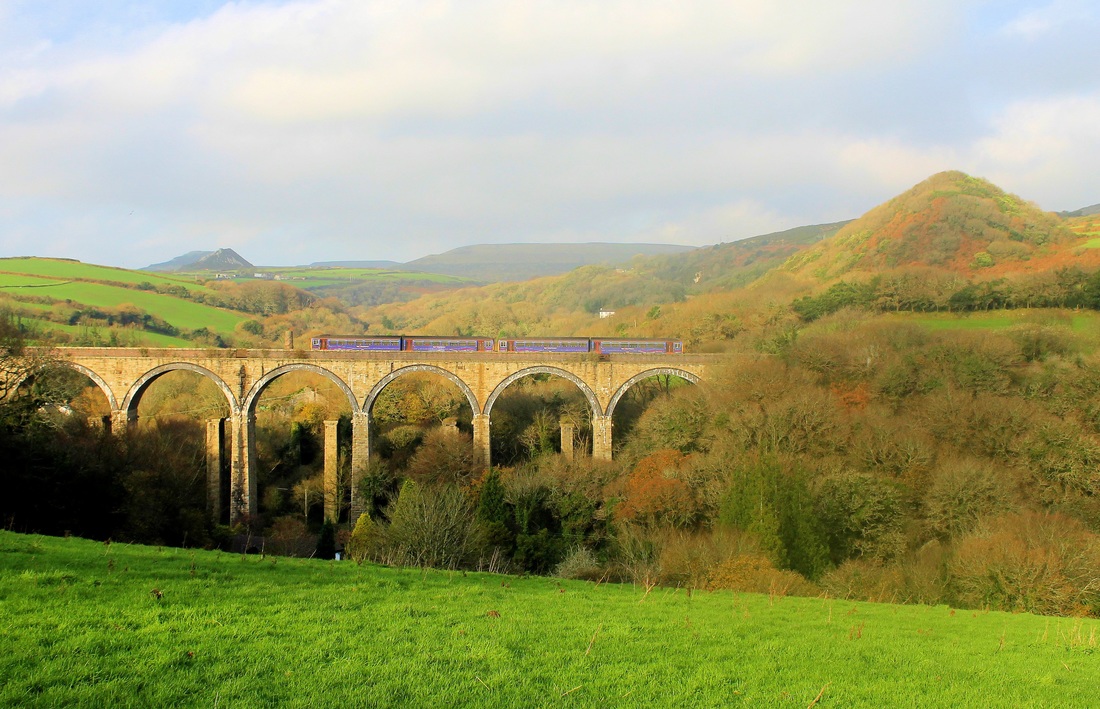
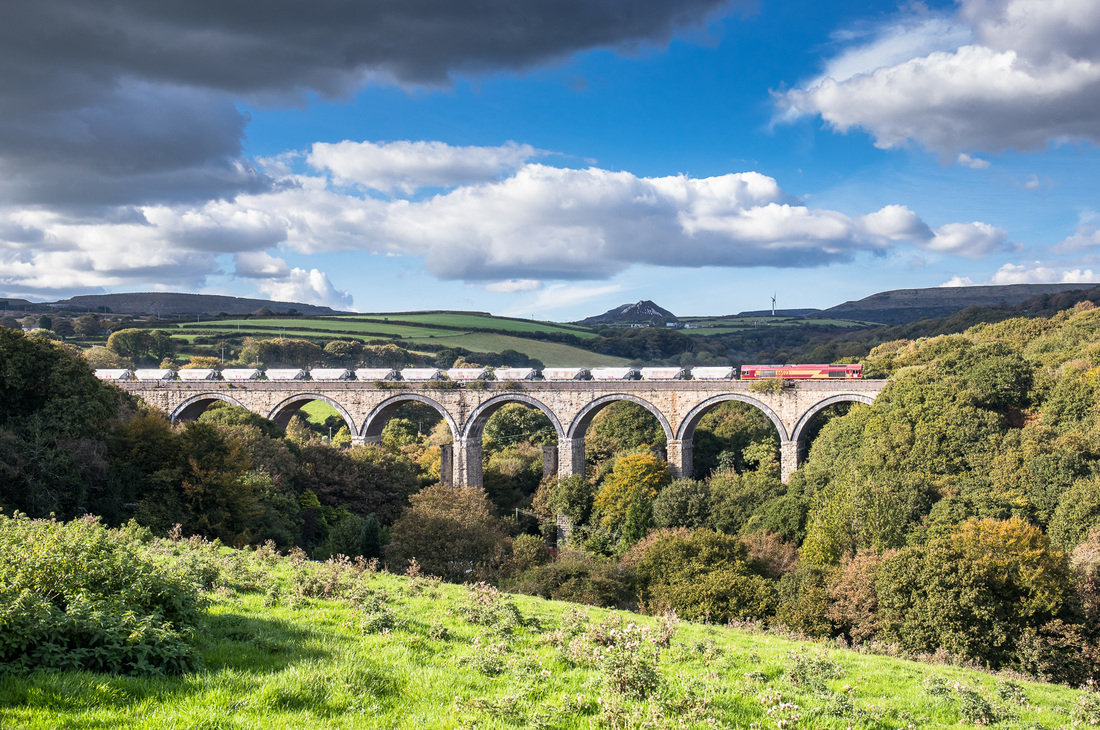
Combe St Stephens The viaduct here is 738 feet long and 70 feet high. The broad gauge line was diverted onto the new structure from 11th July 1886.
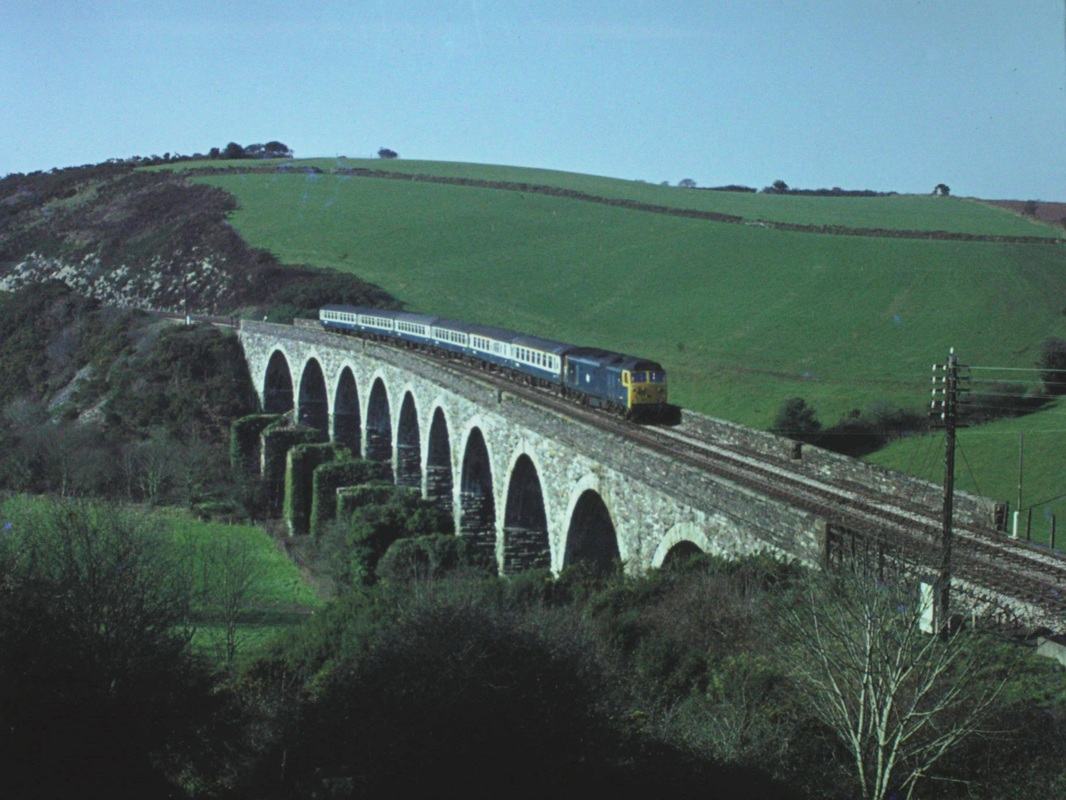
50 032 Courageous crossing the viaduct with an up service on the 15th September 1979 Copyright Mike Roach
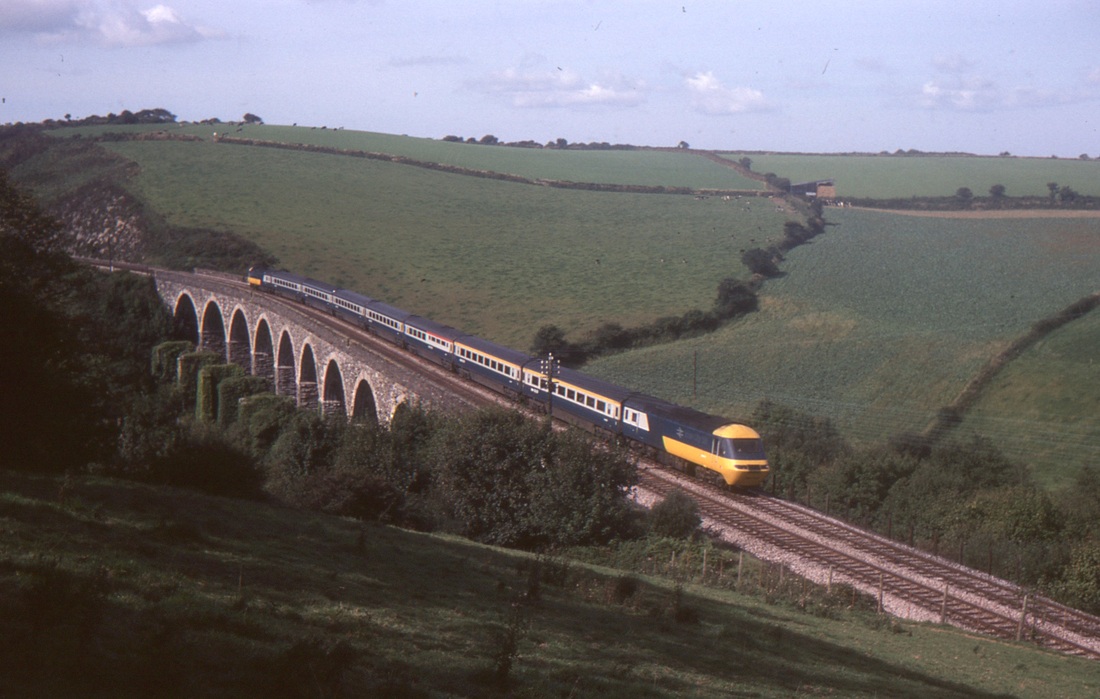
Coombe Viaduct HST on up Riviera 15th September 1979 Copyright Mike Roach
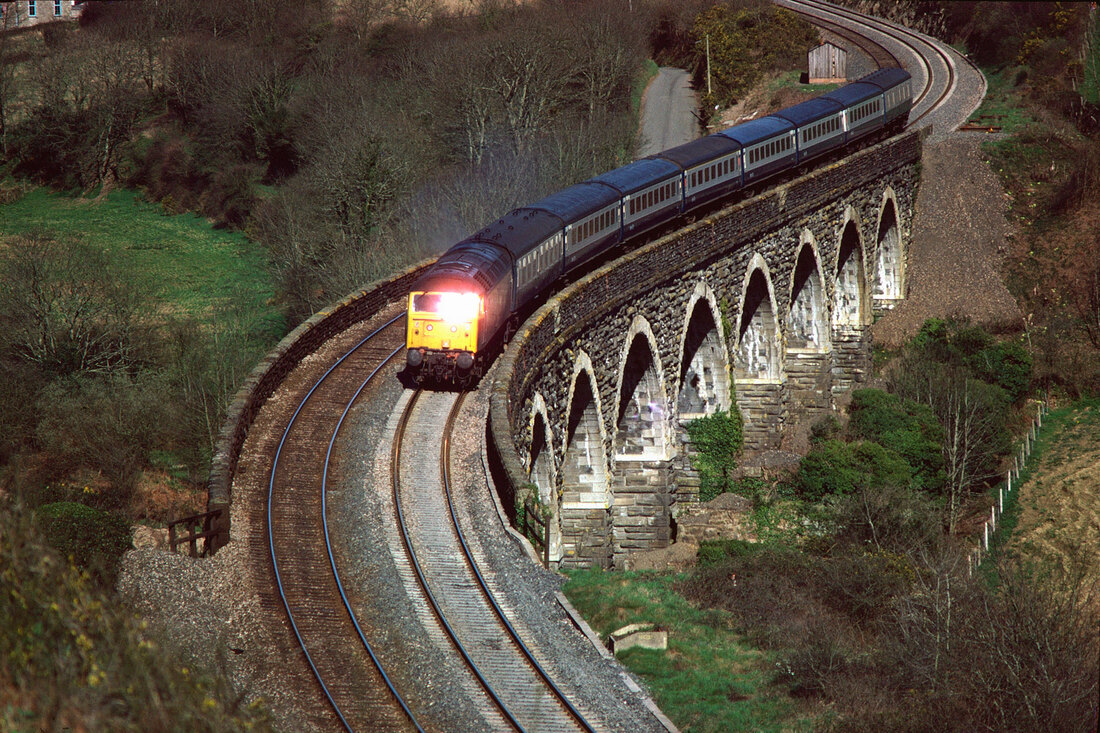
47597 on a down passenger service crossing Coombe St Stephen Viaduct Copyright Nick Trudgian

Just a little further up the line at St Stephens an handy lane comes close to the railway as 50 020 Revenge passes deputising for an HST failure on the 27th August 1979 Copyright Mike Roach
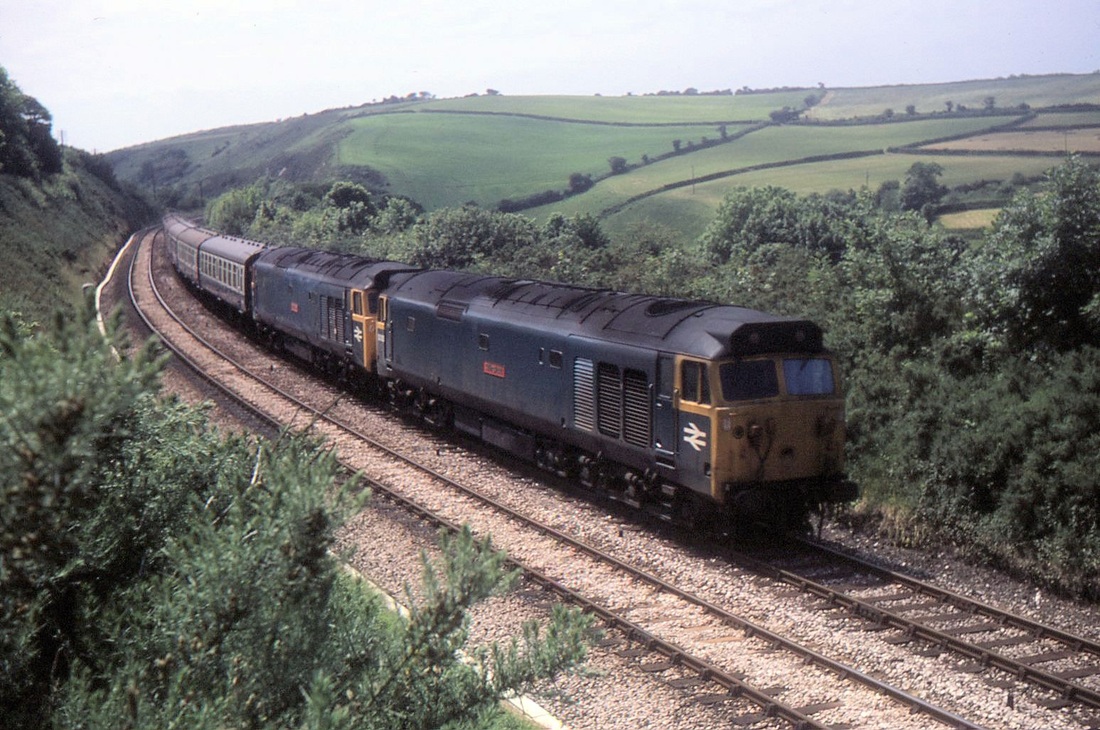
Class 50 double heading. 50005 Collingwood and 50048 Dauntless Combe St Stephens 16th June 1981 Copyright Mike Roach
Crugwallins

2C45 at Crugwallins on the 11th April 2018. Copyright Craig Munday
Burngullow
There have been two stations at this location, the first, nearer St Austell closed 1 Aug 1901, the second located at the junction with the Parkandillack branch closed 14 Sep 1931
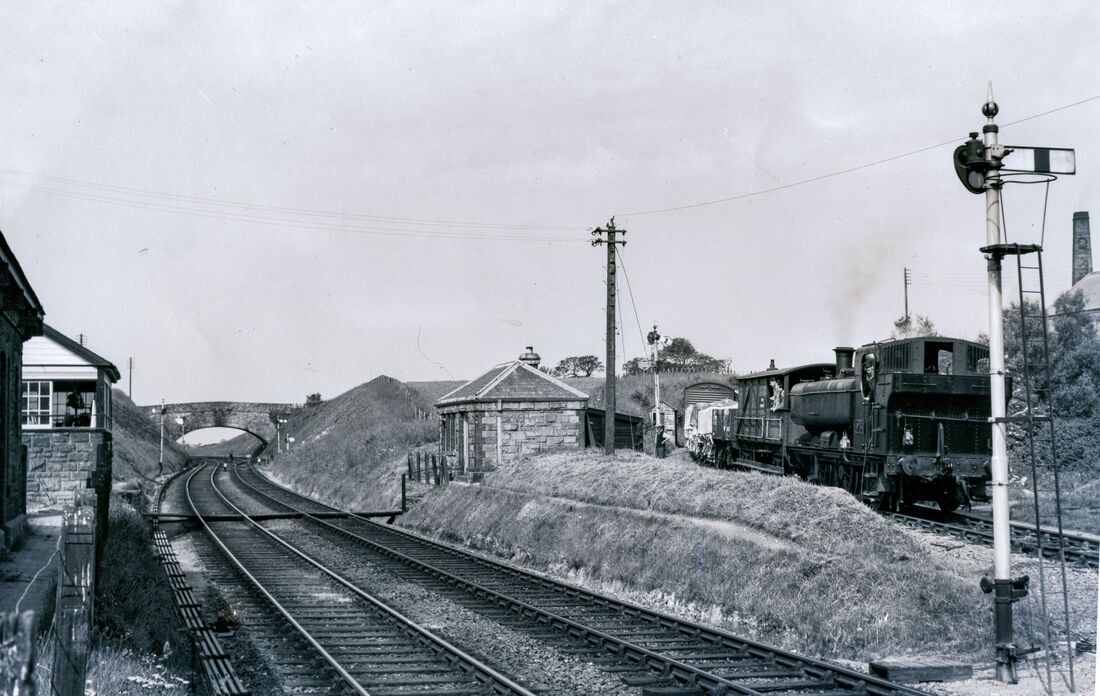
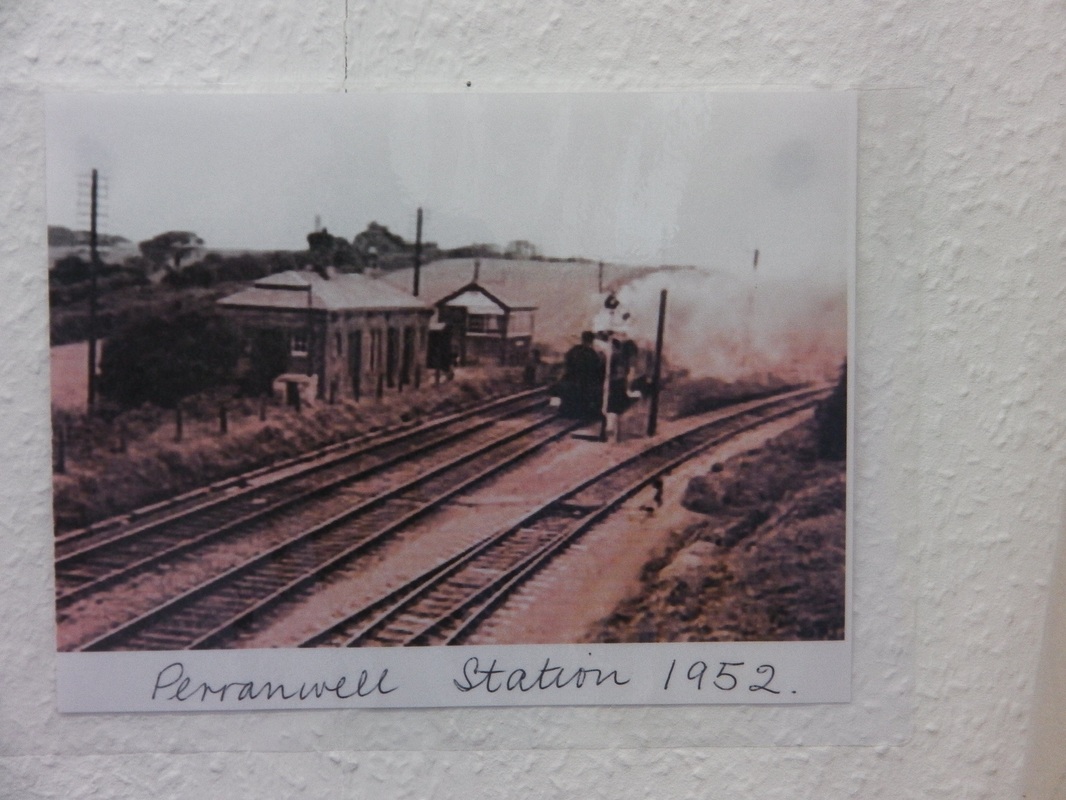
The first two views below came to light stuck on the wall of Carn Brea Village Institute. Right away one can see that the caption is incorrect. If anybody knows where this picture has come from or its copyright holder I will gladly remove it if necessary.
A story :- During WW2 when blackouts were in force and station names were removed the only clue was the calling out of the station name by the guard. However, on this occasion regular passengers used to stopping at Probus and Ladock and Grampound Road were brought to a stand at the signal seen in this picture. Many, thinking it was St Austell, de-trained at the station closed several years earlier, whereupon the signal to cleared and the train moved off leaving them behind!!
A story :- During WW2 when blackouts were in force and station names were removed the only clue was the calling out of the station name by the guard. However, on this occasion regular passengers used to stopping at Probus and Ladock and Grampound Road were brought to a stand at the signal seen in this picture. Many, thinking it was St Austell, de-trained at the station closed several years earlier, whereupon the signal to cleared and the train moved off leaving them behind!!
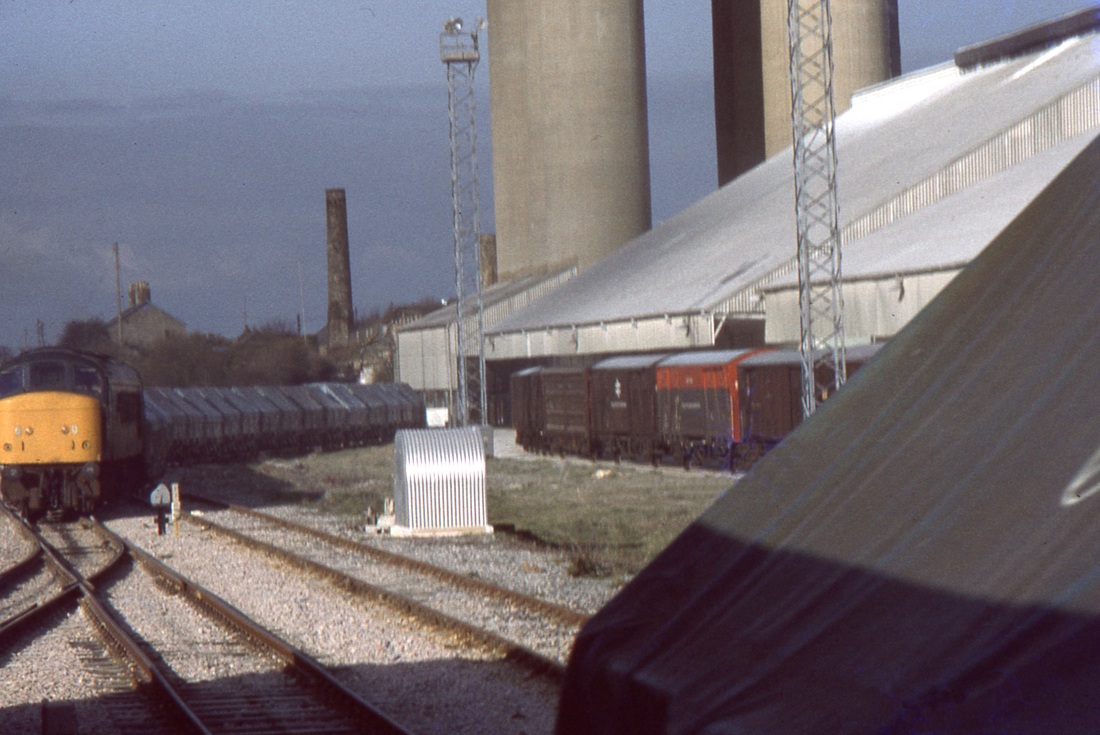
A view taken in the 1980's just west of Burngullow Signalbox - in the foreground an be seen the up refuge siding. Copyright Julian Hanwell.
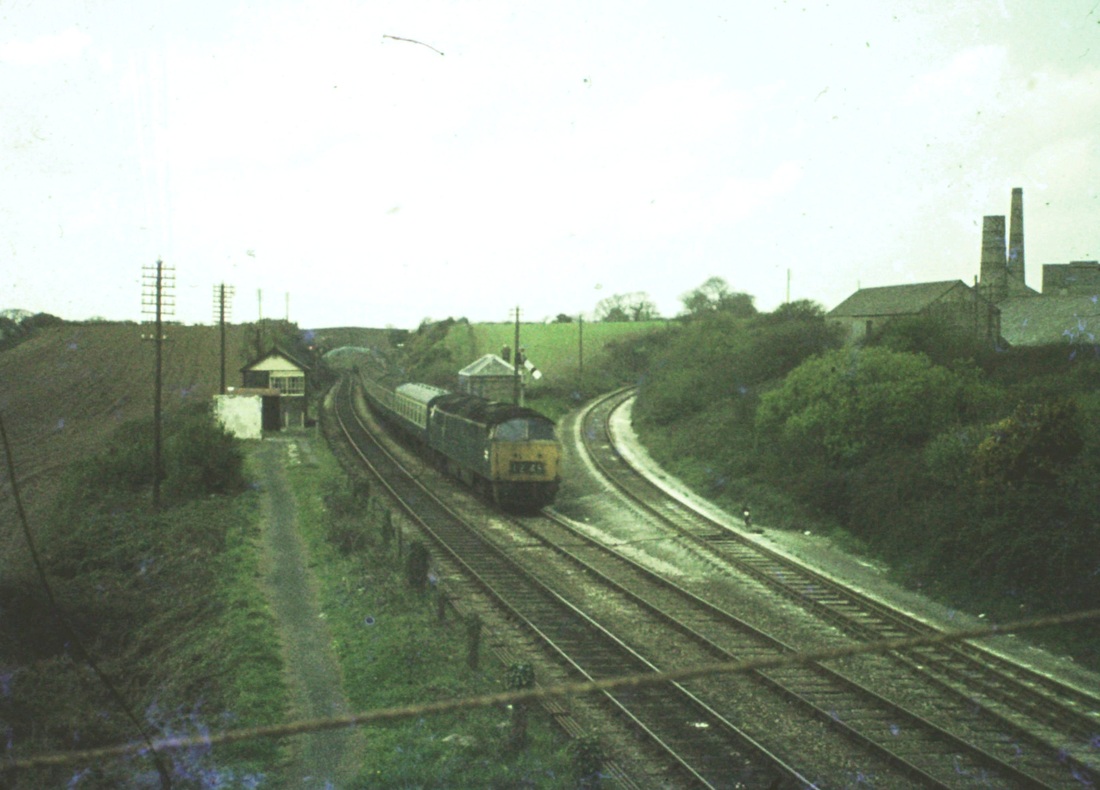
20240114-Burngullow 1960s Roger Jane-1

The tail end of a Newcastle bound train headed by 47521. The 1E91 09.33 Penzance to Newcastle. An unusual view taken from Crugwallins bridge, at Burngullow, shows a moment in time, the removal of the clay liner siding. Picture taken on the 16th August 1986 Copyright Julian Stephens

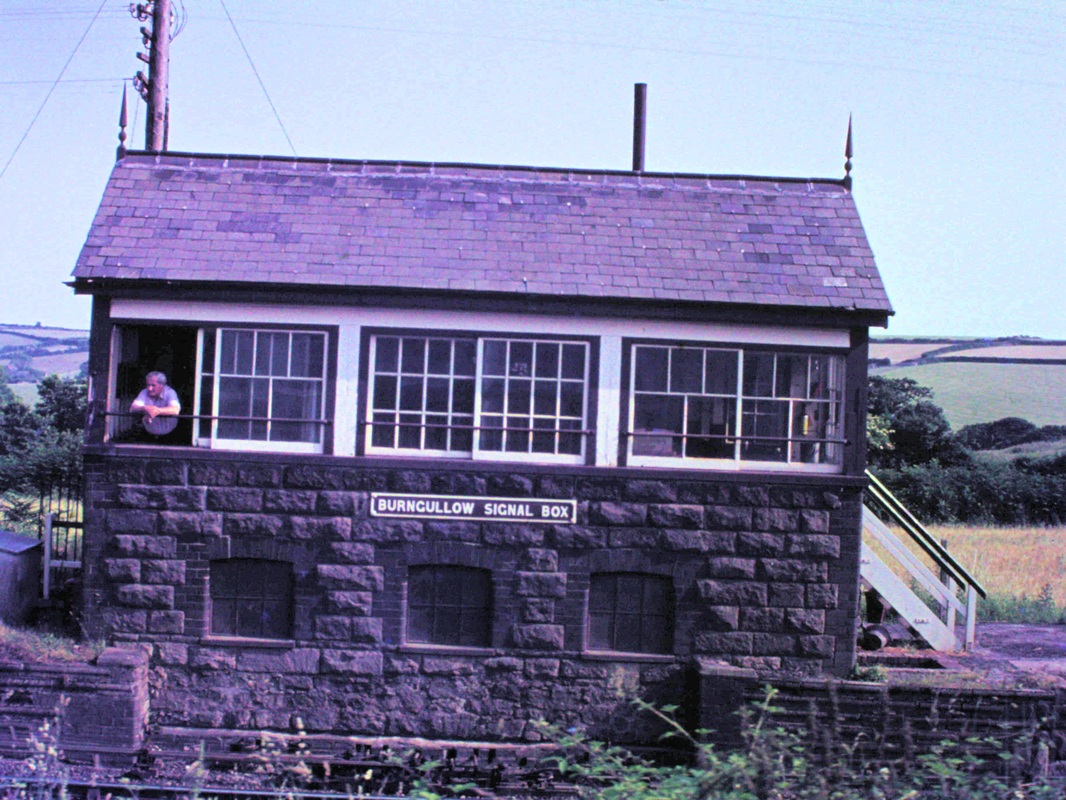

Burngullow Signalbox in the 1980's
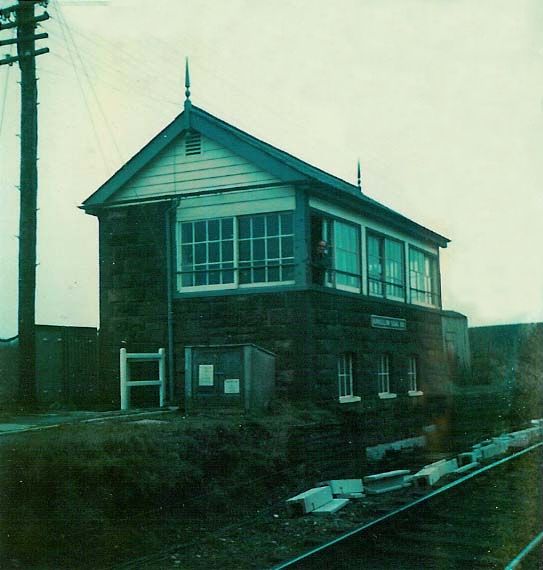
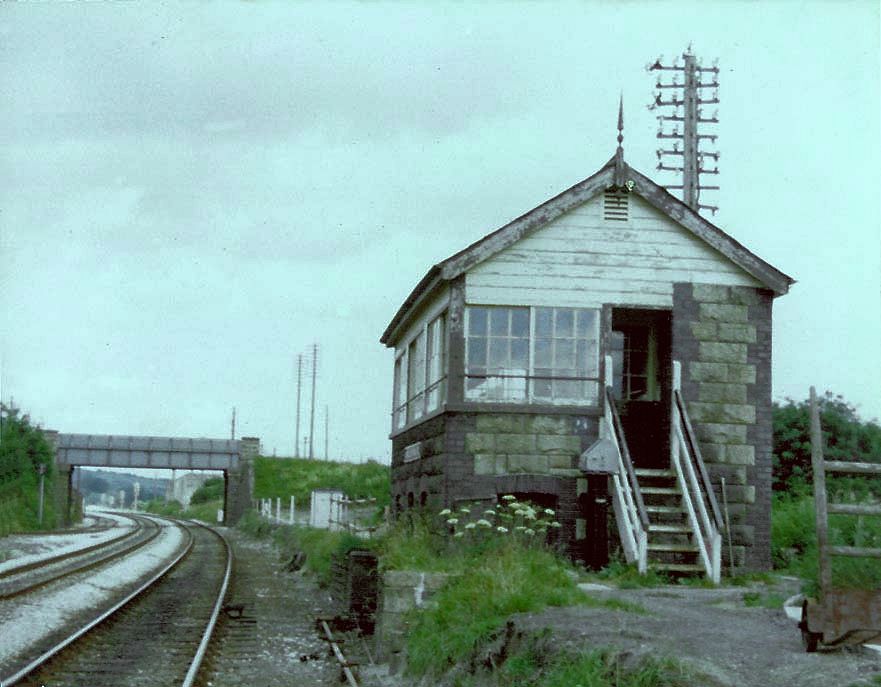
Burngullow Signalbox from the east - 1980's Copyright Julian Hanwell
Burngullow Signalbox from the west. 1980's Copyright Julian Hanwell
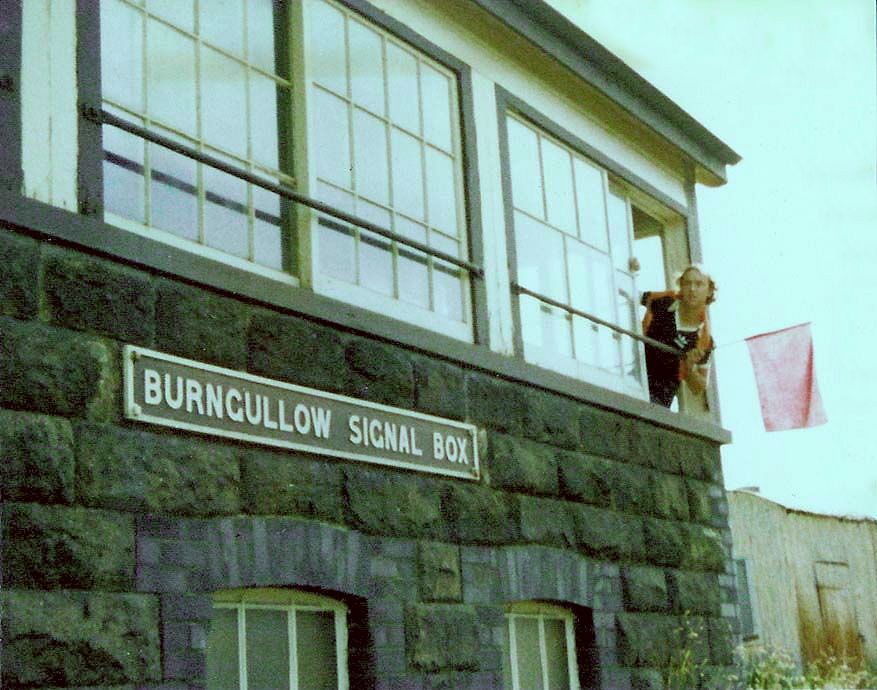
The lad himself. Julian Hanwell holds the red flag - also a nice shot of the box nameplate. 1980's Copyright Julian Hanwell
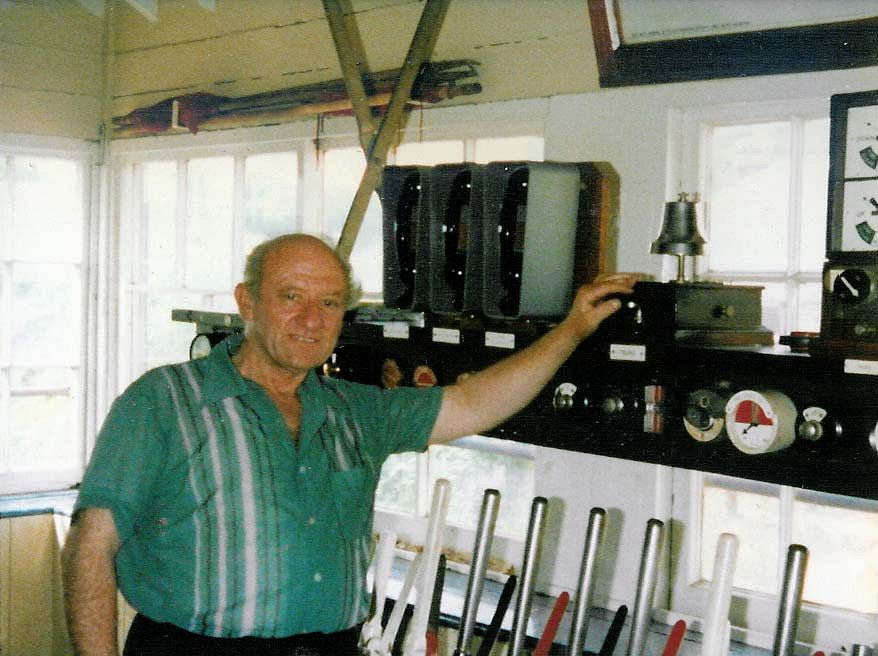
Mr Bob Harris one of the Penwithers Jct Signalmen who went to Drump Lane in 1971. Copyright Julian Hanwell

Mr Dennis Bunt. He went there after St Austell closed 1980's Copyright Julian Hanwell
Burngullow History
Burngullow station opened in 1863, serving local claypits. The sponsor was Robartes of Lanhydrock, who owned the local pits. This was a platform on the south side of the broad gauge single track. In 1869 the branch line to Drinnick was opened, but there was no yard at Burngullow then: this came later. After the conversion of the gauge in 1892, the GWR began the process of doubling the main line and the work reached Burngullow right at the end of the 19th century. Space was needed for sidings and the station was rebuilt west of the road overbridge in 1901. The station closed in 1931, but both up and down buildings were still there until the 1980s.
In the nineteenth century the only clay dries at Burngullow were on the branch; there was nothing where the disused Blackpool dries stand today.
Roy Hart
Burngullow in 1987
47 107 heads a single wagon, possibly from Truro yard, up to St Blazey in July 1987 at Burngullow.
Soon after 50012 Benbow heads west with a Plymouth Penzance stopping train. We can see that the line has recently been singled and the old signal box still in situ was a popular location with ungated access and a fellow photographer present
Kind Regards
Martin Baker
Soon after 50012 Benbow heads west with a Plymouth Penzance stopping train. We can see that the line has recently been singled and the old signal box still in situ was a popular location with ungated access and a fellow photographer present
Kind Regards
Martin Baker
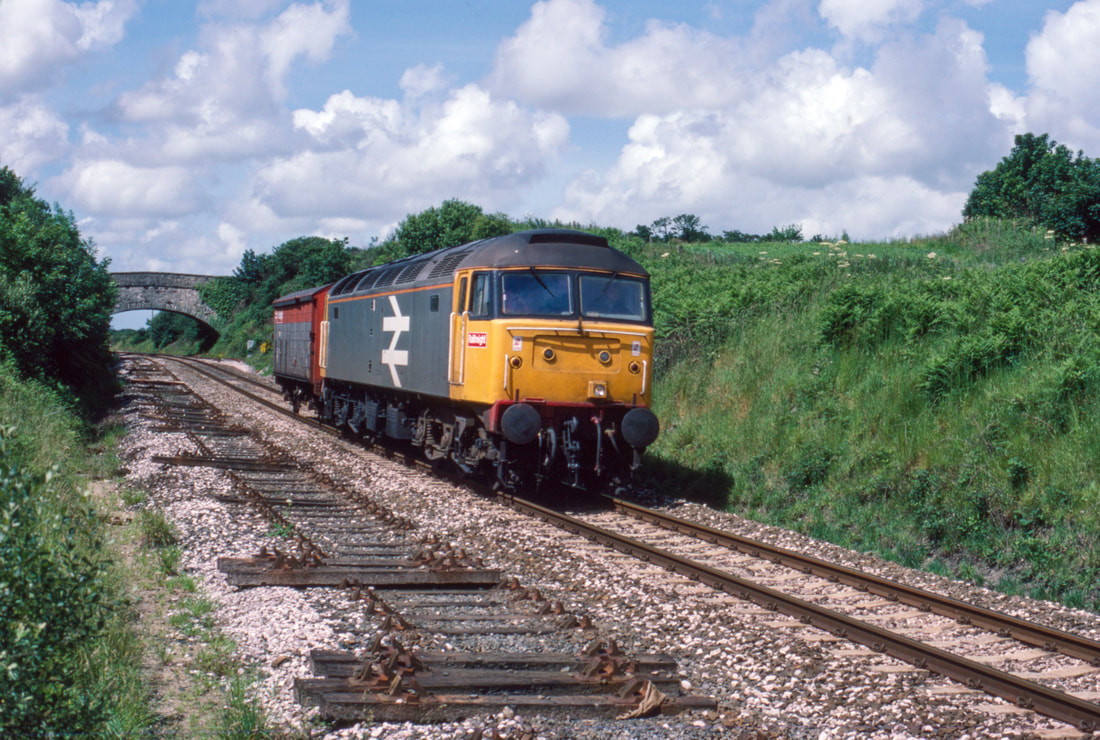
47 107 tows a single wagon past the site of the signalbox. July 1987. Copyright Martin Baker.
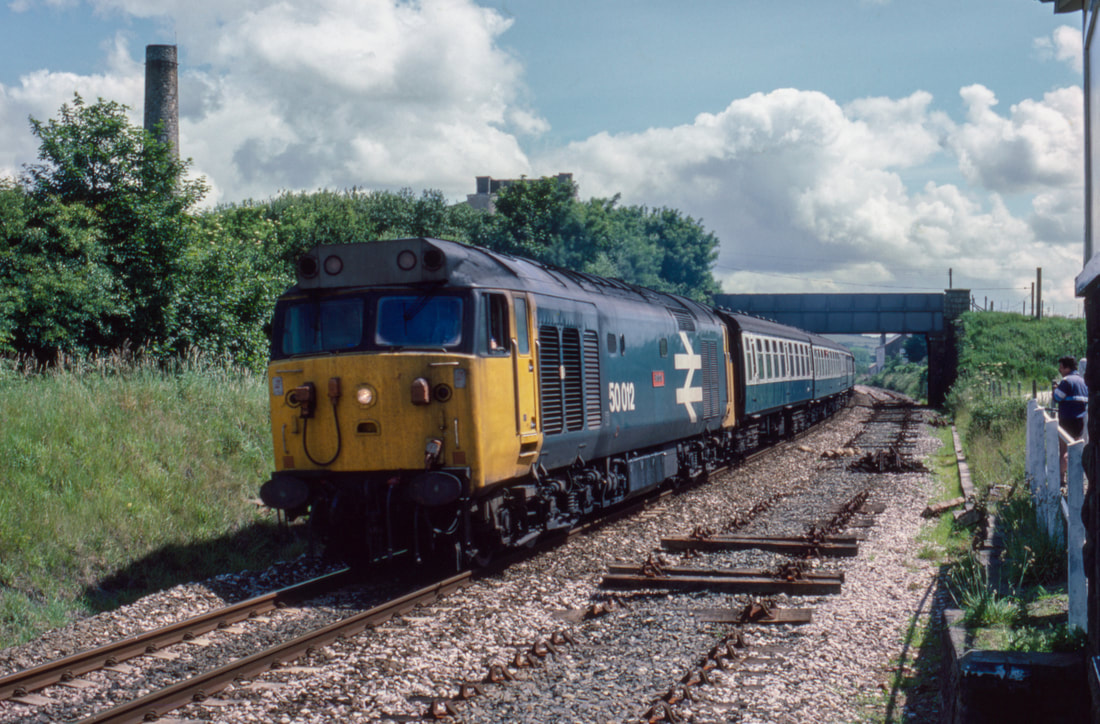
50 012 Benbow leads a service towards Penzance past the old box. There was ungated access at the time. July 1987. Copyright Martin Baker.
Burngullow in 1988 and 50149.
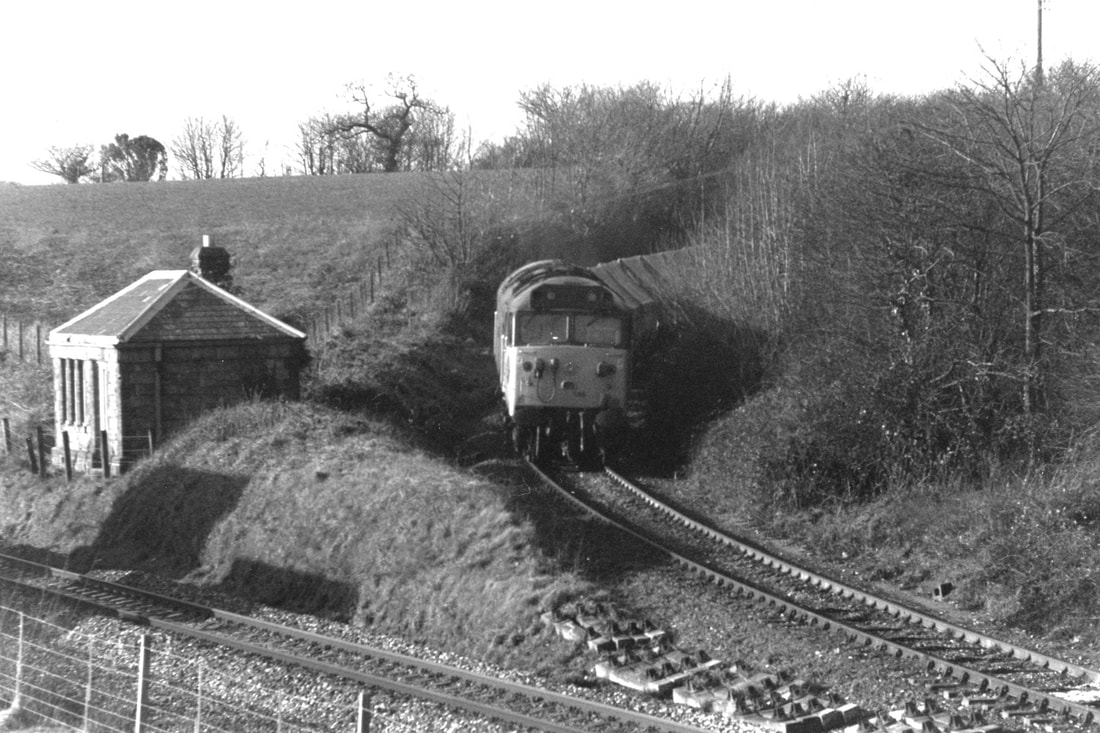
Lit by the low light of January 50149 emerges off the Parkandillack branch. Burngullow station building still there many years after closure.Burngullow-01 11th January 1988 Copyright Julian Stephens
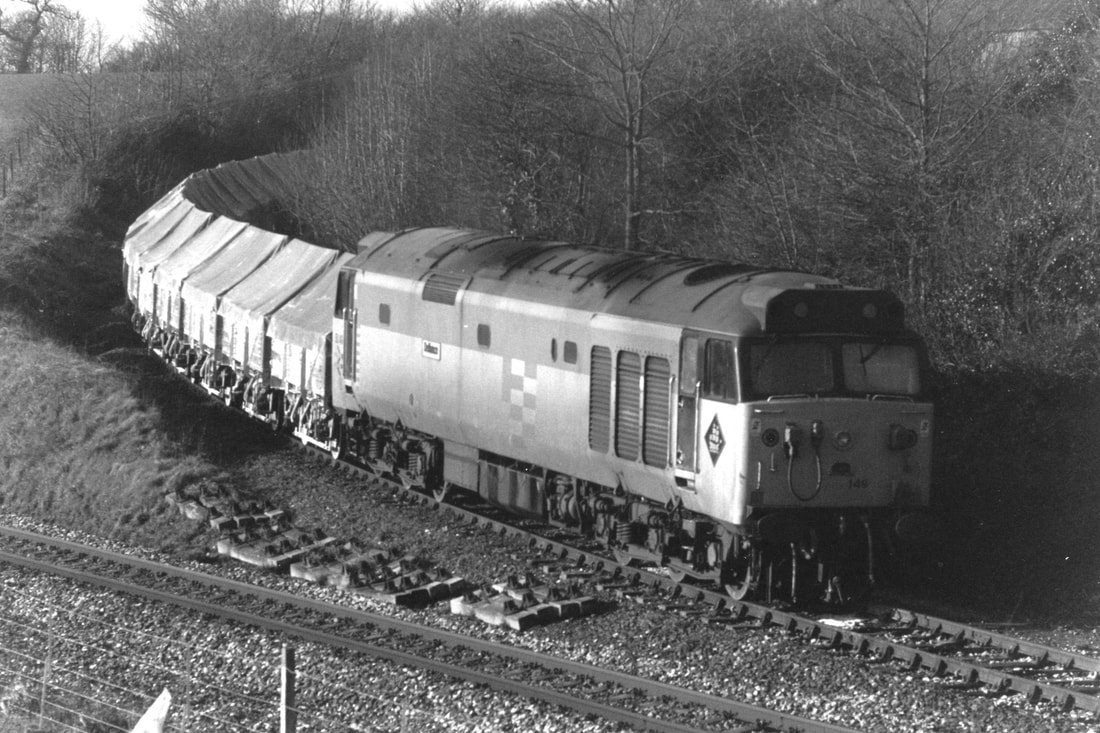
50149 moves on further out alongside the main line at Burngullow-02 11th January 1988 Copyright Julian Stephens
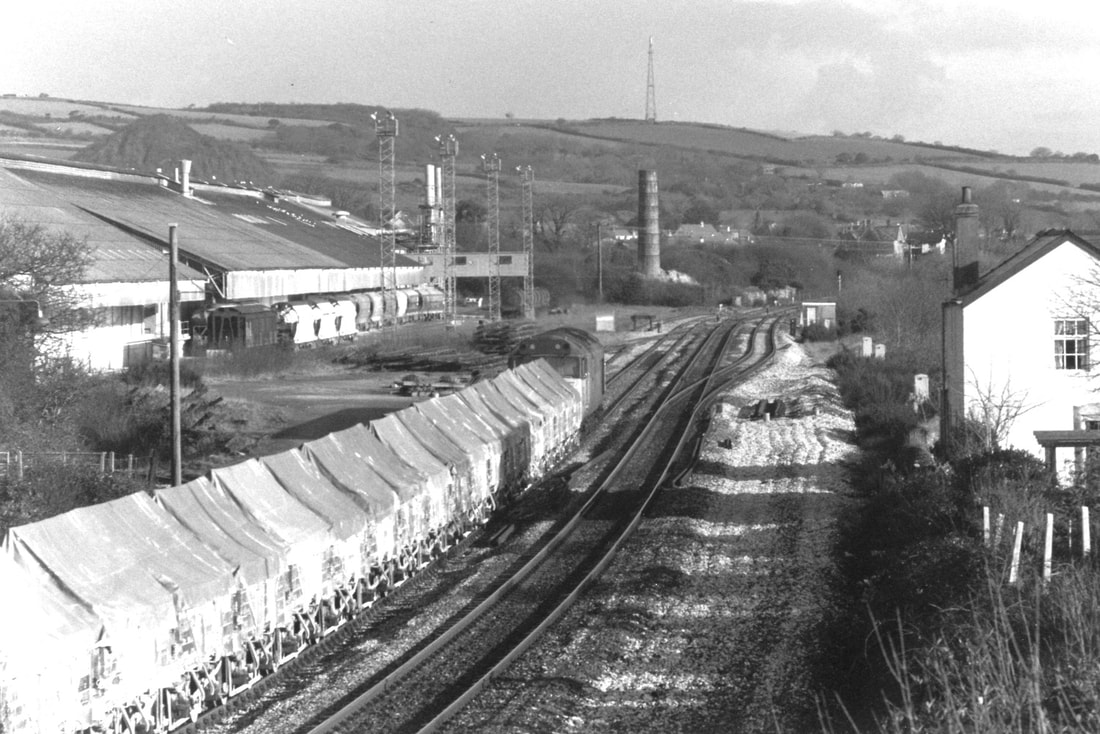
50149 and a rake of clay hoods at Burngullow-03 11th January 1988 Copyright Julian Stephens
Class 37 St Blaise coming off the Parkindillack Branch at Burngullow. 5th February 1994 Copyright Roger Winnen
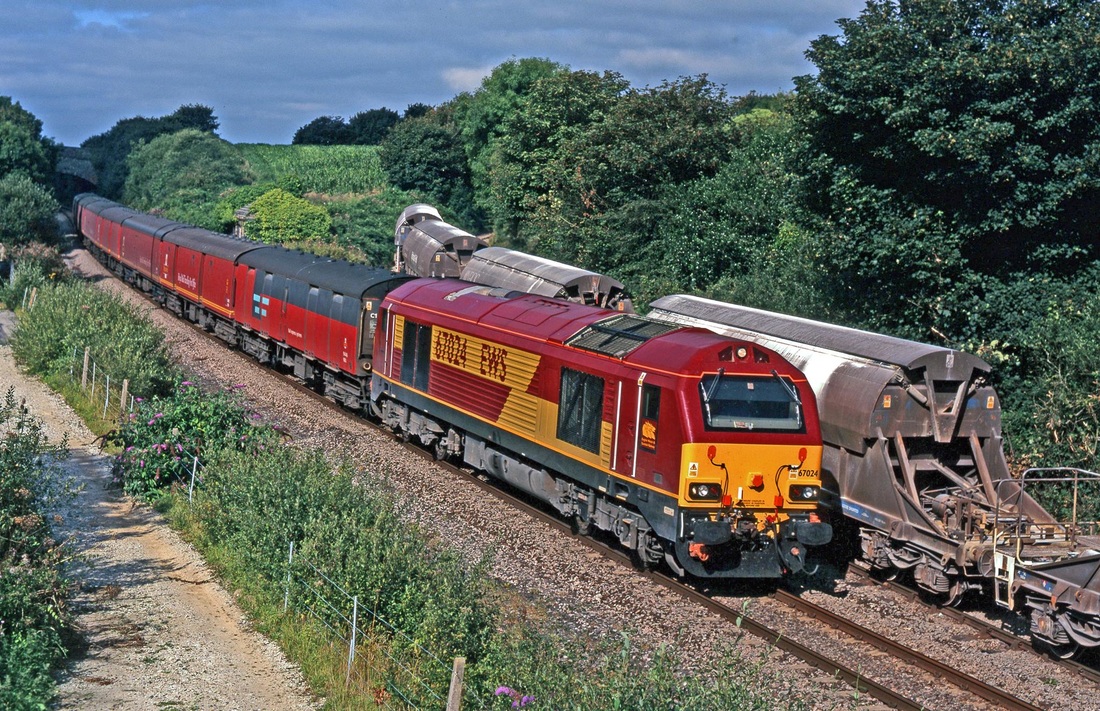
The Royal Mail traveling Post Office Train is seen on the main line as it storms past a clay train coming off the Parkandillack branch. Copyright Mark Brannel
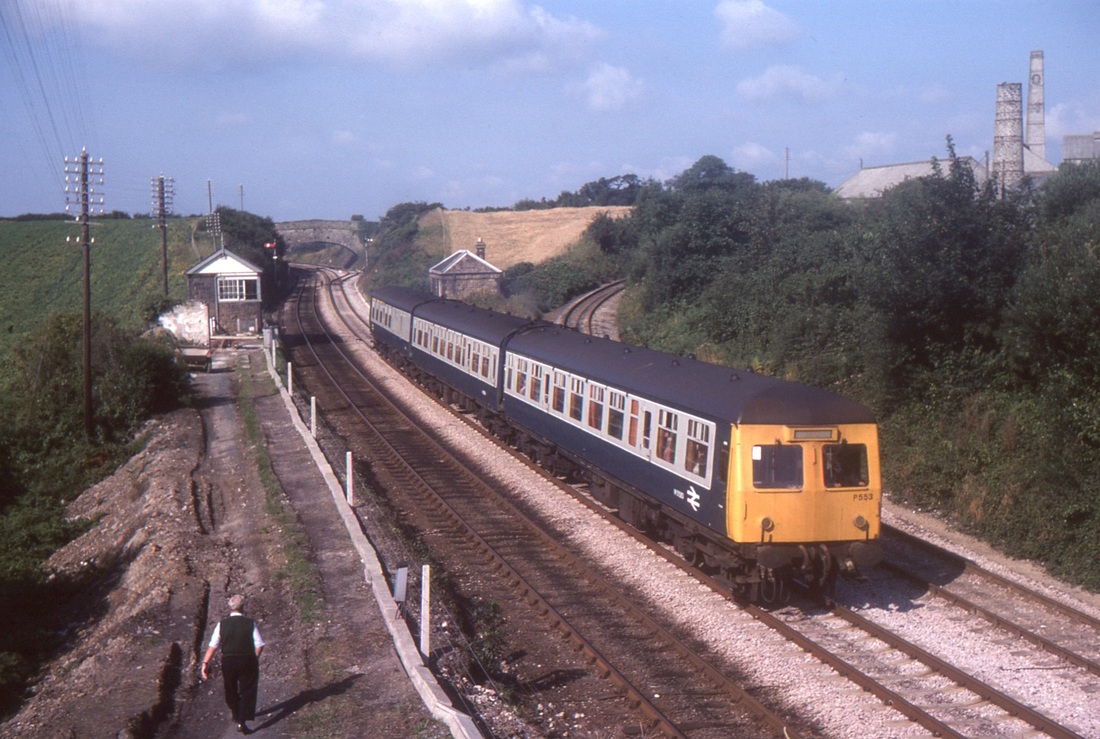
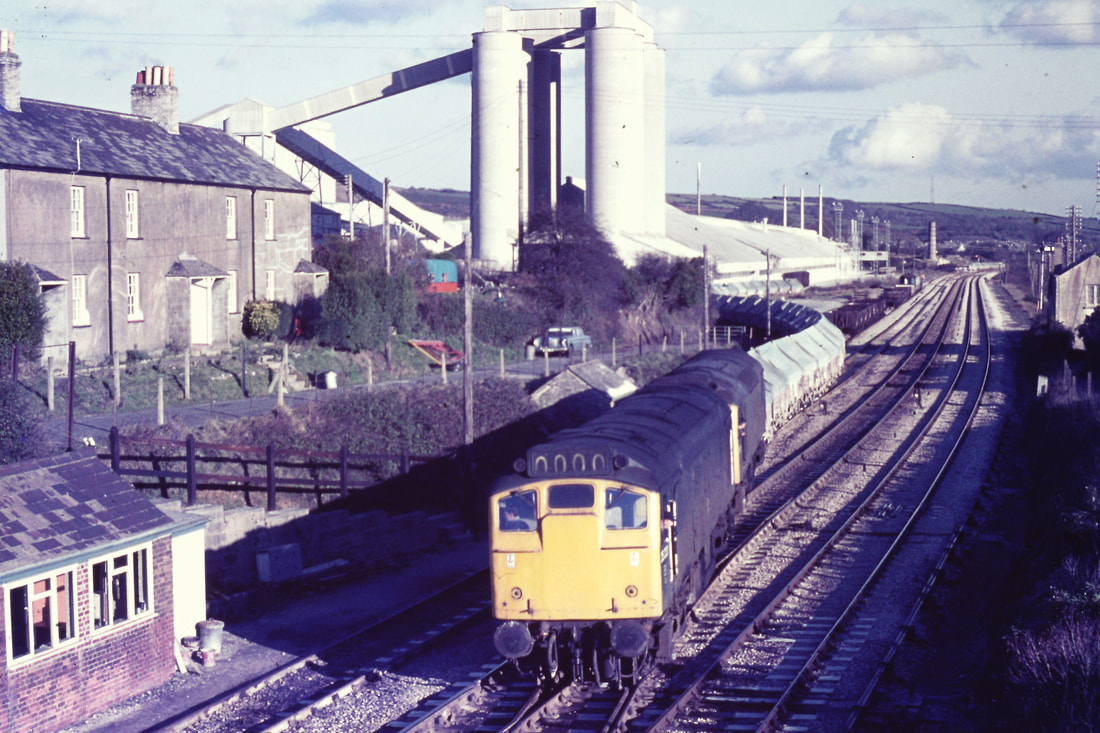
Mike Roach, who took this photograph on the 27th August 1979 recalls that the DMU had, for some reason come to a stop here. Note what is probably the relief signalman making his way towards the signal box Note also the Burngullow station buildings and the up refuge siding. Copyright
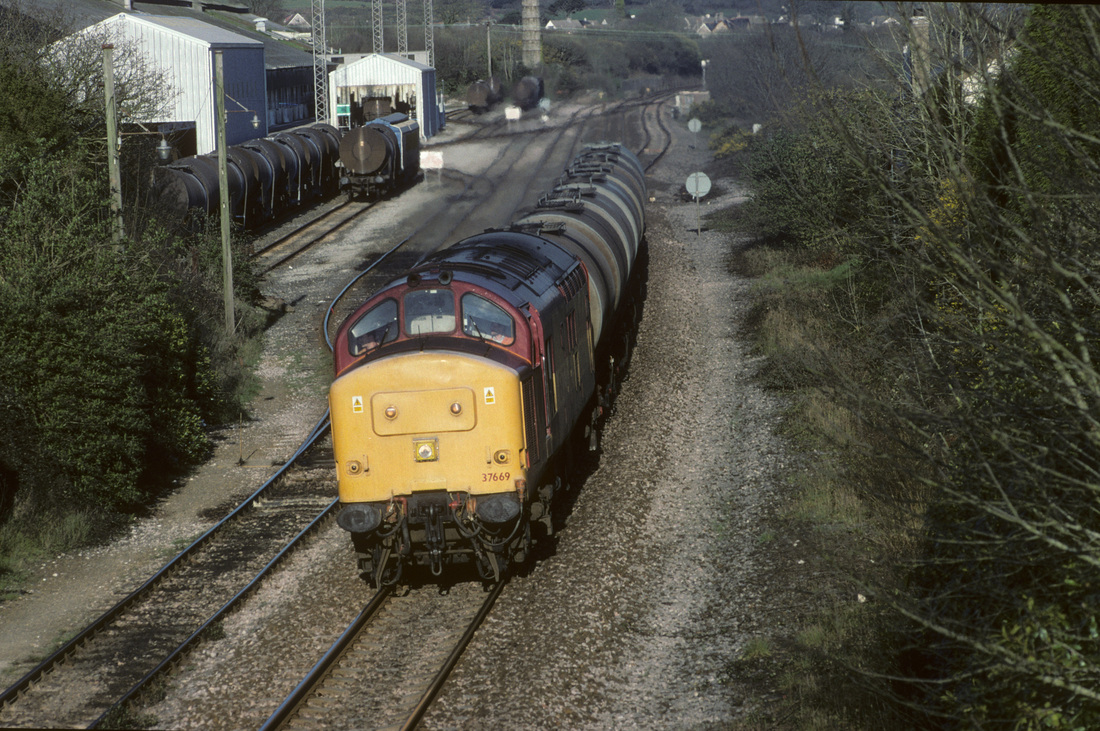
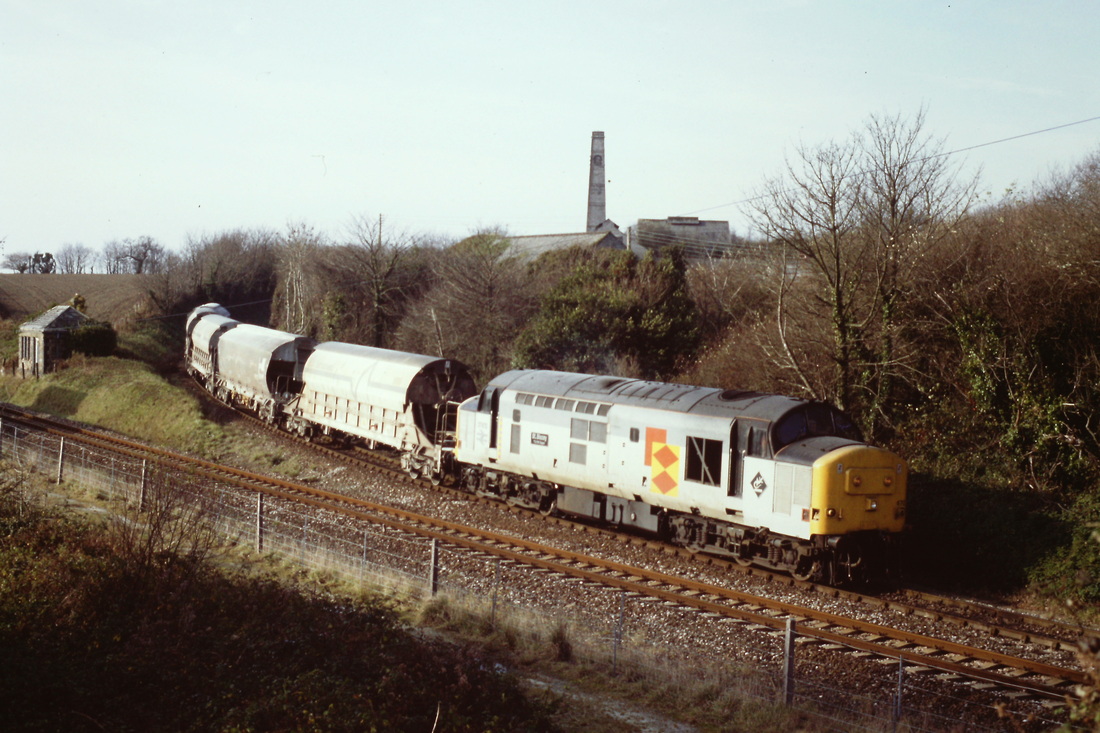
Two memories of the past. 37 669 enters the single line section to Probus with the fuel tanks for Penzance, Long Rock on 16th March 1998,
Both the fuel tanks and the single line section are things of the past, sadly in the first case, and thank heavens for the re-doubled track.
16th March 1988 Copyright Roger Geach
Burngullow - a view of Blackpool Driers taken from an up train on 1st January 2011. Copyright Roger Winnen

56 013 on trial in Cornwall approaches along the then single track from Probus. Having assisted the sleeper to Penzance it returned light engine to Burngullow before doing a trial run to Parkandillack. Copyright Craig Munday
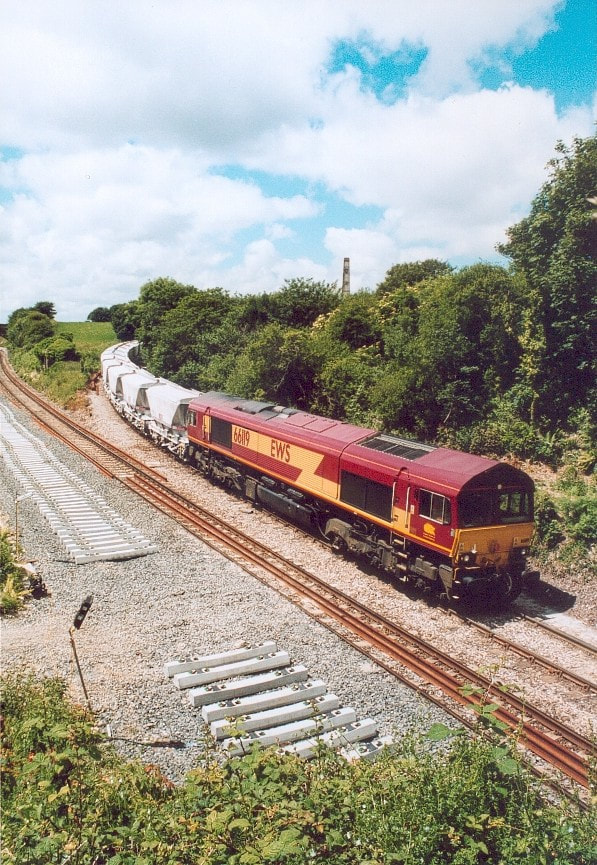
Burngullow redoubling. 66119 joins the main line with a clay train from Parkandillack. 12th June 2004 Copyright ChrisHarvey
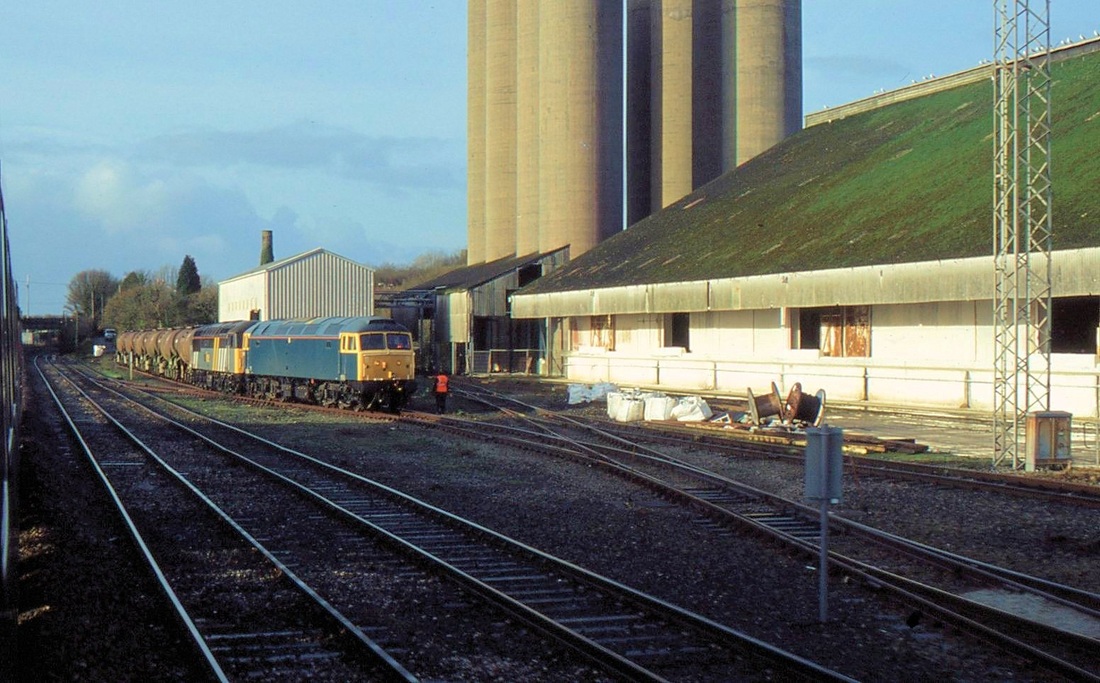
A super shot in bright winter sunshine as a Class 25 shunts a very long train at Burngullow. 29th December 1976. Copyright Roger Winnen
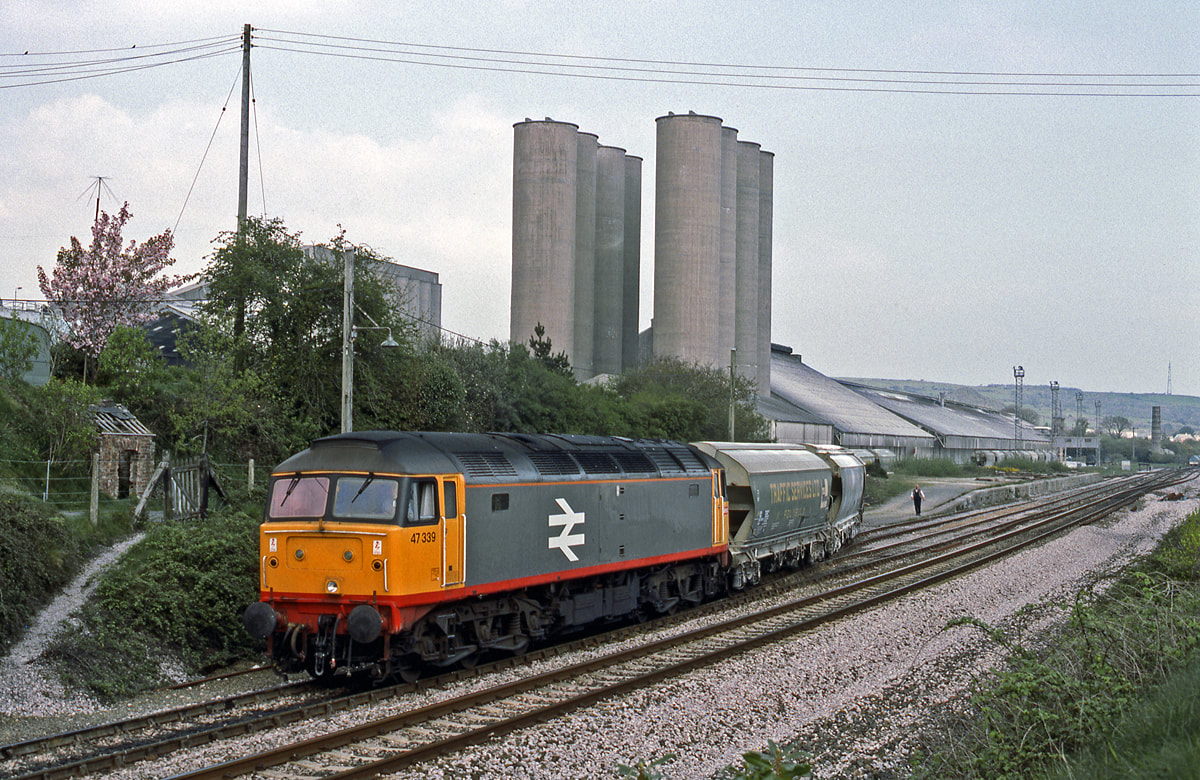
The scene at Burngullow as 47339 shunts the Polybulks on the 26th April 1988 Copyright Ron Kosys
140809ze Crossovers at Burngullow under darkening skies. Copyright Roger Winnen N.B. Blackpool driers now disused face demolition. Note the crossovers painted white to reduce the effect of the summer sun.
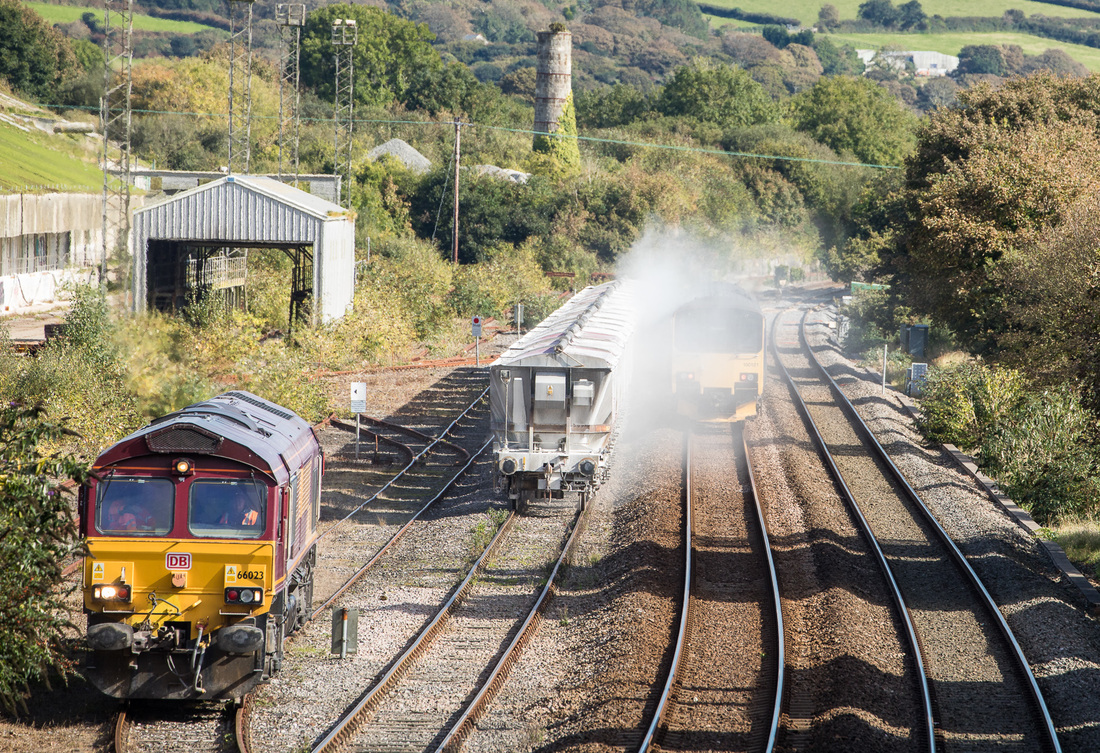
Quiite a remarkable picture at Burngullow. 150121 disappears in a cloud of China Clay dust as it passes the CDA's that 66023 had just deposited at Burngullow 10th October 2016 Copyright Ron Westwater
An unusual view taken from Trewoon bridge - this is east of Burngullow. 47824 on the 1330 Penzance to Plymouth on the 17th August 1992. Copyright Roger Geach
Drone Footage at Burngullow by Jon Hird
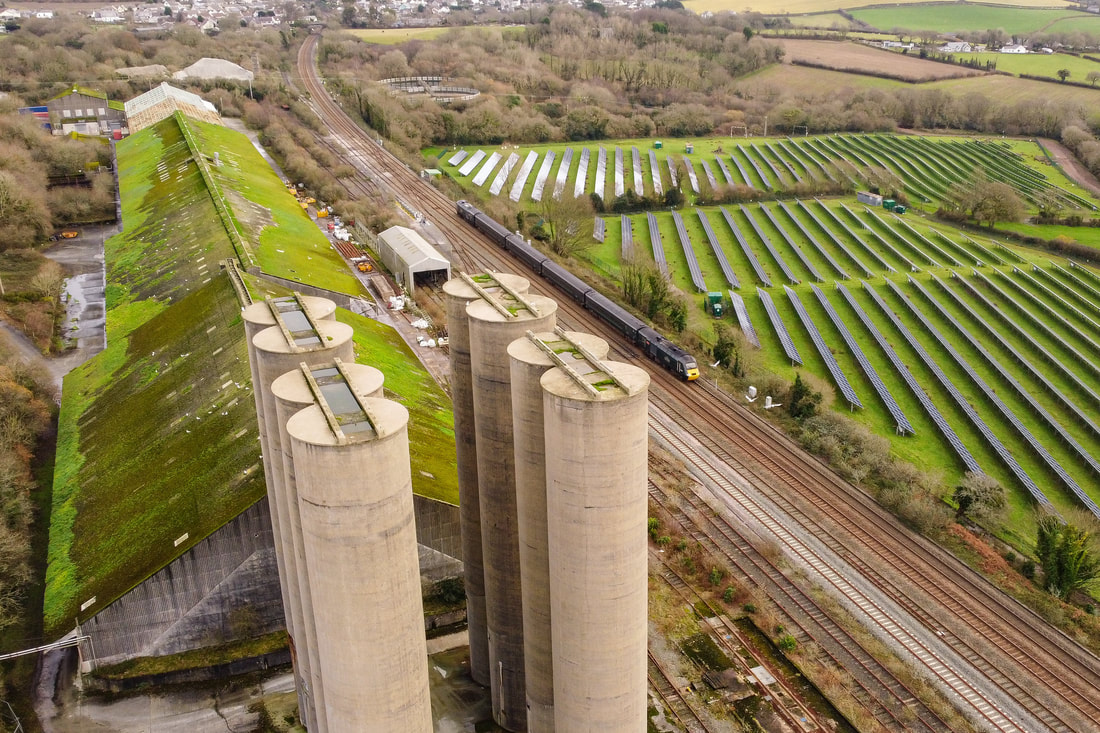
A Castle Class HST at Burngullow. Copyright Jon Hird
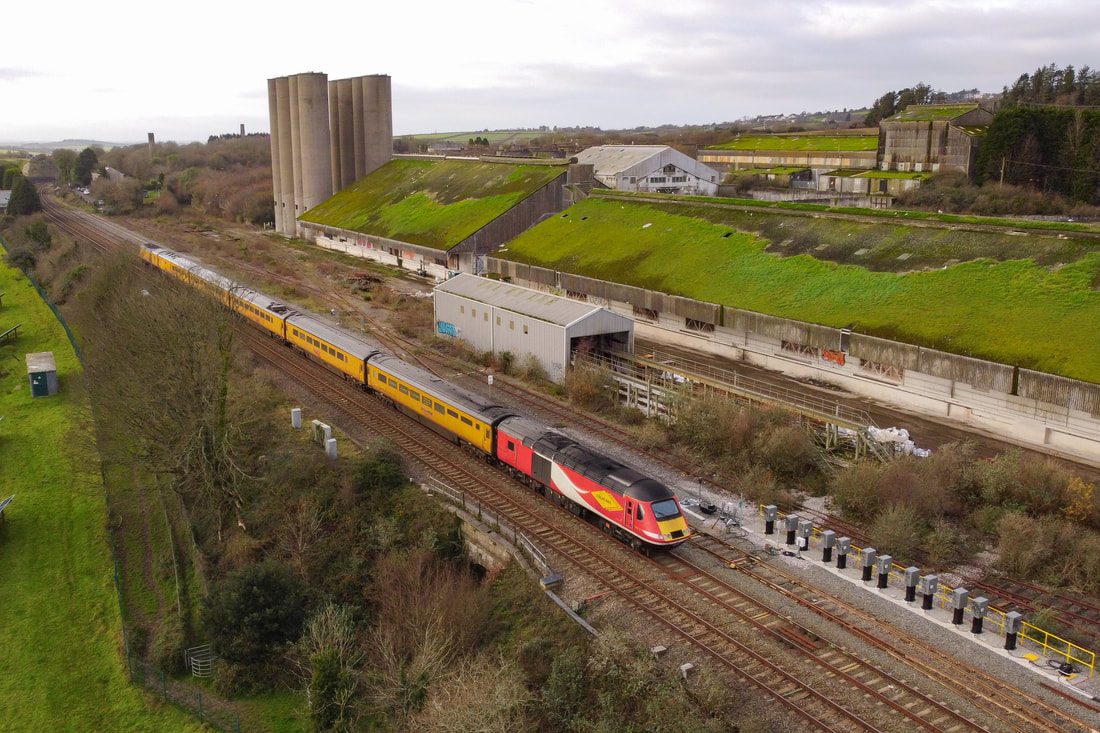
The measurement train at Burngullow on Friday 15th December 2023 Copyright Jon Hird
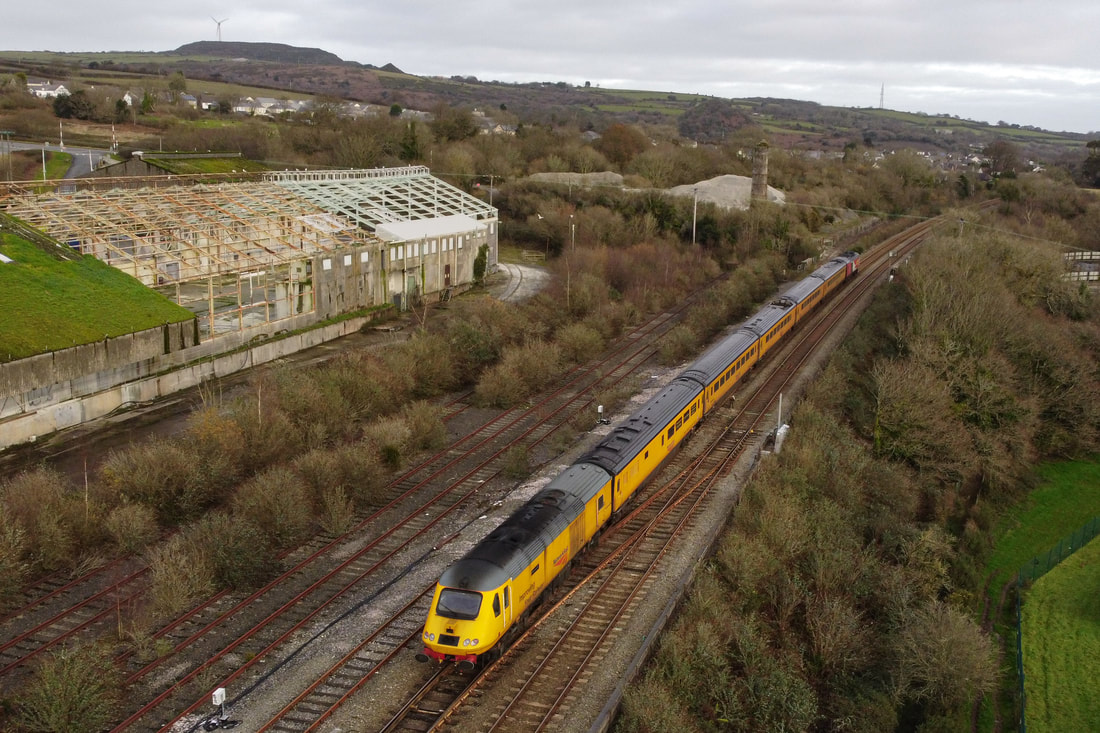
The measurement train at Burngullow on Friday 15th December 2023 Copyright John Hird
New sand traffic to and from Burngullow? 2018/19 Craig Munday
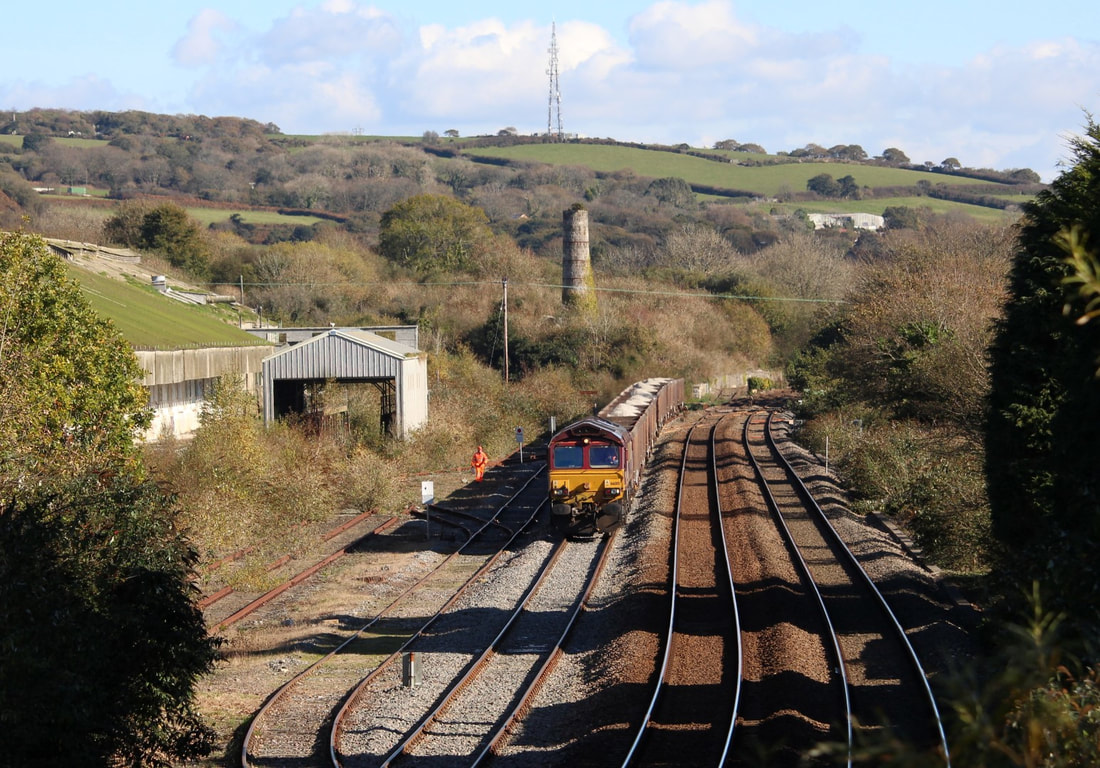
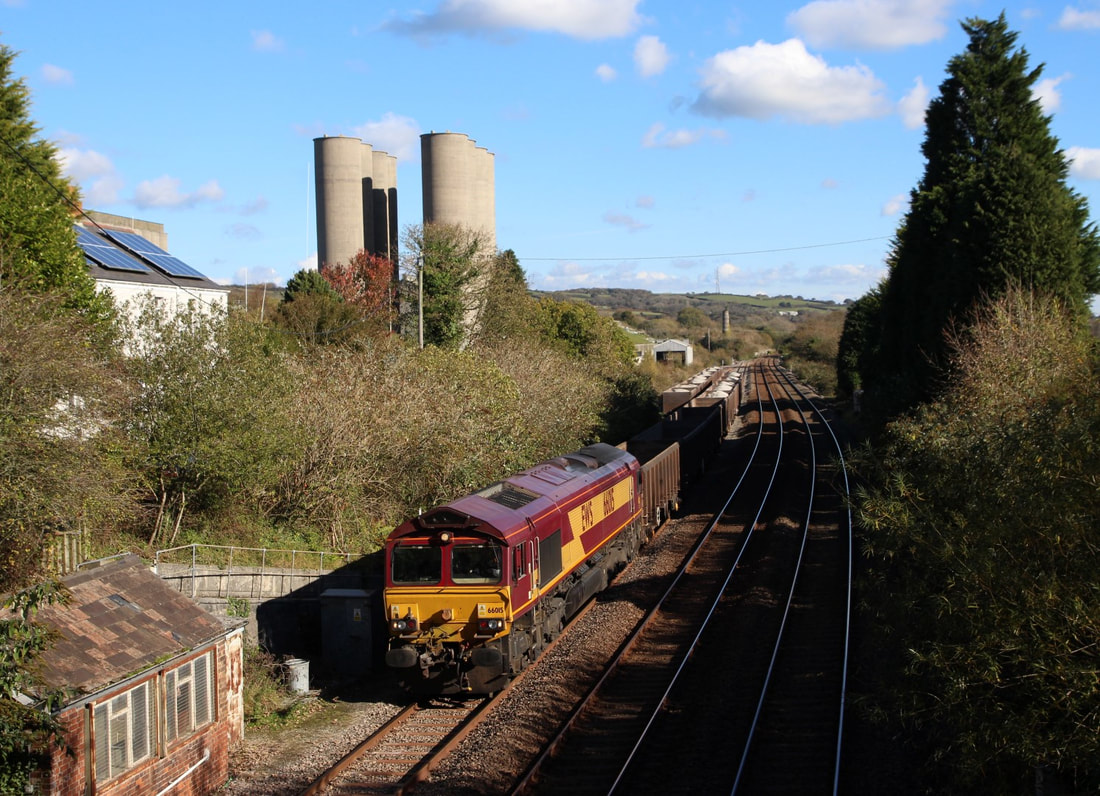
The long awaited DB Cargo sand trial finally got underway today (30th October 2018). 66015 in original EWS livery worked down 17 KEA (bogie box wagons) Didcot to Burngullow overnight ready for loading. The train was worked back in two portions, the first trip is seen at Bolitho in wonderful light.
Fingers crossed we see a steady stream of this traffic in 2019.
All the best, Craig
Fingers crossed we see a steady stream of this traffic in 2019.
All the best, Craig
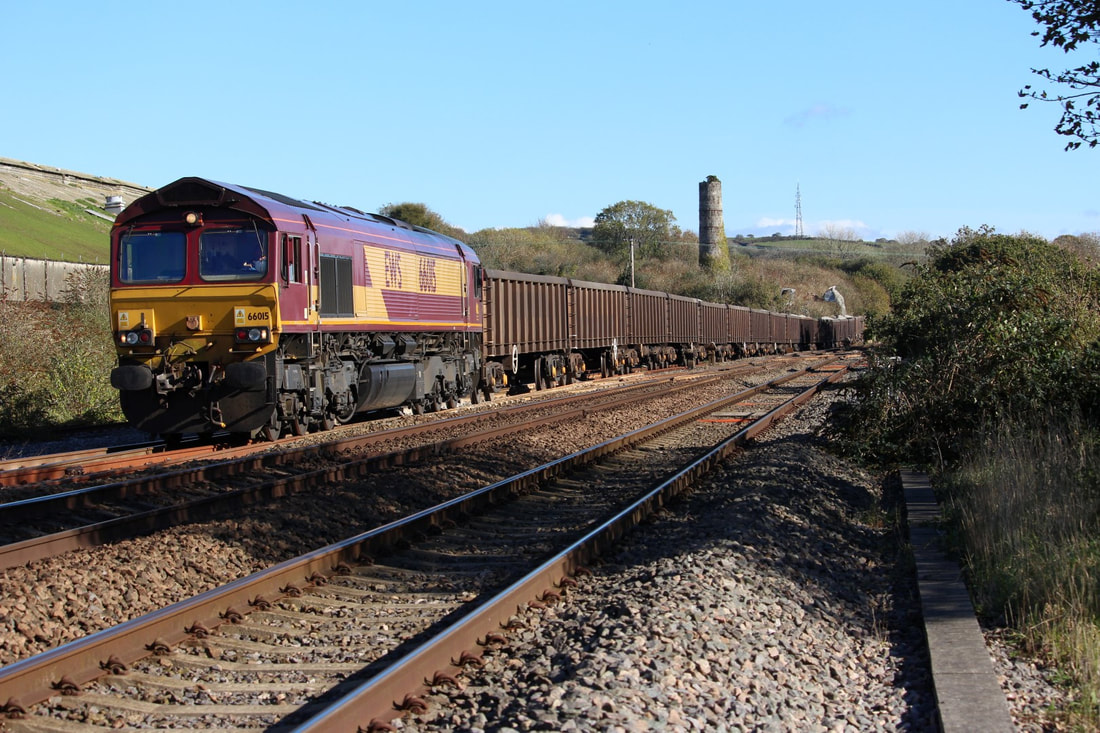
66015 on sand Burngullow 12.16 30th October 2018 Copyright Craig Munday
66015 on sand Burngullow 12.41 30th October 2018 Copyright Craig Munday
66015 on sand Burngullow 13.00 30th October 2018 Copyright Craig Munday
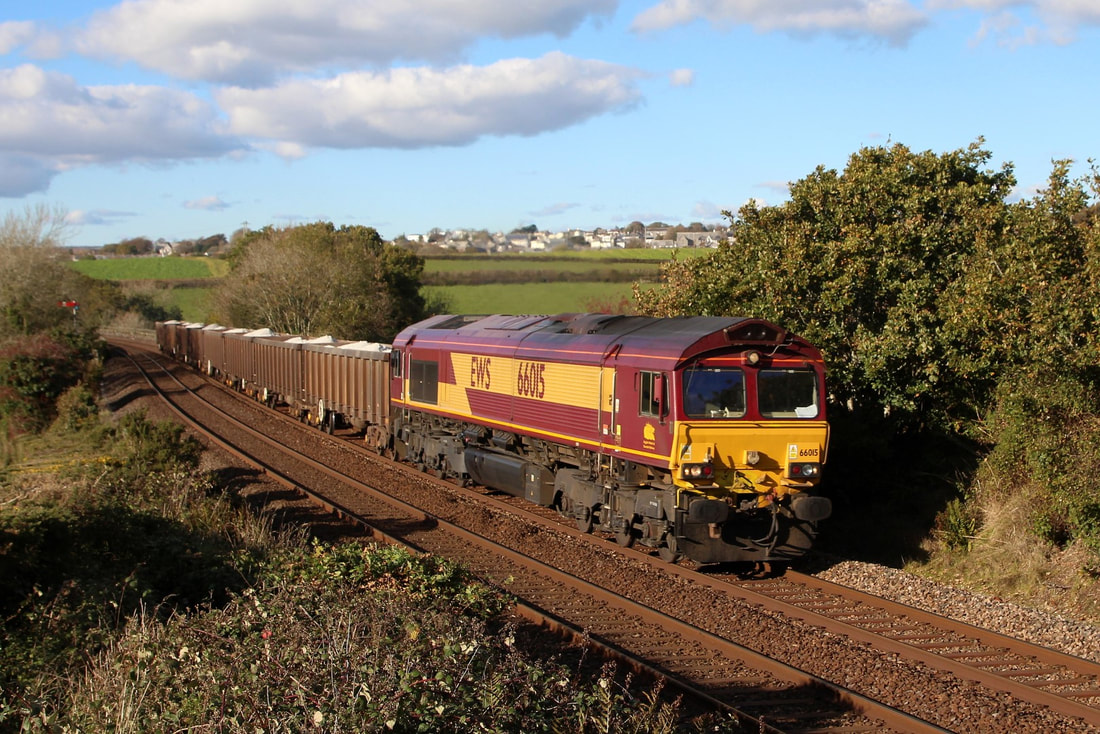
66015 on sand seen at Bolitho 14.51 30th October 2018 Copyright Craig Munday
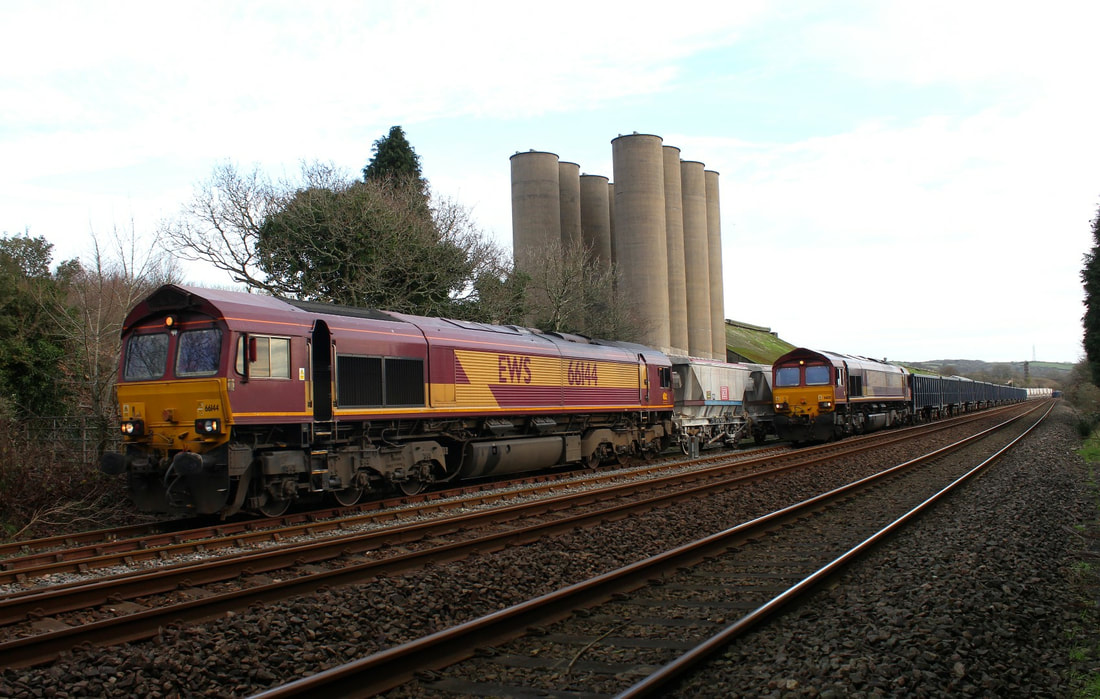
66144 with CDA's passes 66121 with sand train. Burngullow on the 8th January 2019 Copyright Craig Munday
Trackwork at Burngullow over the weekend 4 & 5th September 2021
Engineering works took place at Burngullow over the first weekend of September 2021 to relay the run round loop, this saw 2 x Colas and 1 x Freightliner ballast trains head to Cornwall for the job. The vegetation has been cleared to allow the work to take place but unfortunately the West end connection from the loop to the dries has now been plain lined. Colas Rail's 66849 'Wylam Dilly' is seen waiting to depart with 6Y41 to Exeter Riverside on 4/09/21
Alan Peters
Alan Peters
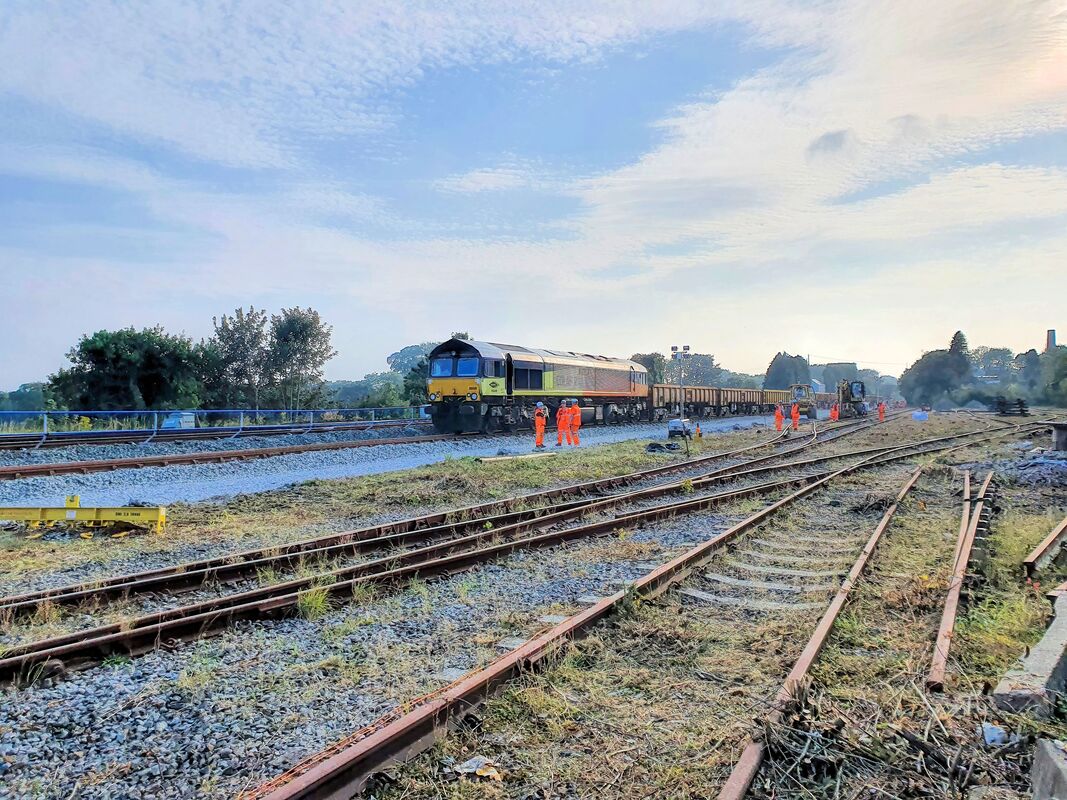
Burngullow relay 4th September 2021 Copyright Alan Peters
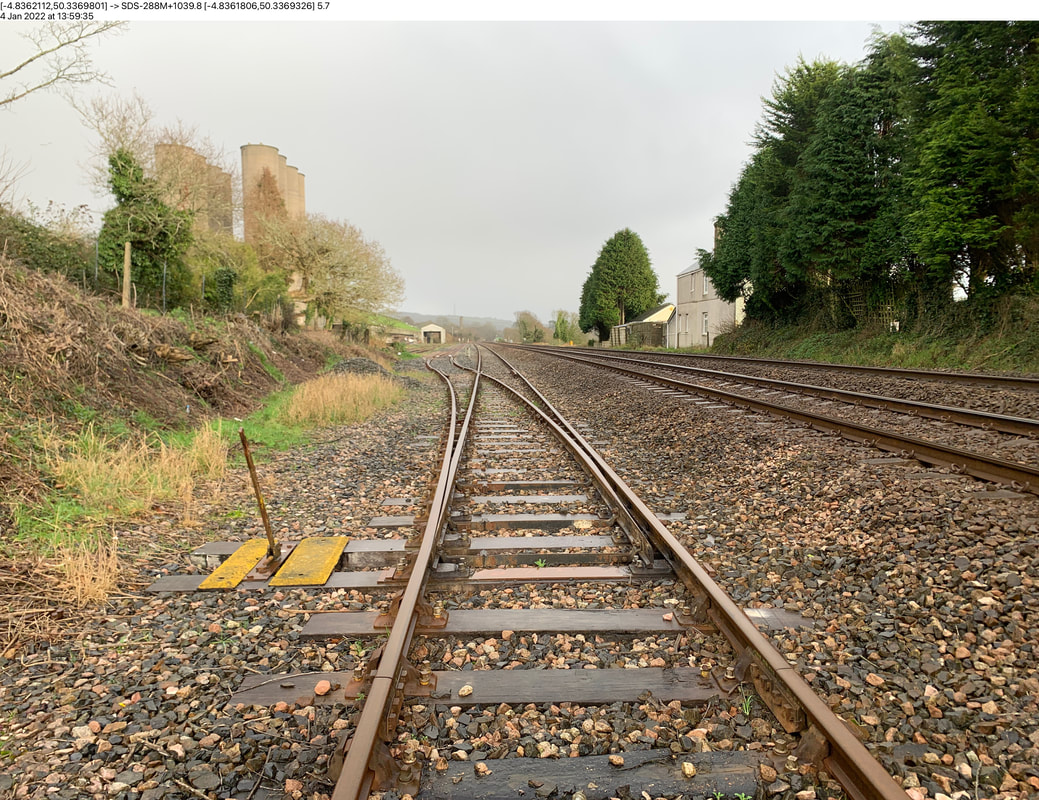
Burngullow - overview of the S&C unit providing accessegress to the siding loop at Burngullow Jn, SDS, 288m1039y (taken just before we got drenched!. 4th January 2022. Copyright Mark Howells. N.B. The original Burngullow station building closed 1901 is seen to the right.
Preparations for Trewoon bridge replacement
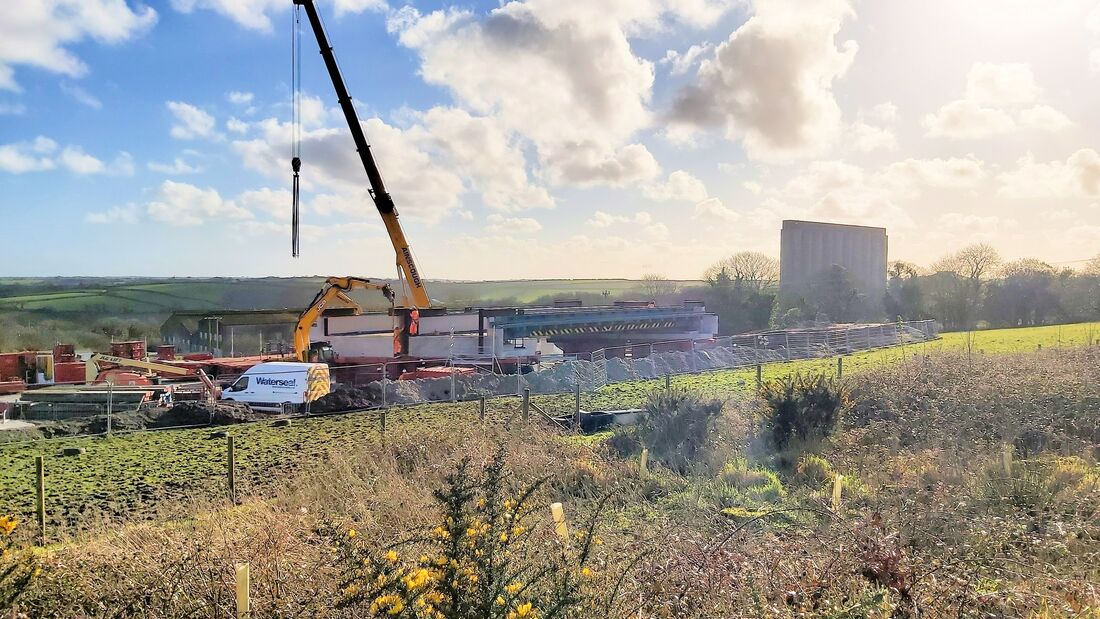
New Trewoon bridge being assembled at Burngullow 25th February 2021. Copyright Phil Hadley
Dear CRS, My work takes me past the old Blackpool Dries site at Burngullow which is where the new replacement bridge for Trewoon is being assembled before being moved down the road to be lifted into position. I managed to get the attached photo on my phone this afternoon and thought your members may like to see it. All the best, Phil
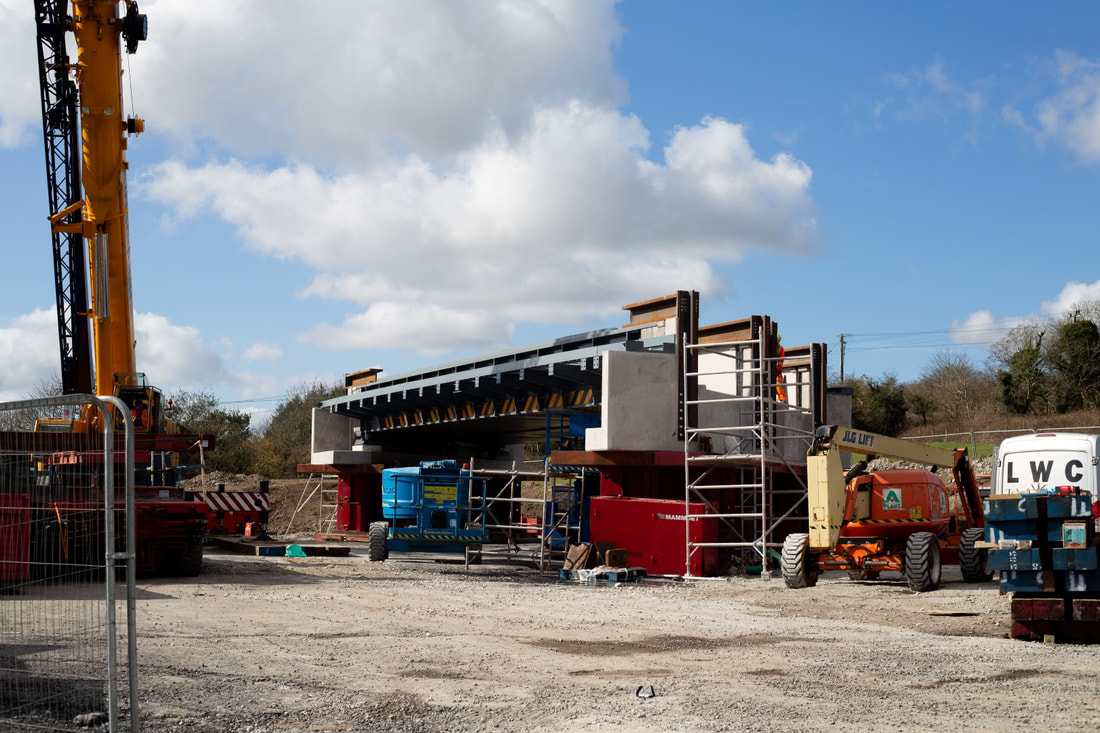
A close up view of the construction site at Burngullow for the new Trewoon bridge. 26th February 2021. Copyright Craig Munday.
Trewoon Bridge Replacement.
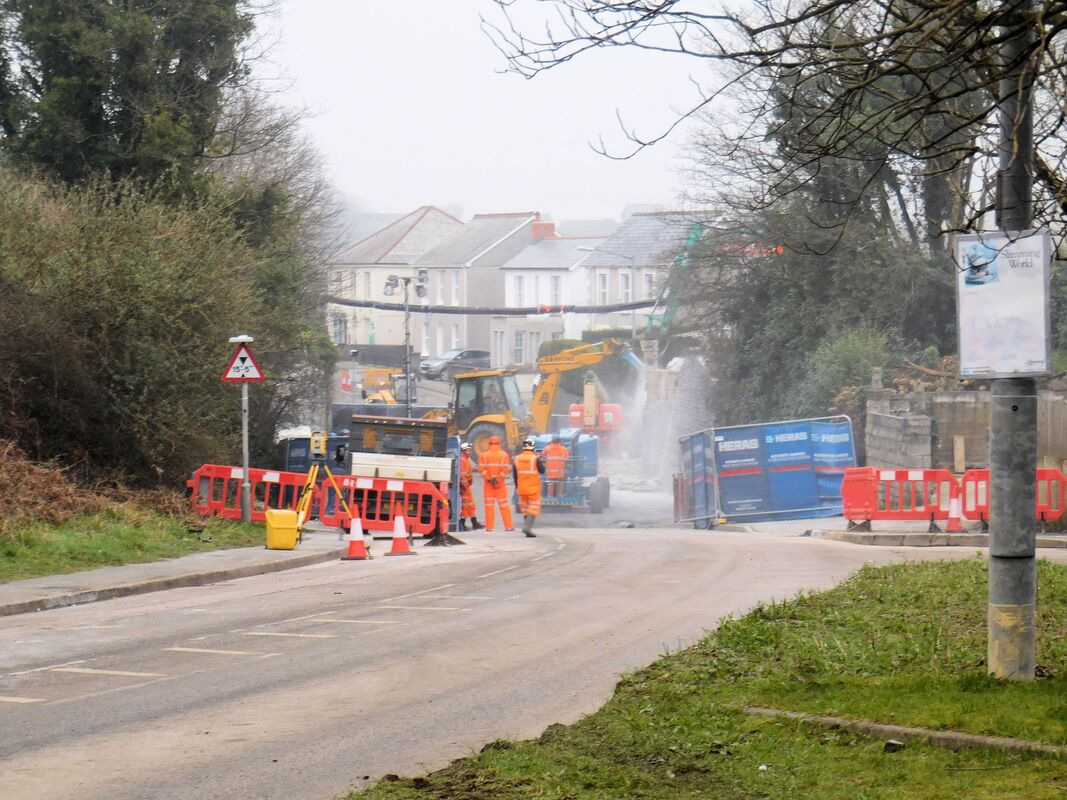
Trewoon Bridge work 2nd March 2021 Copyright Nathan Hadley North side.
Trewoon Bridge work 2nd March 2021 Copyright Nathan Hadley North side (2)
Trewoon Bridge work A view along the track eastwards from the bridge over Hembal Lane. 2nd March 2021. Copyright Nathan Hadley
Gover viaduct
It's a pity that there are few of the conical clay waste heaps surviving these days there is one in this pictures as 66101 crosses Gover viaduct west of St Austell on the 26th March 2015. Copyright Ron Westwater
Considerable interest was aroused in the unusual diagramming of 143's to cover a service in the far west - they are usually banned over the Tamar. However, it did happen on 12th December 2015 and Craig Munday was there to catch the spectacle as they returned over Gover Viaduct.. Copyright.
In addition to the attractive conical tip the dark clouds make this scene on the 10th October 2016 Copyright Ron Westwater.
Very dramatic skies as the 6P24 headed by 66018 crosses Trenance Viaduct (west of St Austell) 8th January 2021 Copyright Craig Munday.
NMT viewed from Trewiddle on the 18th November 2022. Copyright Craig Munday.
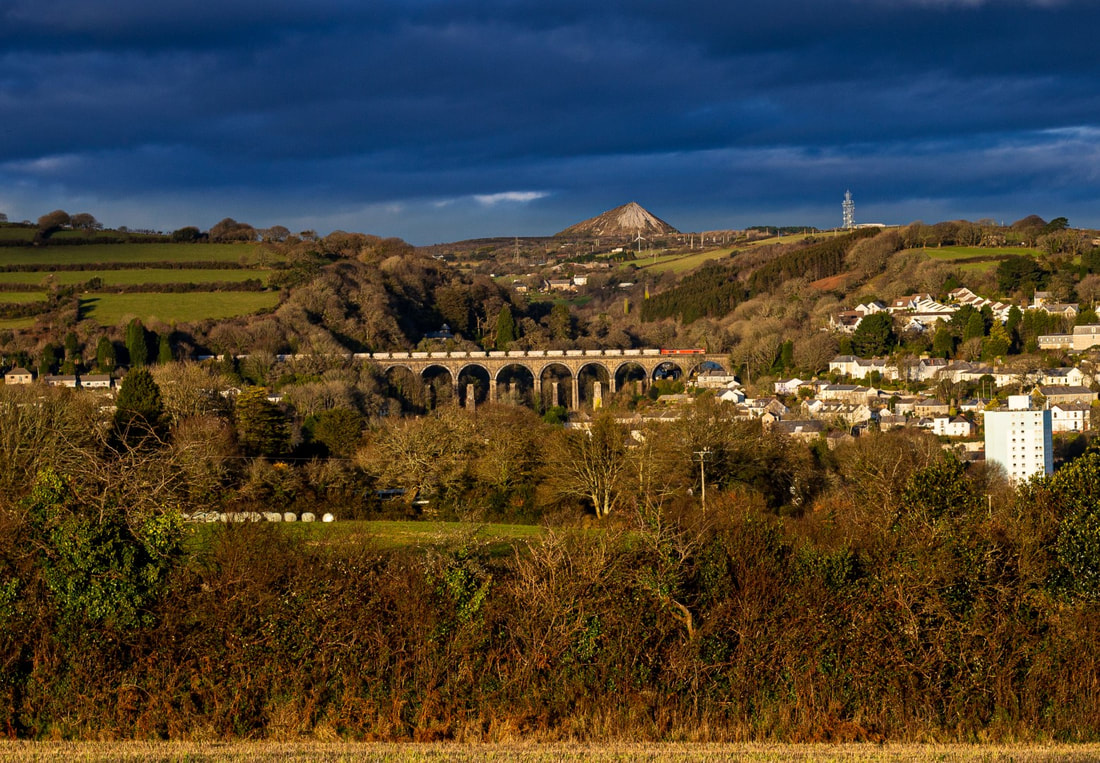
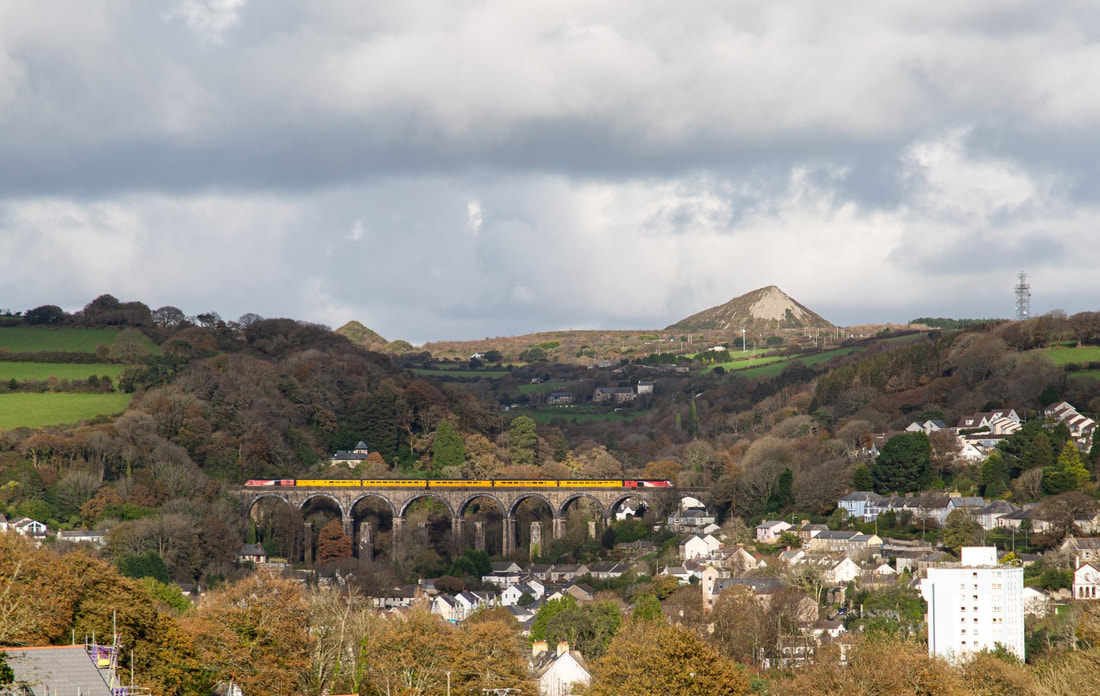
St Austell Viaduct
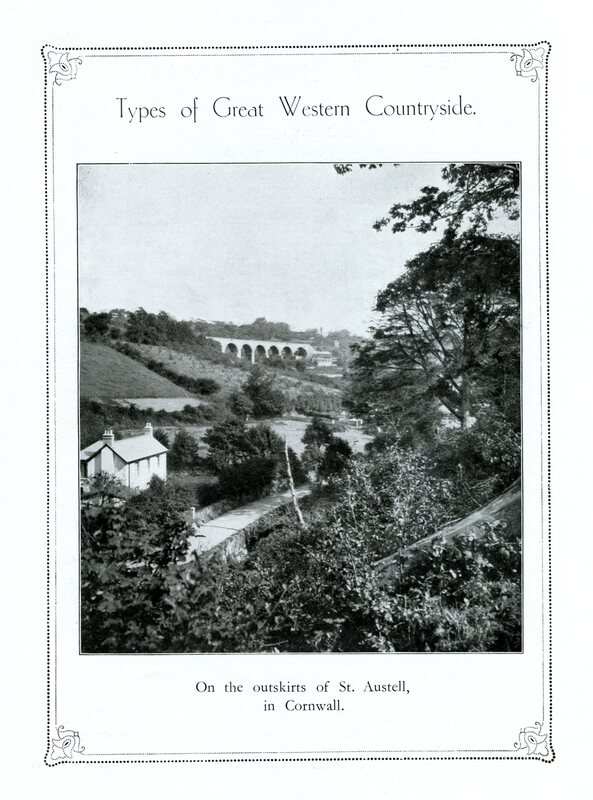
From the GW Magazine August 1934. Submitted by Mike Roach.
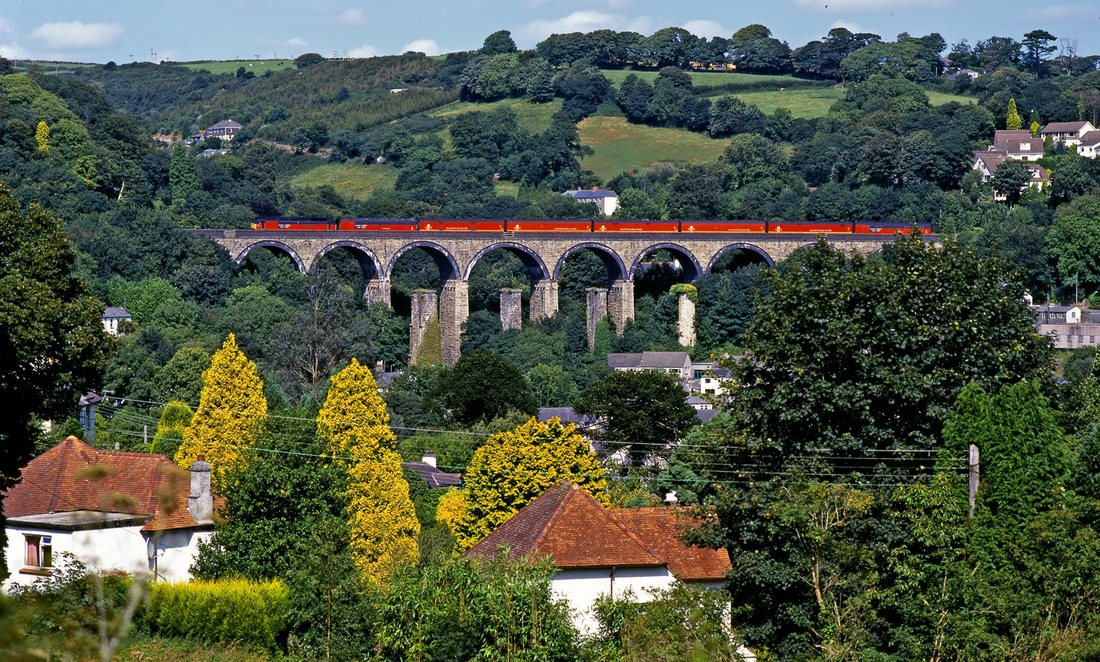
A splash of red as loco 47742 cross St Austell viaduct, heading for Penzance with the Royal Mail Post Postal Train Copyright Mark Branner
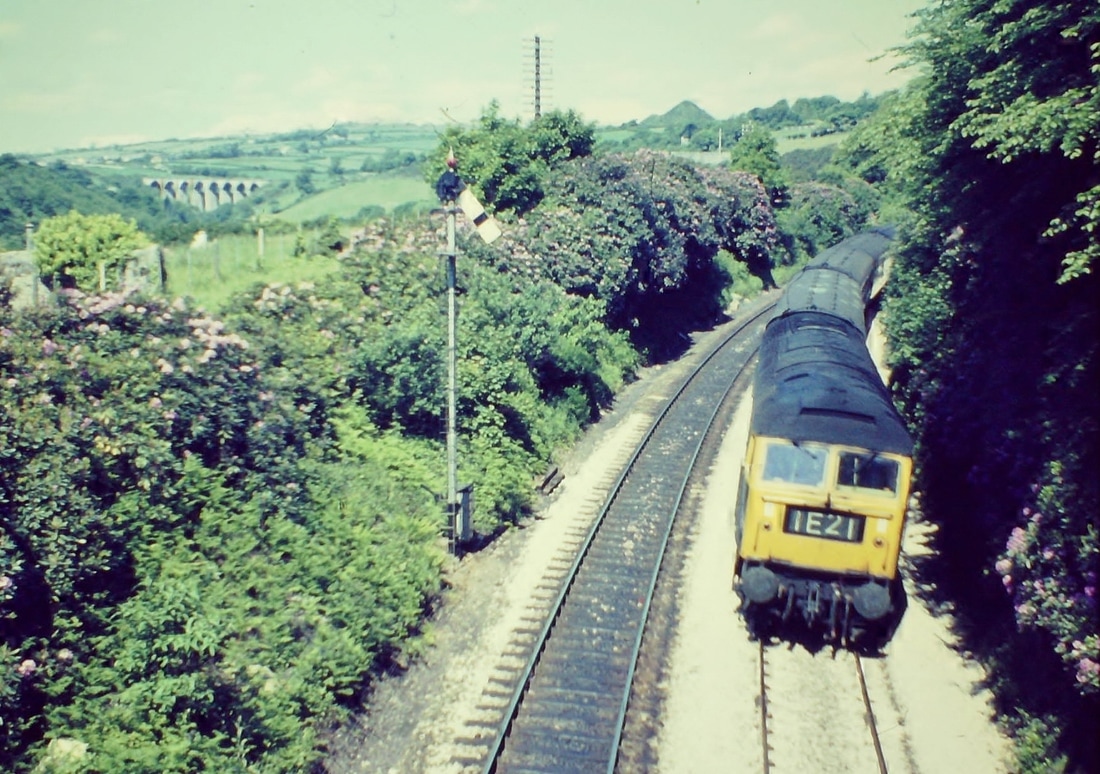
A welcoming signal at St Austell to the class 47 hauling an up service as it approaches the station. An undated but interesting view which includes, in the distance, Gover viaduct. Copyright Sid Sponheimer.
St Austell
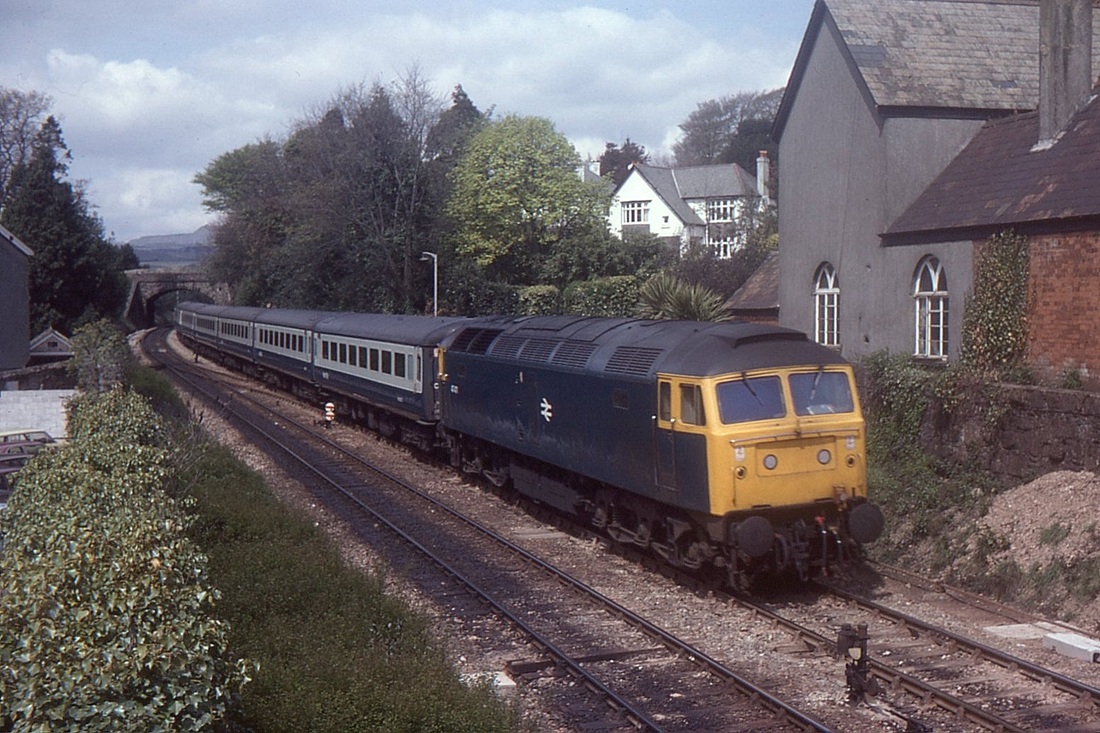
A 47 with a rake of mark 2 stock on an up service slows for the St Austell stop now just yards away. 8th May 1979 Copyright Mike Roach
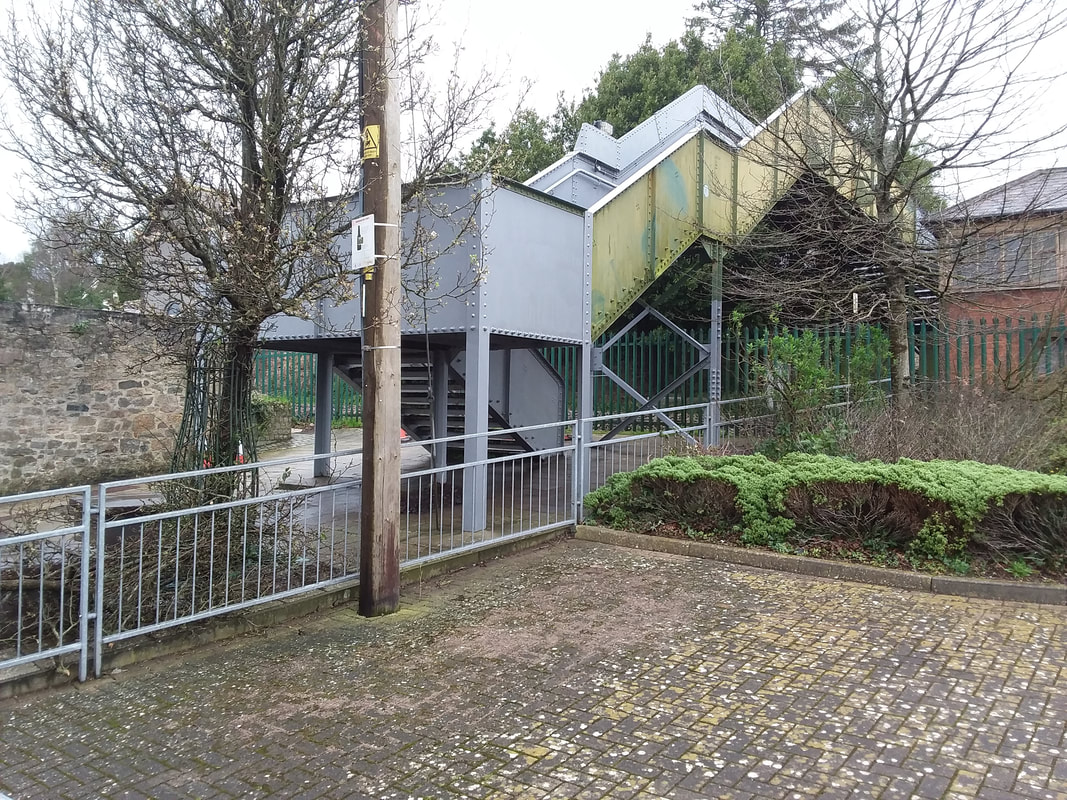
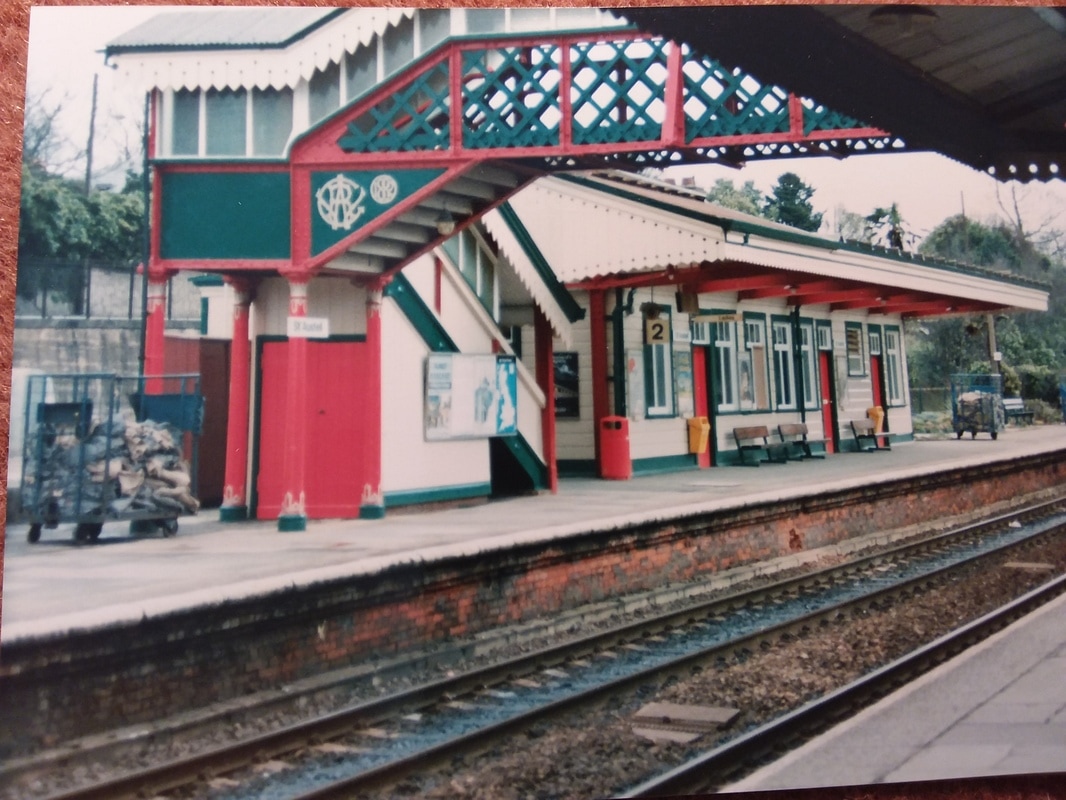
St Austell - The other foot bridge being repainted. This was formerly at St Blazey being moved to this location to replace a level crossing w.e.f. 25th September 1925. This view on the 23rd February 2020. Copyright Dave Anthony
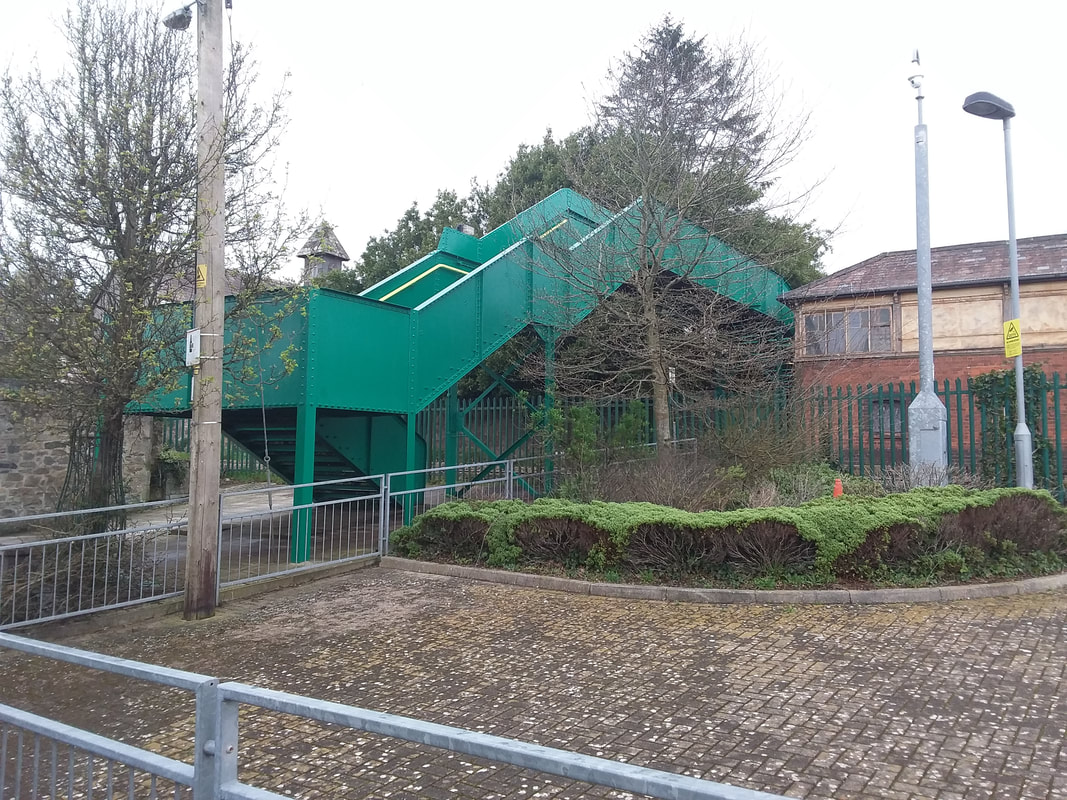
St Austell footbridge - looking splendid 22nd March 2020. Copyright David Anthony/
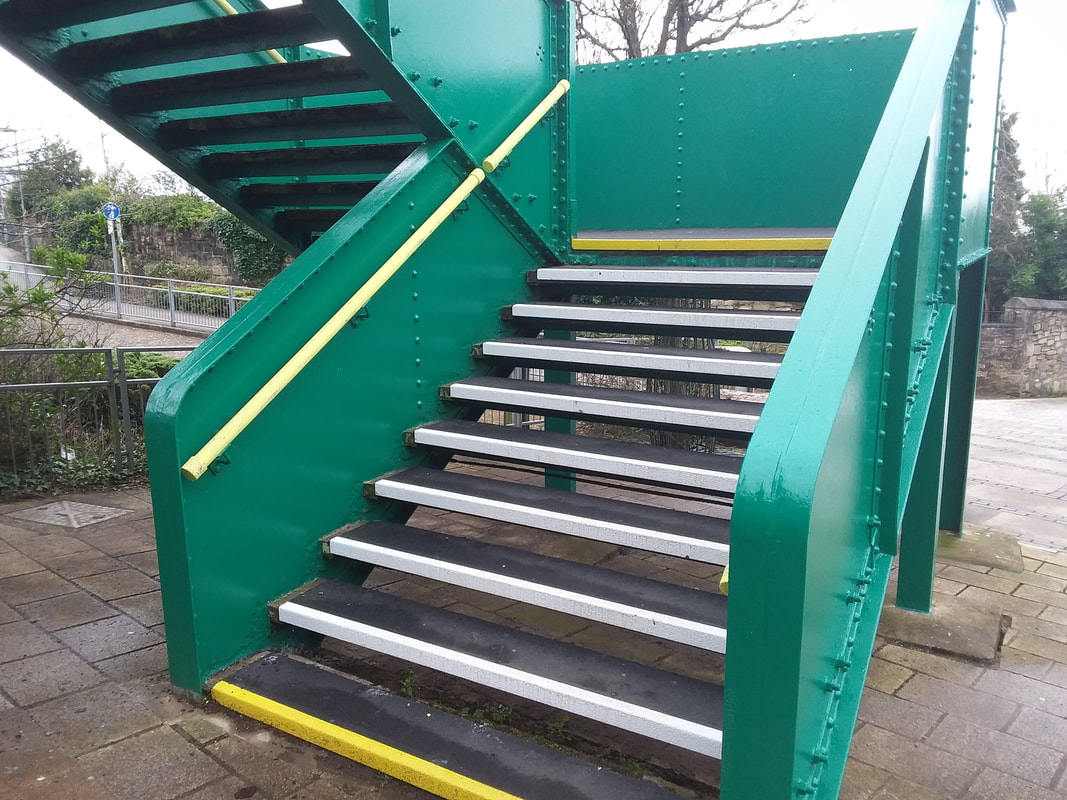
Too good to use! St Austell footbridge - looking splendid 22nd March 2020. Copyright David Anthony/
A picture by Julian Hanwell from near the foot of the footbridge of a Peak Hauled up service approaching St Austell. Copyright.
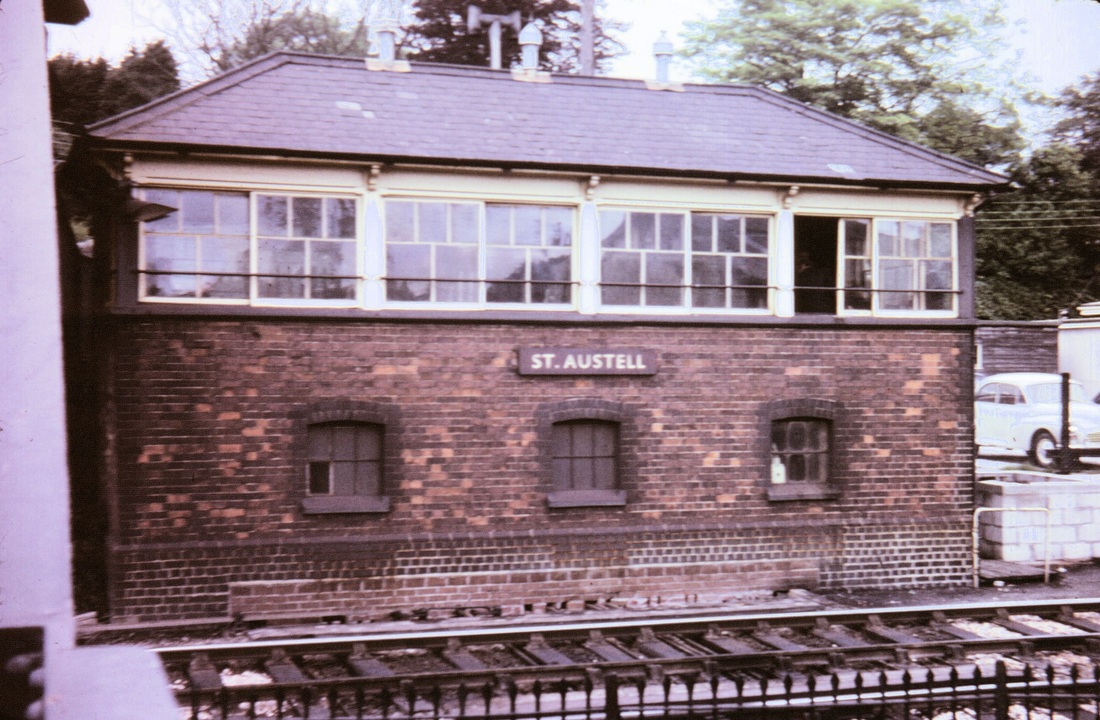
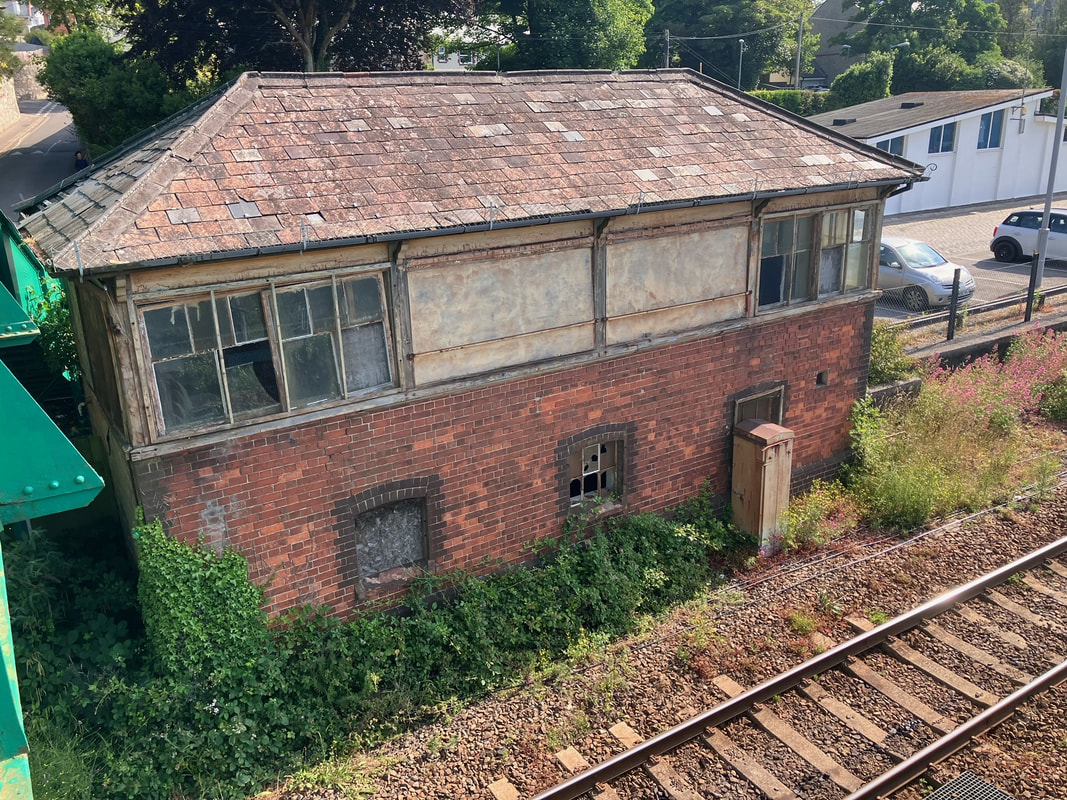
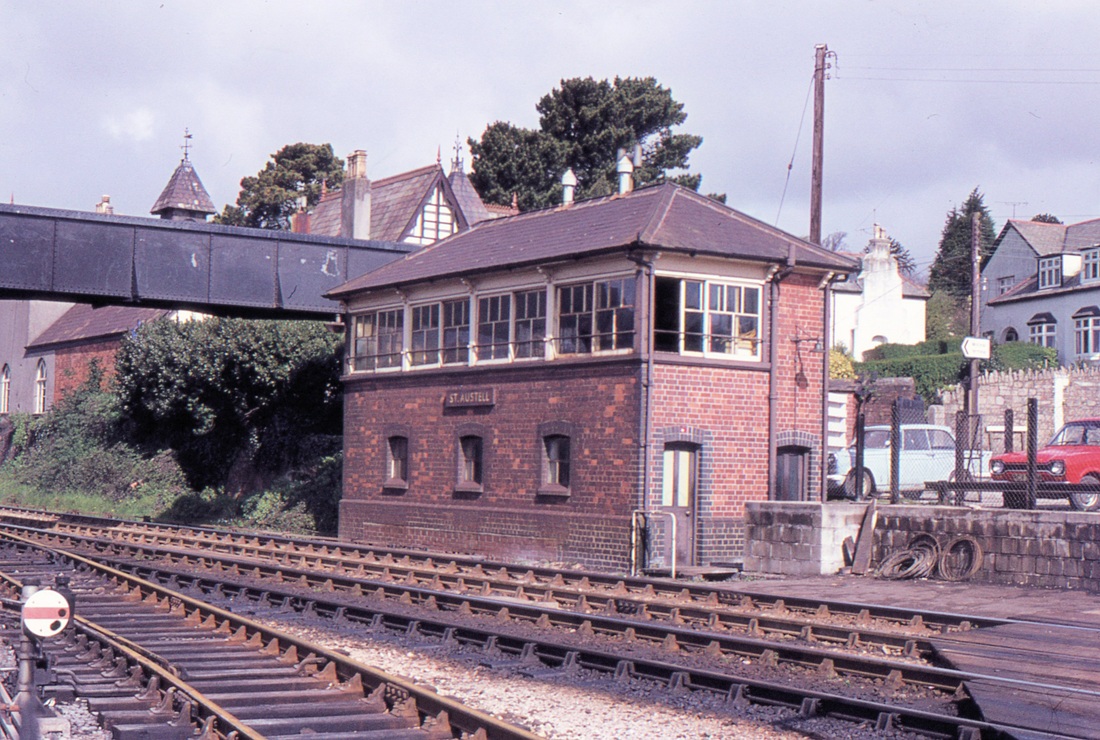
St Austell signalbox in 1973 Copyright Chris Osment
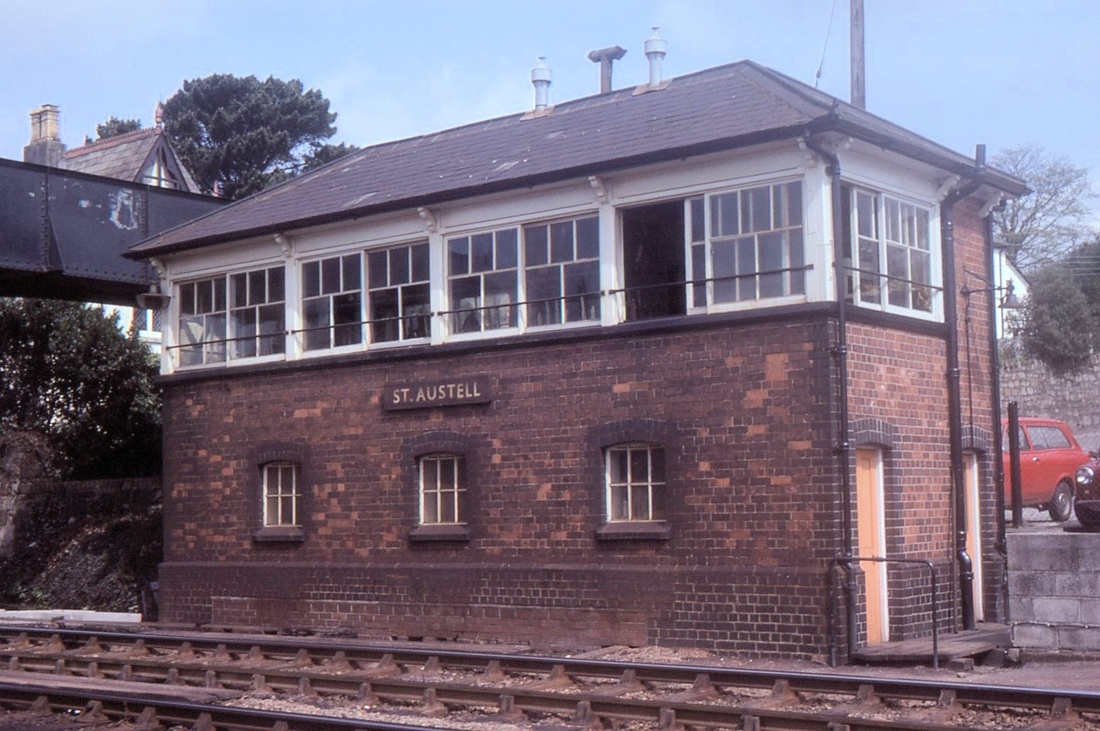
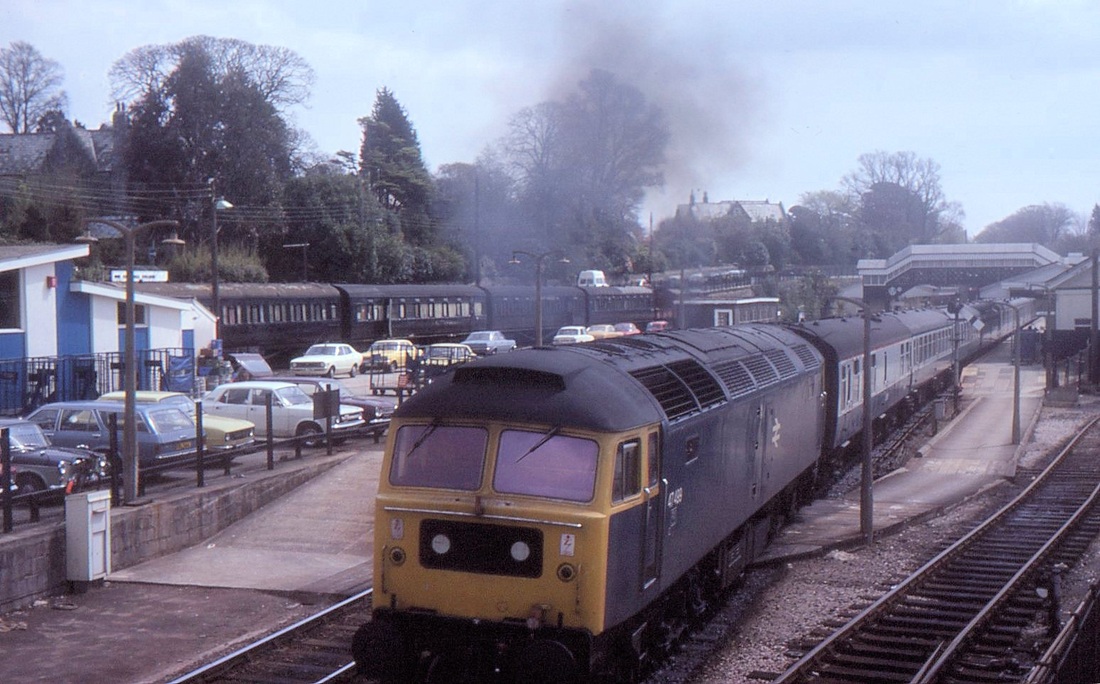
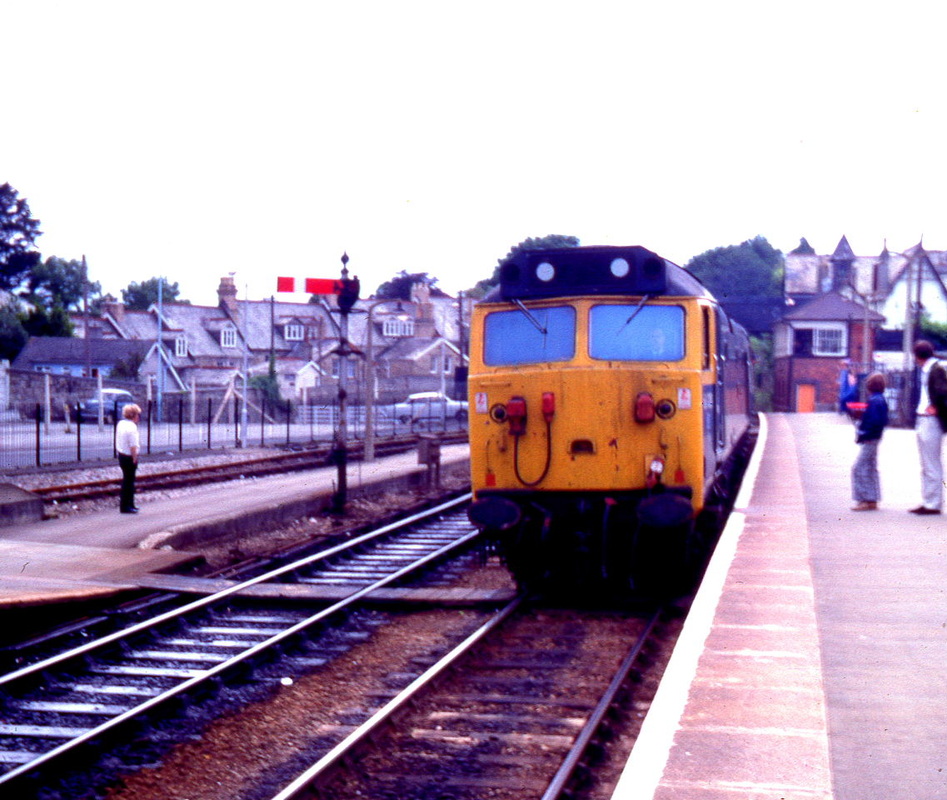
St Austell Signalbox. For some reason not fitted with the usual cast iron nameplate. 8th May 1979 Copyright Mike Roach
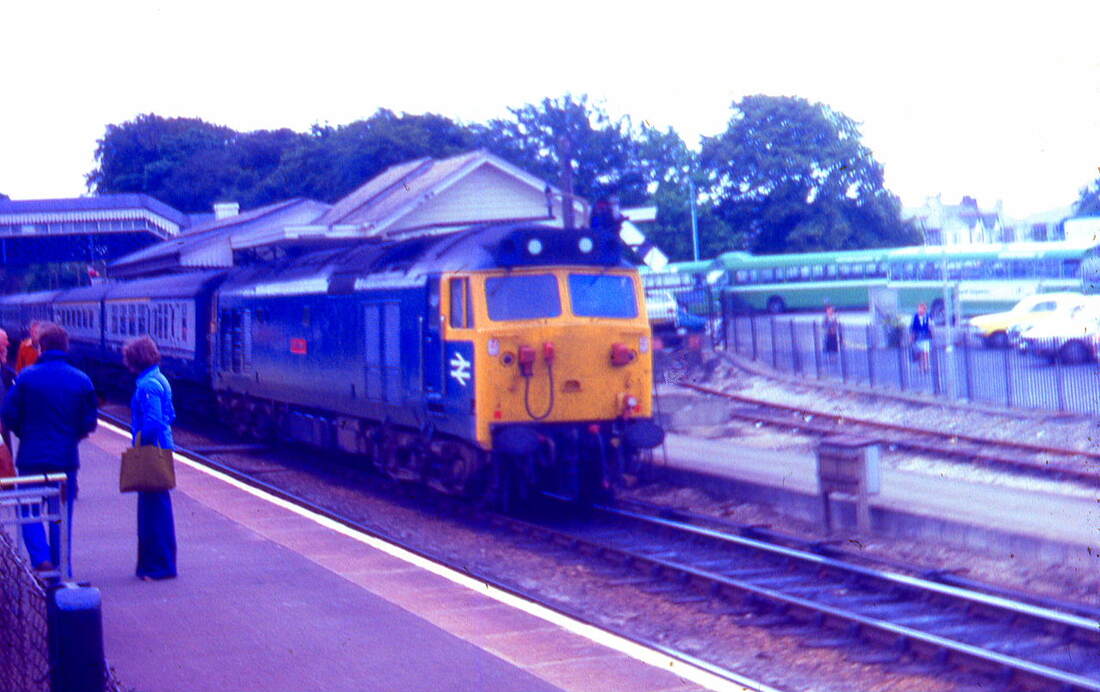
50004 St Vincent having arrived at St Austell with the Saturdays only Worcester Shrub Hill / St Austell Motorail service. The train waits at St Austell while the Motorail flats are being removed, before being shunting across to enable the cars to come off. While the train itself continued to Penzance. The picture was taken on 22nd July 1978 Copyright Steve Widdowson.
Interestingly the siding, part of a fan of sidings still exists across part of the forecourt - this was removed in about 1971.
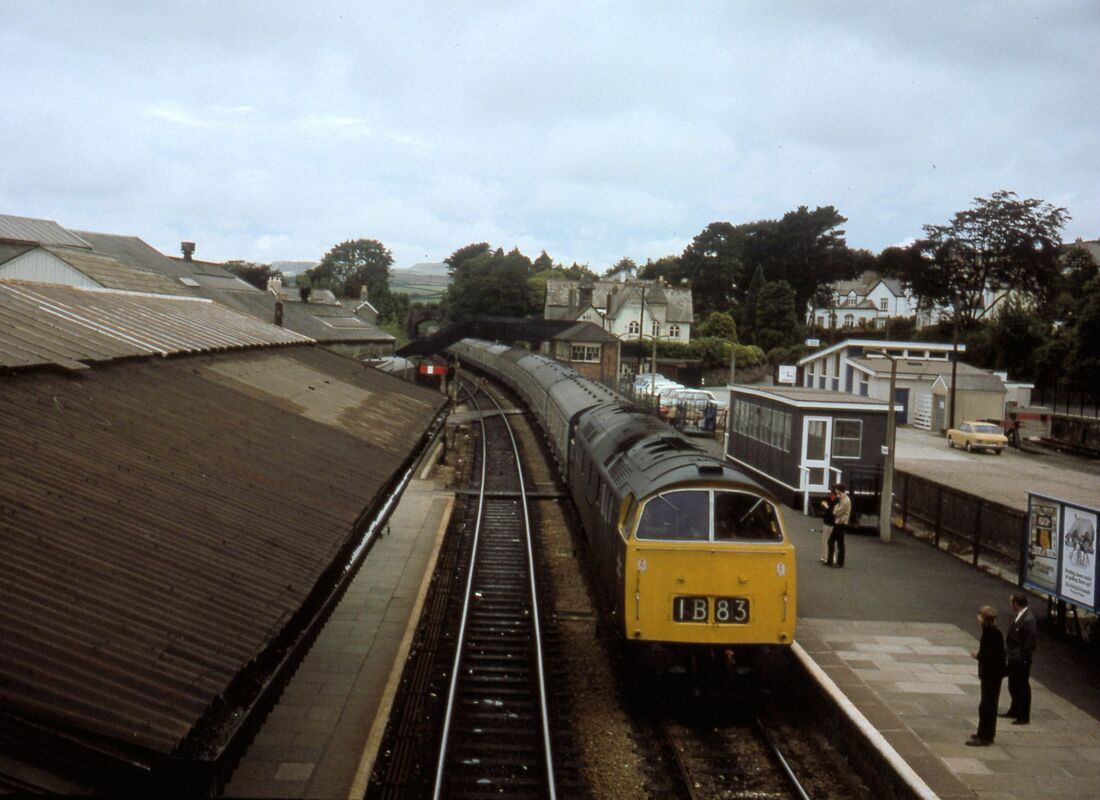
St Austell Engeland 1975 Copyright Paul Delcour, Hilversum, Netherland. See comment on this picture below.
Hello Keith,
I was interested in Paul Delcour Hilverson's nice photo of a 'Western' arriving at St Austell in 1975. I would like to add the following information regarding this picture. According to the BR WR Working Timetable for the summer of 1975 the headcode 1B83 was used M-F on the 1530 Paddington-Penzance and on the Saturday night 2355 Paddington-Penzance sleeper. This overnight working also conveyed motor cars as far as Exeter St Davids in GUV (General Utility) vans. As this is an 'up' working there is some mystery as to why this headcode is displayed at the London end of the loco. Maybe it was turned at Penzance (was that possible in 1975?), was wrongly set or had been set as such for some days, I've no idea. The loco is recently 'ex-works' and can be identified as a Swindon built example by the inboard positioning of the overhead warning flashes. Swindon-built locos that received repaints in 1975 were D1009 (released off Laira on 04.07.1975) and D1010 which was released by Laira on 09.05.1975. My money is on this loco being D1009 Western Invader. Maybe someone else can help with further clarification on my comments. Paul, many thanks for this; do you have a date (either approximate or exact) to help further?
Regards, Guy Vincent
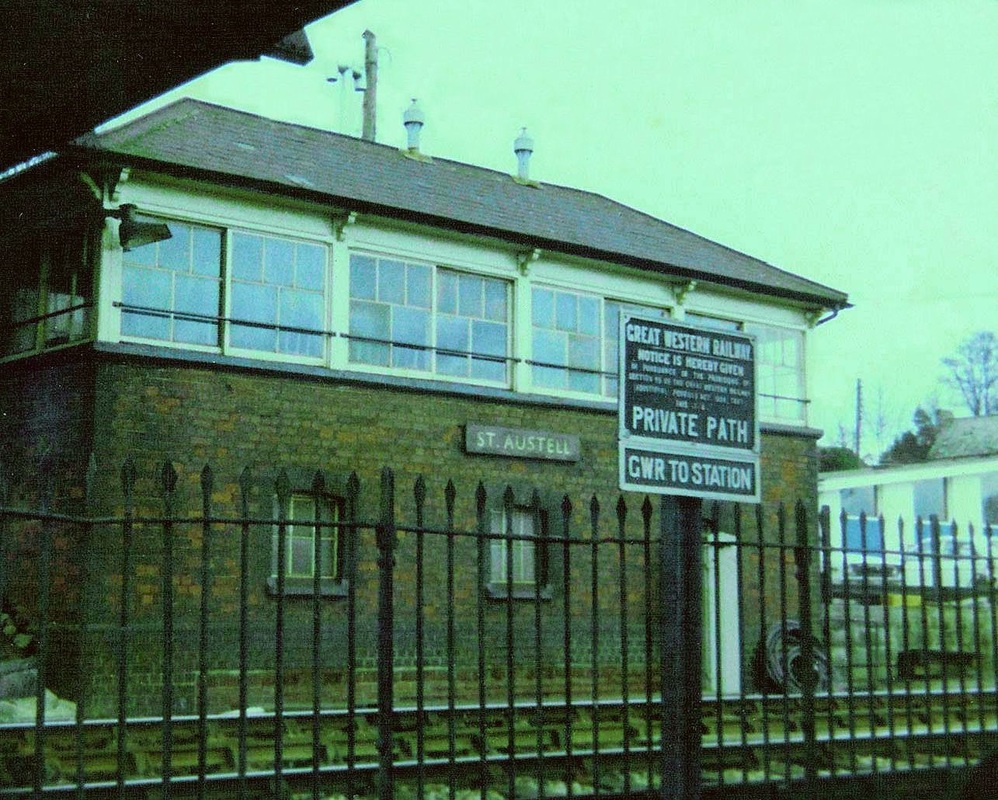
Julian Hanwell's view of the signal box includes two cast signs, one time very familiar. Copyright.
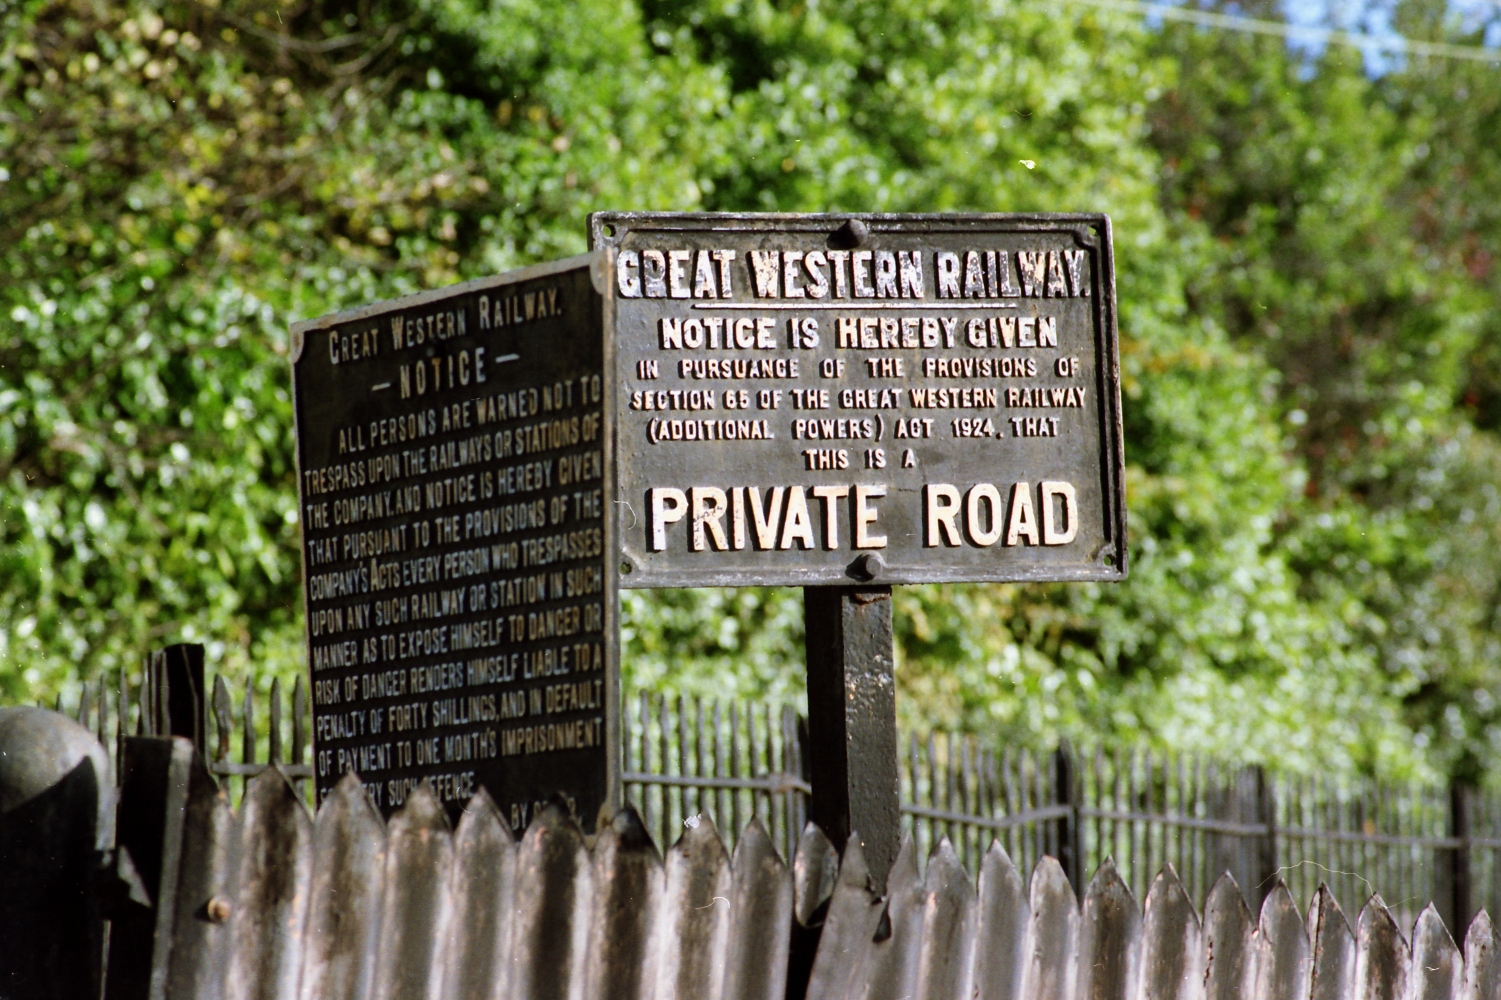
St Austell station Signs at the Palace Road entrance. Copyright Julian Stephens N.B. This is the entrance behind the box in the picture above or to the right in the picture below.
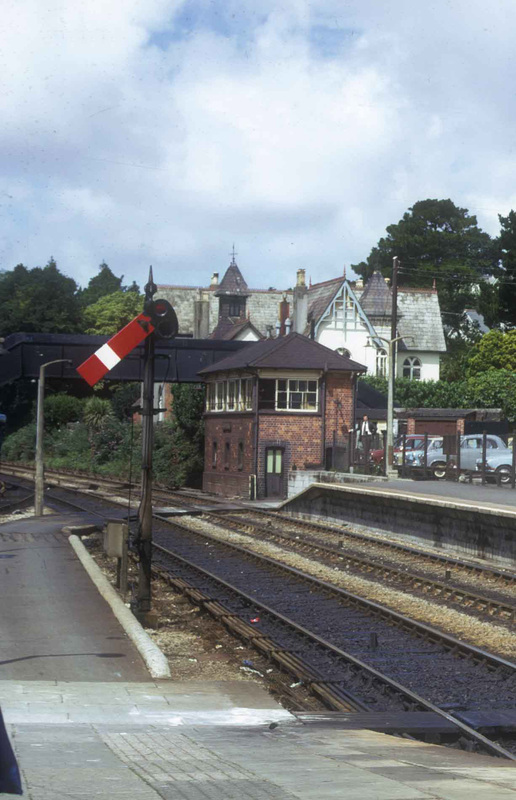
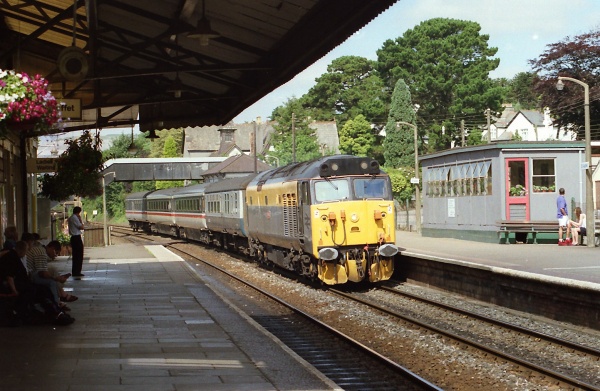
St Austell on the 20th July 1975 Copyright Roger Geach The building behind makes an interesting roofline. This box closed 22nd March 1980
50 036 Victorious runs into St Austell on the 27th August 1979 Copyright Mike Roach
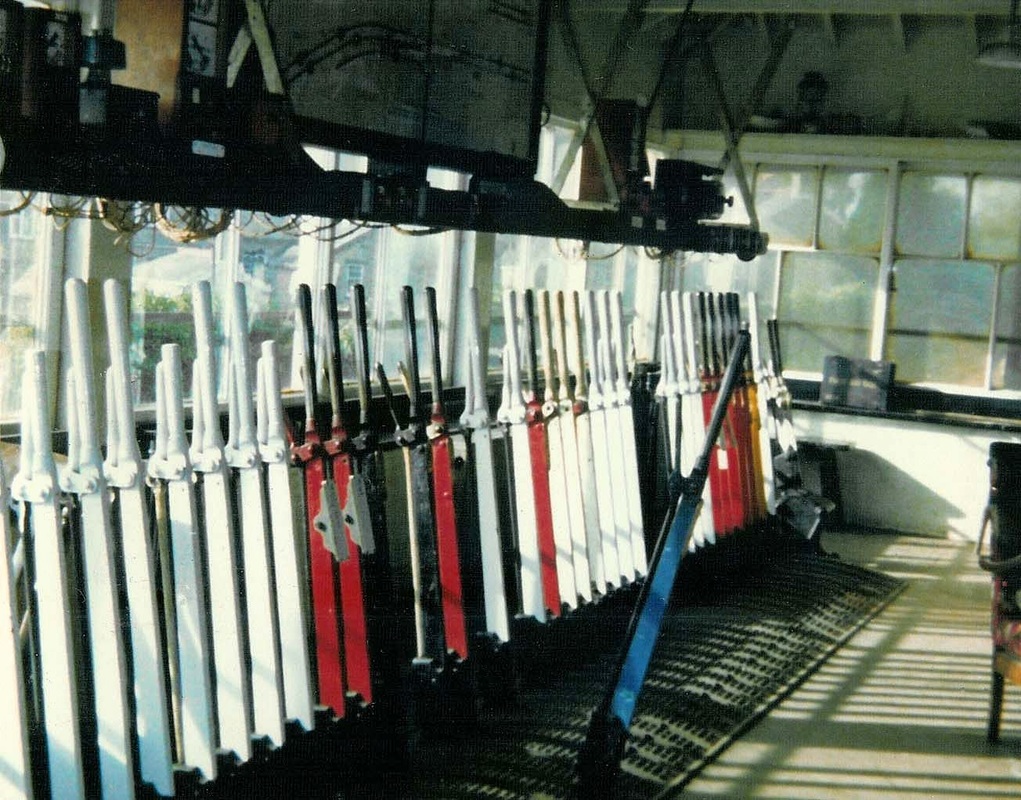
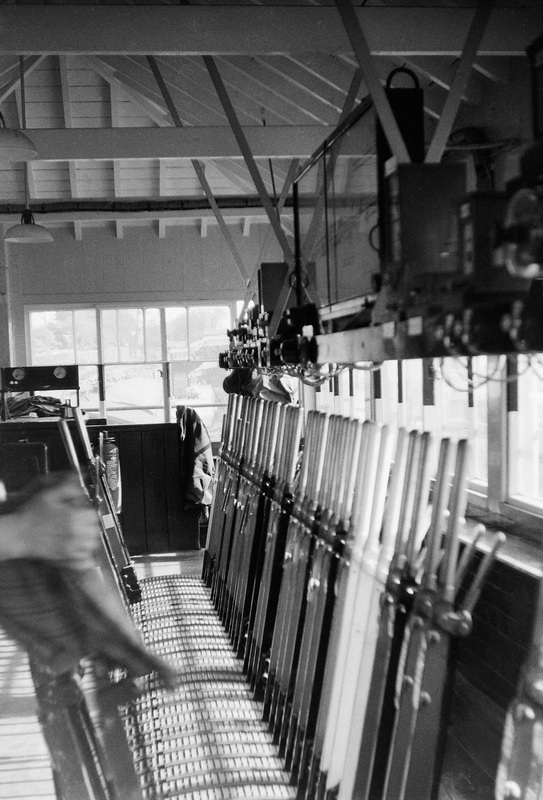
Now, care of Julian Hanwell and also Andrew Jones, we take a look inside the signal box at St Austell
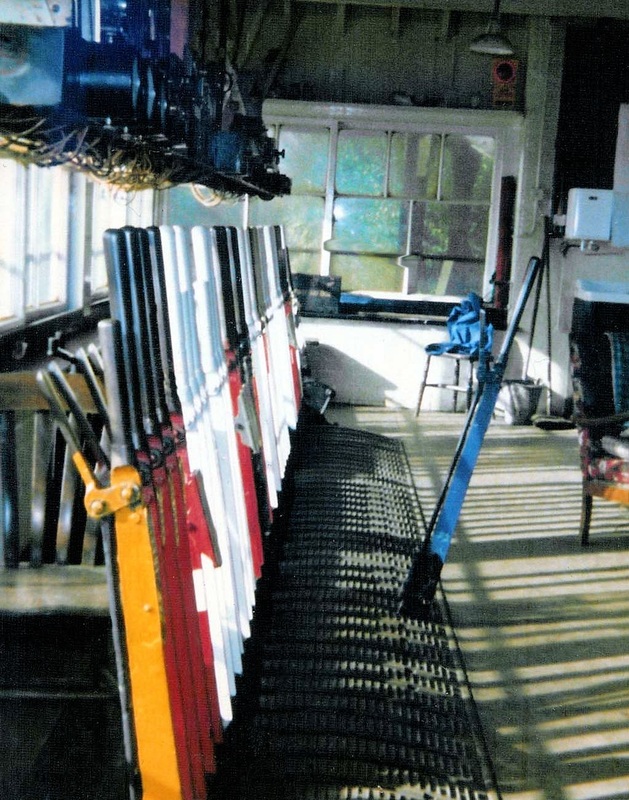
The lever frame at St Austell Signal Box. Copyright Julian Hanwell
The instrument shelf and lever frame at St Austell Signal Box. Copyright Julian Hanwell.
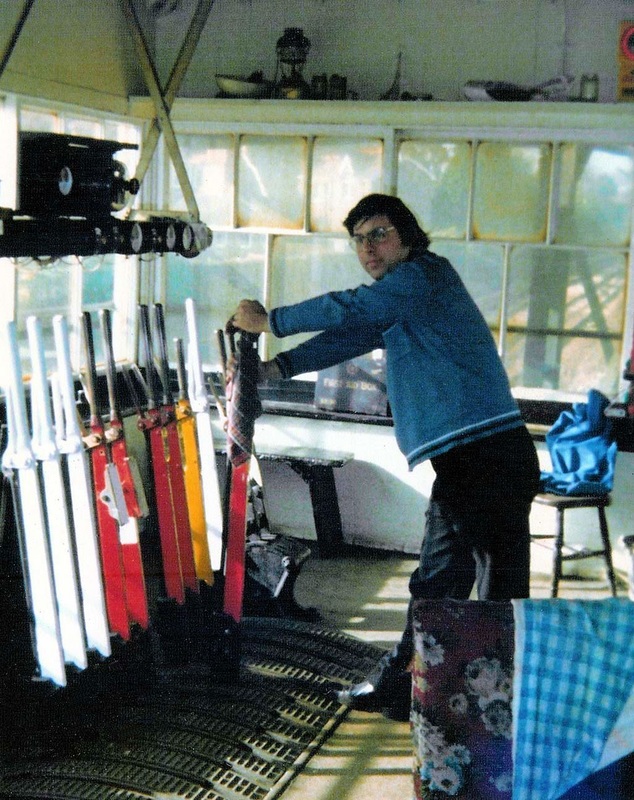
The Signalman is Mr Roger Matthews, he demonstrates the art of 'lever pulling'. Note the customary duster on the lever. Copyright Julian Hanwell.

St Austell Signal Box Frame. The frame was removed shortly after the box closed and sold to me as 'scrap' for £80. I used the frame to build my own signal box (in Norfolk) just like Bill Carne did at the Farm Museum. I sent pictures to Frank Speritt when I put it all together. I attach a photo of my self putting 1/2 the frame together at my house. I eventually sold the frame to a Cornish Lad in St Austell who then resold it to one of the railway societies for spare parts. So it is still out there in parts somewhere. A scrap dealer also wanted the frame but BR sold it to me ! I did manage to keep some (about 5) of the remaining brass lever plates which I still have.
There is no mention of the cast iron name plate being ordered in M Dunn's book 'GWR Signal Box Name Plates'. (An excellent reference book). It may have been removed when St Austell was no longer a level crossing? The general thoughts were (back in the 70s) that the plate was broken when removed during WW2 but there is no evidence to support this. Text and picture copyright Julian Hanwell
And more St Austell signalbox pictures - from the Andrew Jones collection.
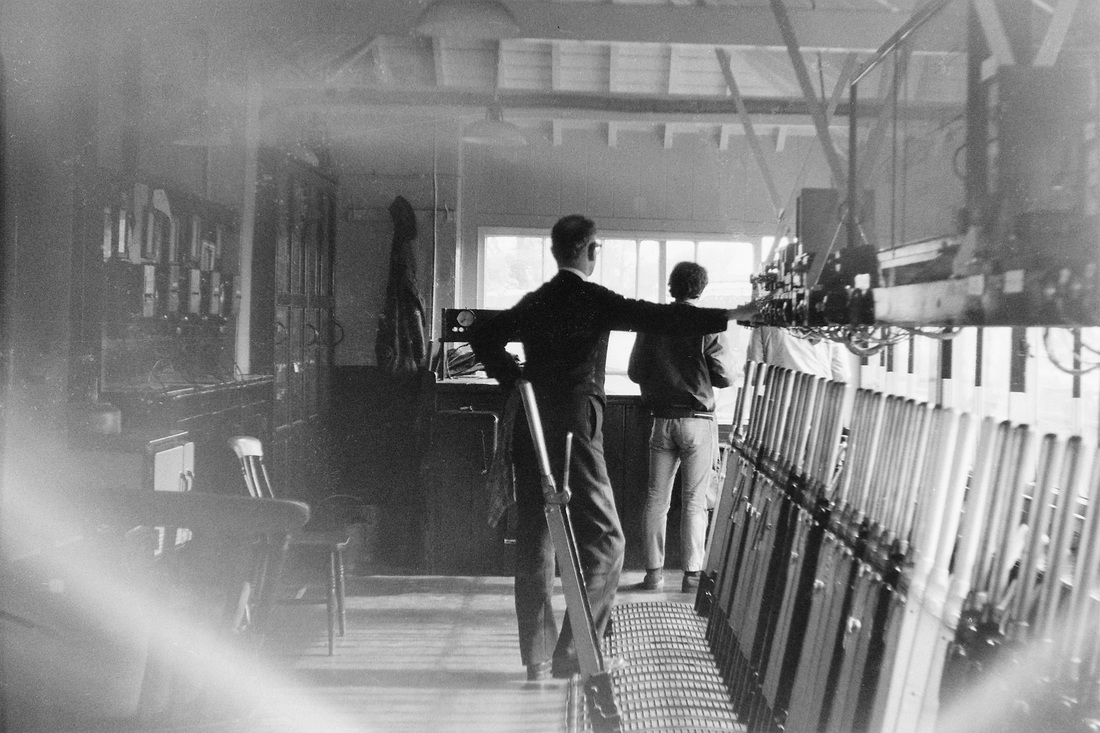
An end of film shot so slightly hazy but well worth saving. The duty signalman looks on as a St Austell Photographic club member take prime position. January 1969 Note there seems to be an absence of the usual comfortable chair! Copyright Andrew Jones
A second, clearer shot of the frame, the station buildings can be seen in the distance. January 1969 Note the hand on the nearby lever, complete with duster. Copyright Andrew Jones
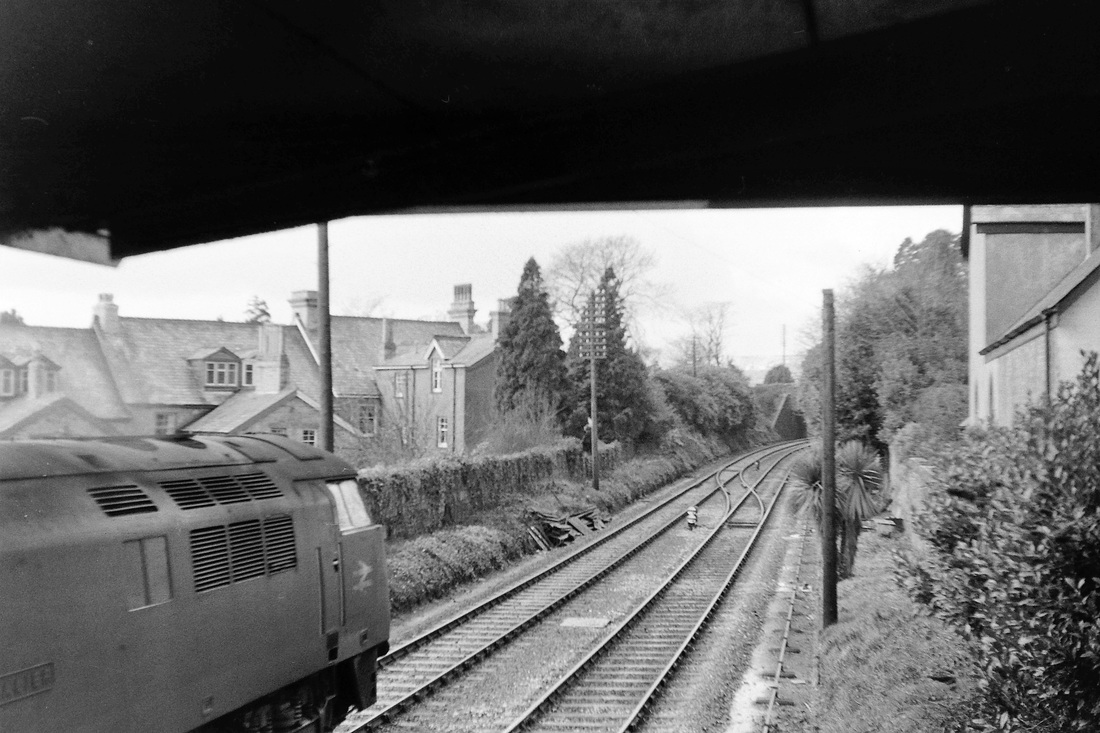
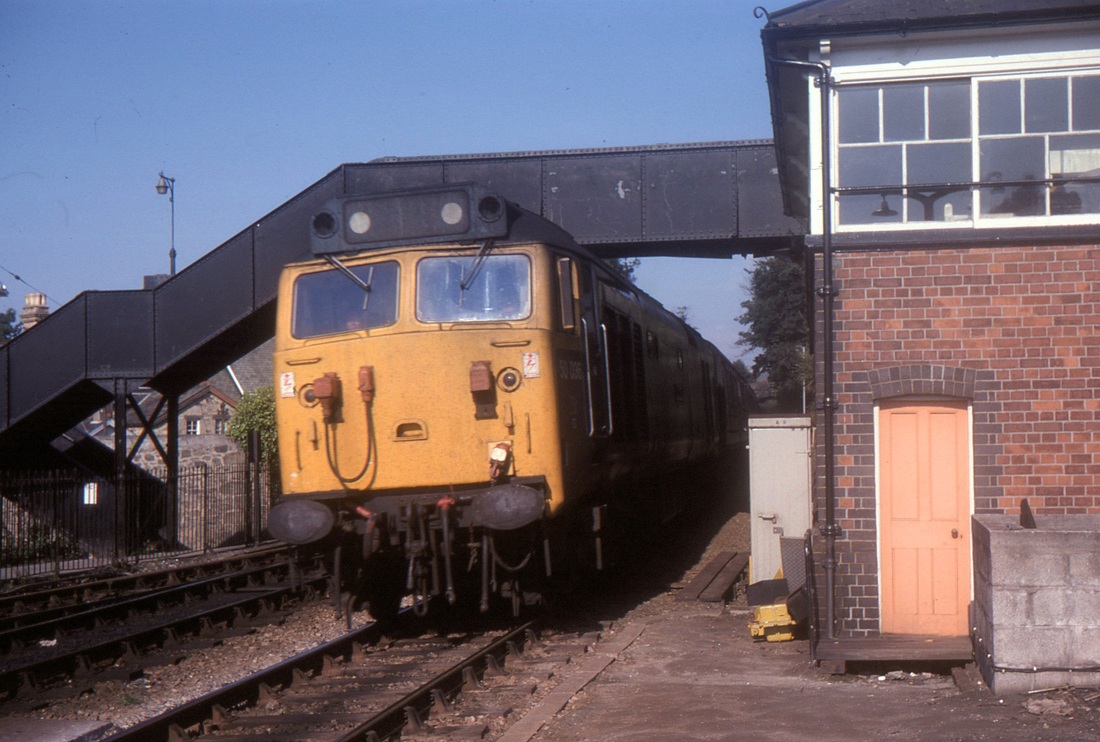
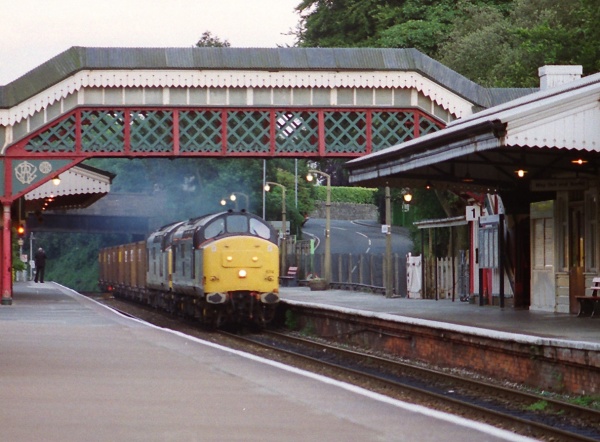
St Austell box January 1969 as D1021 Western Cavalier sets out on a down train. This loco built in July 1963 was withdrawn in August 1976 and scrapped in December 1978. Note how looking in a westerly direction the box peeped out from under the footbridge. The was at one time a vehicular level crossing here. Copyright Andrew Jones
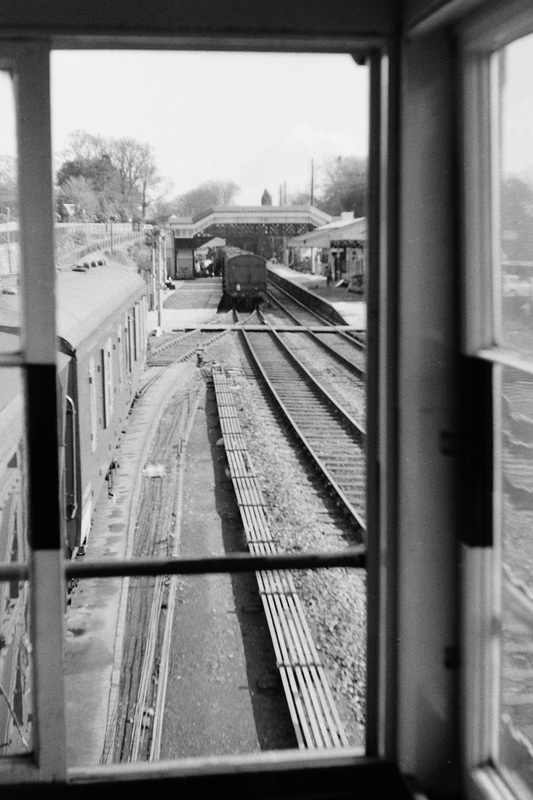
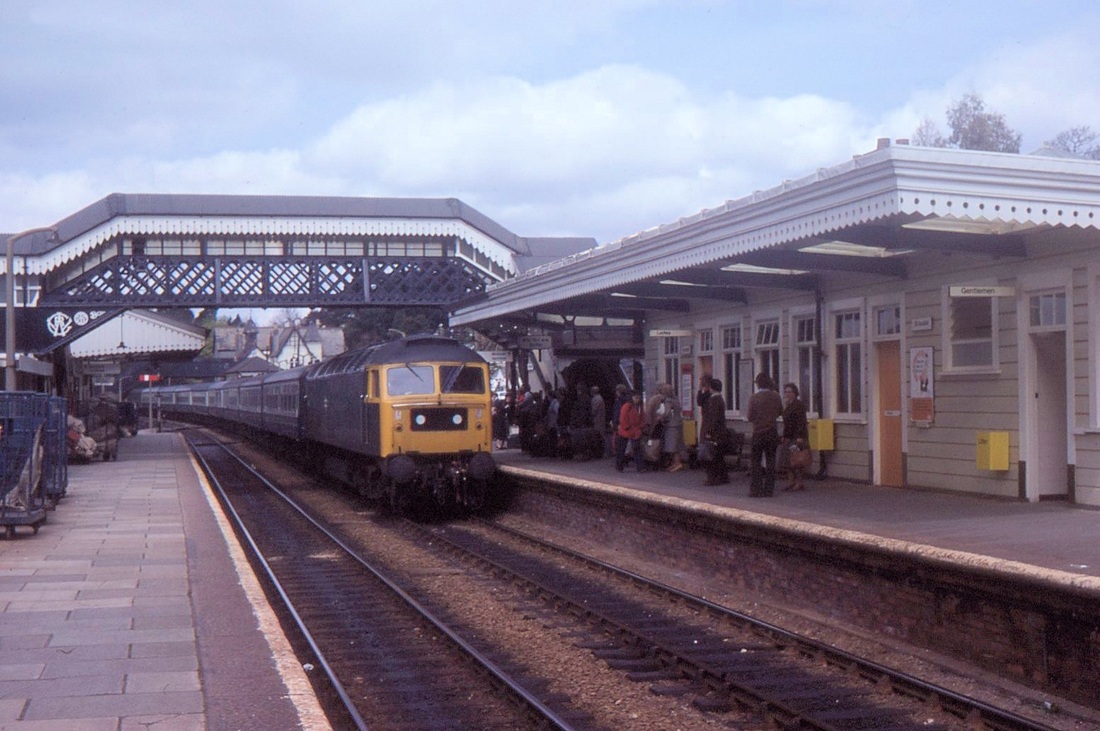
A view looking eastwards towards the station in January 1969. The lamp on the tail of the up train standing in the platform indicates that it is complete. A couple of rail vehicles stand on the siding which was removed w.e.f. 7th March 1971 to permit an up platform extension. At one time there was a loop line around the back of the up platform necessitating a cross over over this siding. This loop was removed in 1931 (Tony Cooke Track Diagrams report). It must be said that the station looks complete with the old footbridge connecting the platforms. The old bridge is still there in 2016 but has been replaced by a modern structure complete with lifts, nice but not quite as nice!! The old bridge which is out of use is condemned but listed. Copyright Andrew Jones
A further note from Roy Hart (Rangoon) for which we are most grateful.
The shots of St Austell box were fascinating: I remember being allowed to work the box back in the sixties. The box had a 43 lever frame dating from 1907. The frame was of the old 'double twist' type, with the levers at 5 inch centres -it was relocked in modern tappet form in 1931 when the layout was extended with a new goods loop and the new goods yard at the Par end. St Austell had an early form of illuminated diagram - not like the modern ones with little red lights to show the position of trains, but with large white lights the size of an old half-crown. As trains moved on to each track circuit, there was a loud 'thump' as the mechanism worked and a new light was illuminated. Thus the signalman didn't have to look up to see where a train was, he could hear it! This splendid old diagram was saved, re-wired and now serves at Bewdley South on the Severn Valley Railway.
The shots of St Austell box were fascinating: I remember being allowed to work the box back in the sixties. The box had a 43 lever frame dating from 1907. The frame was of the old 'double twist' type, with the levers at 5 inch centres -it was relocked in modern tappet form in 1931 when the layout was extended with a new goods loop and the new goods yard at the Par end. St Austell had an early form of illuminated diagram - not like the modern ones with little red lights to show the position of trains, but with large white lights the size of an old half-crown. As trains moved on to each track circuit, there was a loud 'thump' as the mechanism worked and a new light was illuminated. Thus the signalman didn't have to look up to see where a train was, he could hear it! This splendid old diagram was saved, re-wired and now serves at Bewdley South on the Severn Valley Railway.
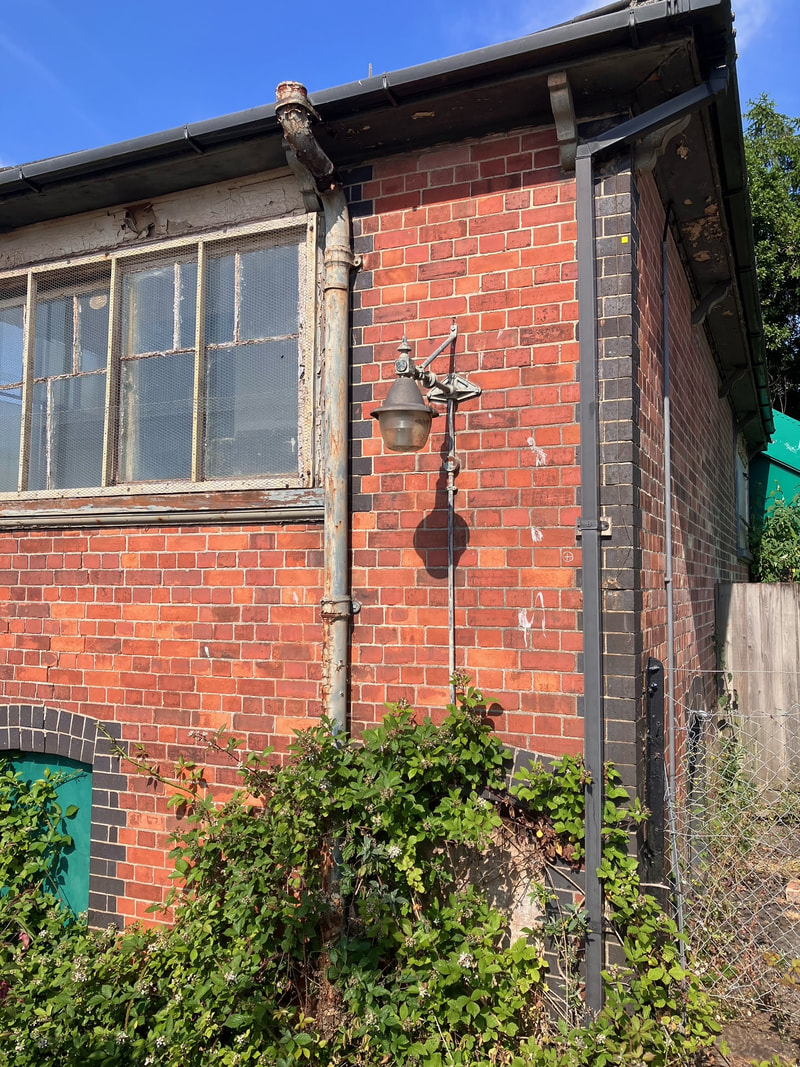
St Austell Signalbox in 2022. David Anthony
A trip via St Austell today(6th April 2022) reveals the old signal box is not fairing well with apparently no maintenance being carry out unlike the recently refurbished footbridge.
I wonder how long it's got...
Cheers
Dave Anthony
I wonder how long it's got...
Cheers
Dave Anthony
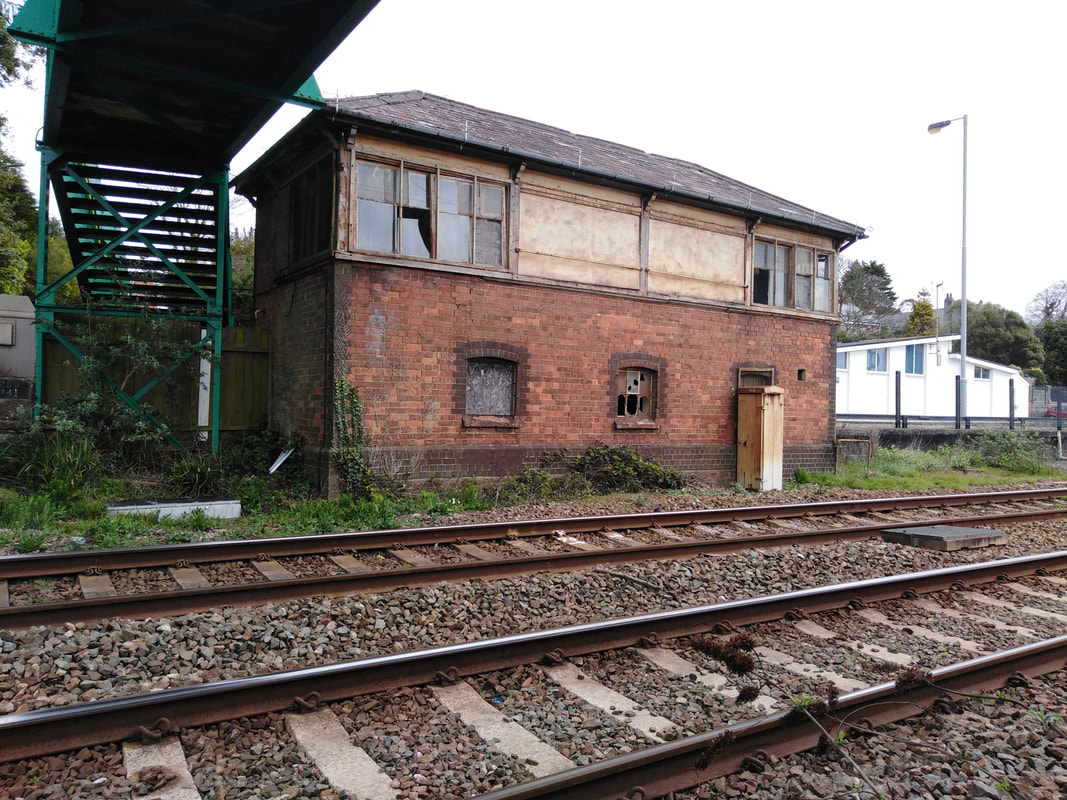
St Austell Signalbox in decline 1 6th April 2022. Copyright David Anthony
St Austell Signalbox in decline 2 6th April 2022. Copyright David Anthony
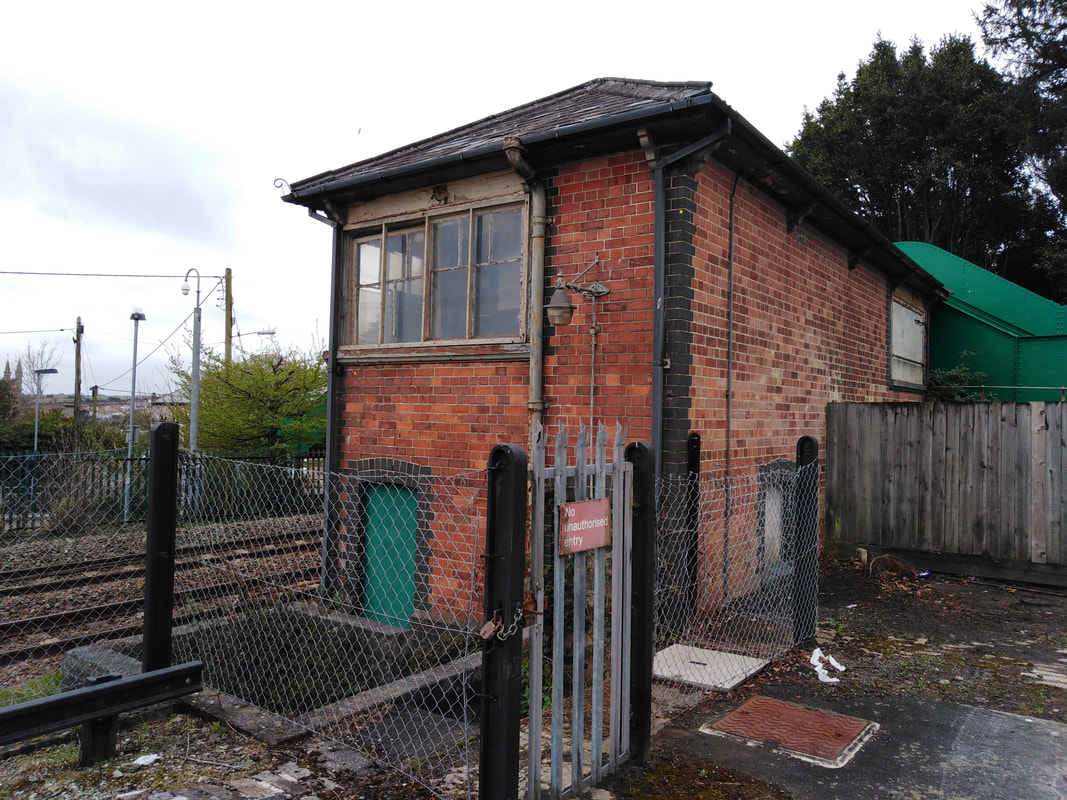
St Austell Signalbox in decline 3 6th April 2022. Copyright David Anthony
St Austell Box - still there in June 2023. Dennis Clarke.
I took a few photos of St Austell signal box today. [15th June 2023) I believe it closed in 1980 but is still doing well 43 years later. I was at Lostwithiel later where 802019, working 2C26 13:42 Plymouth to Penzance, failed with engine issues and was moved into the down loop. All the passengers travelled west on the following HST, Regards, Dennis Pictures copyright Dennis Clarke.
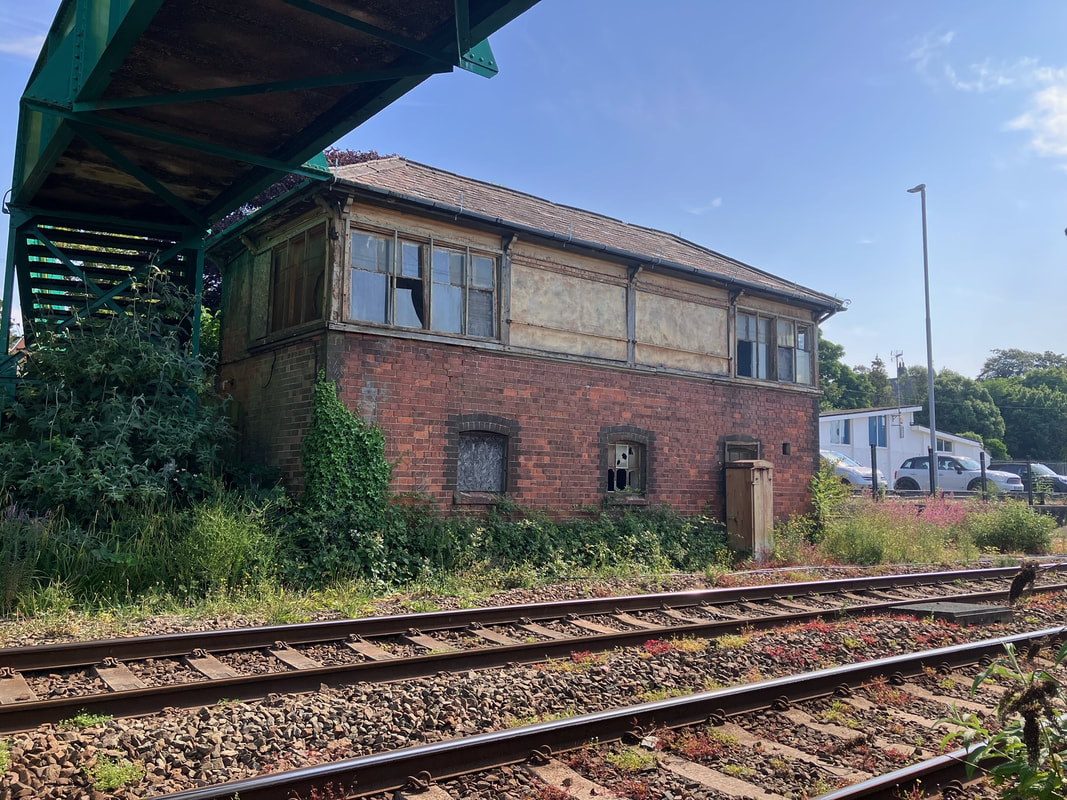
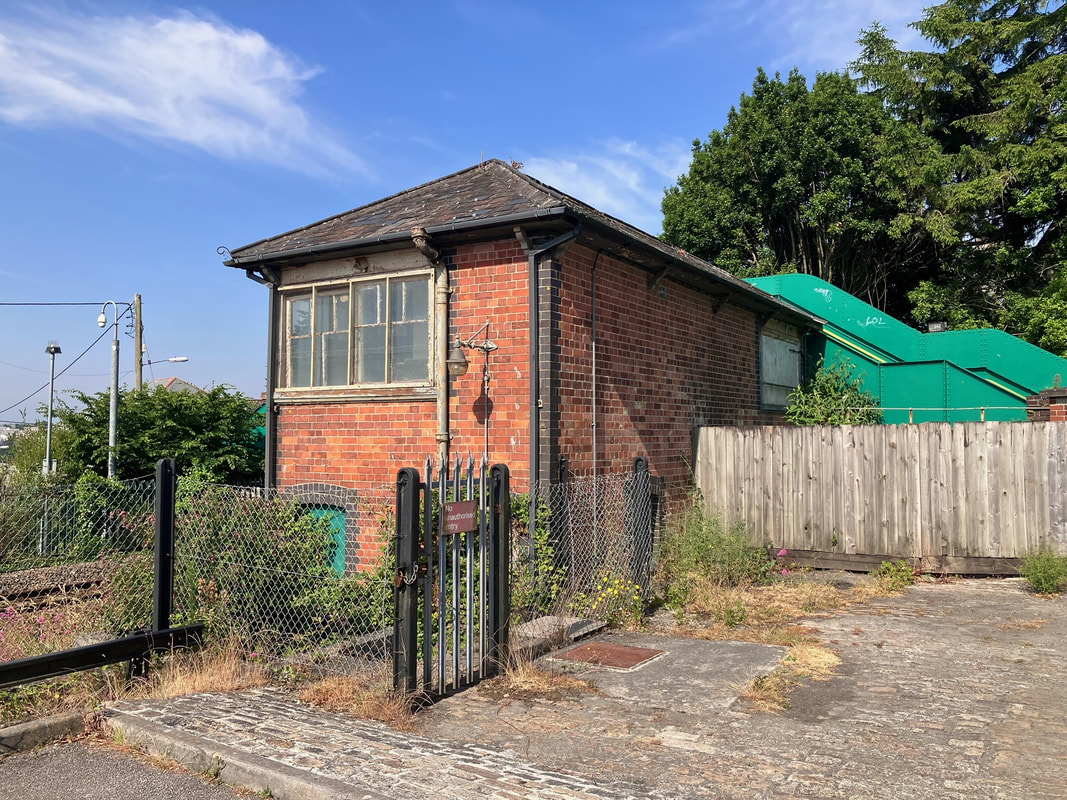
Many thanks to Dennis for making good use of a short pause at St Austell.
Its the 8th May 1979 as a 47, possibly 499, hauls away a down service. Note the black engineers train in the sidings. Also the siding, once one of four running into the station goods yard, The rest were removed 1965, there had been a siding on the up side but this was removed to permit a platform extension in 1971 Copyright Mike Roach
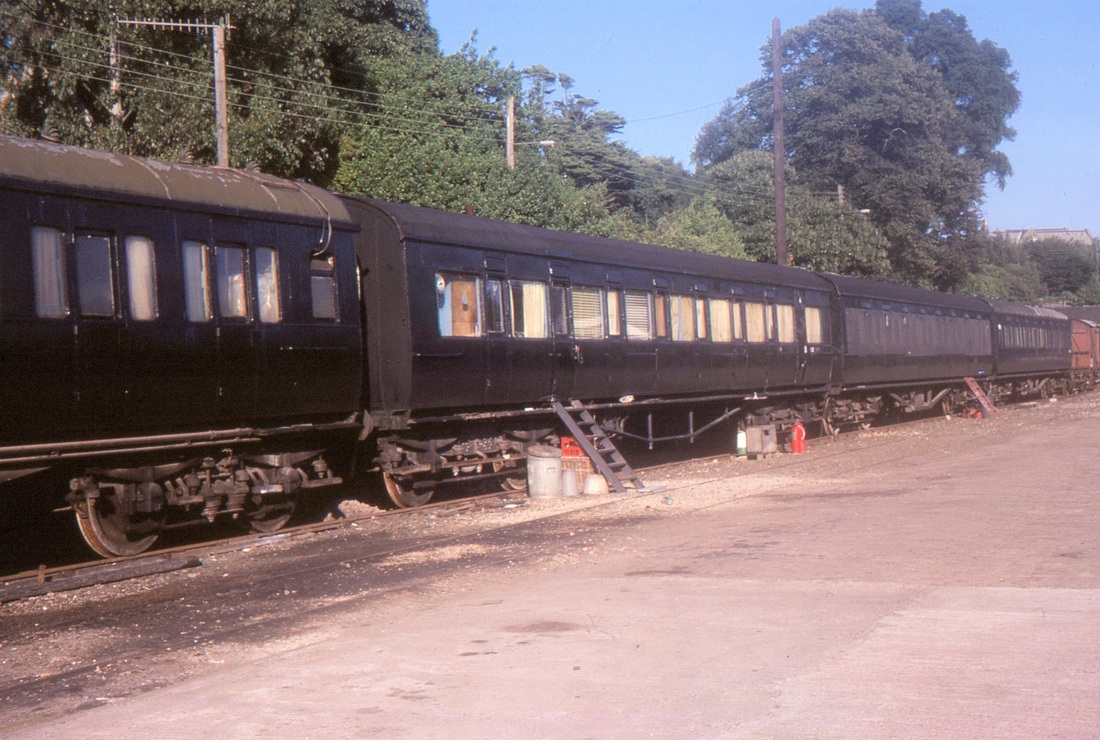
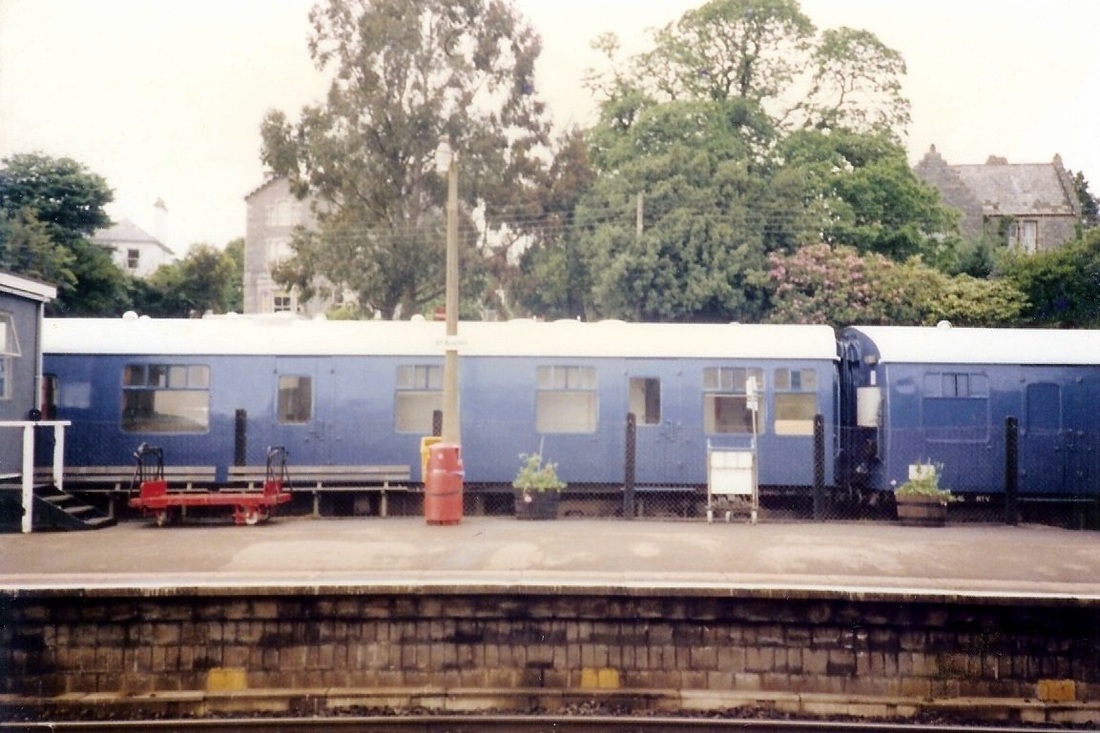
Four former Camping Coaches in use by the Signalling and Telegraph Department at St Austell 27th August 1979 Copyright Mike Roach
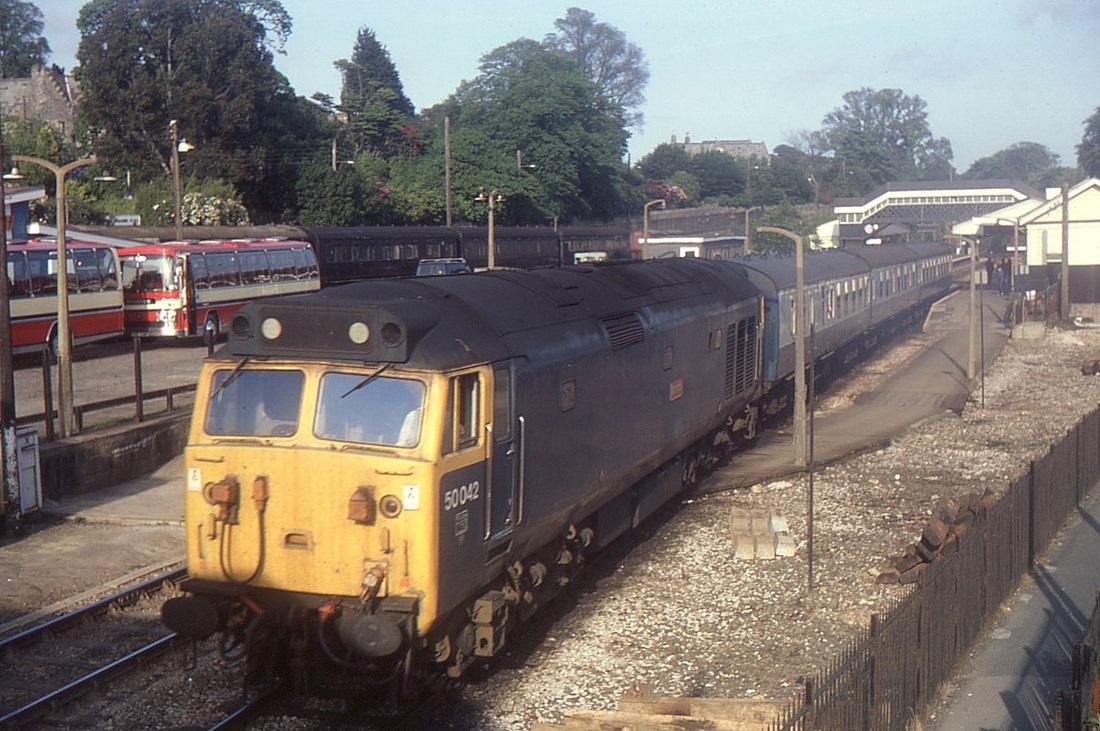
Mike Roach took this shot at St Austell on the 16th June 1981. 50042 Triumph now preserved at Bodmin sets off with a down train past the recently lifted down siding. In the background the engineers coaches remain. One wonders what the road coaches were there for? Copyright
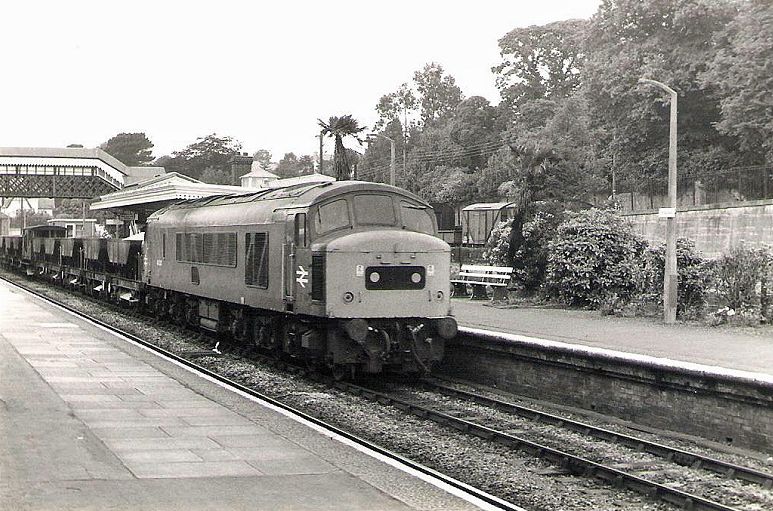
St Austell with a Peak on ballast. Note wagons in the background on the long removed sidings on the up side. 12th July 1980 Copyright Andrew Thompson
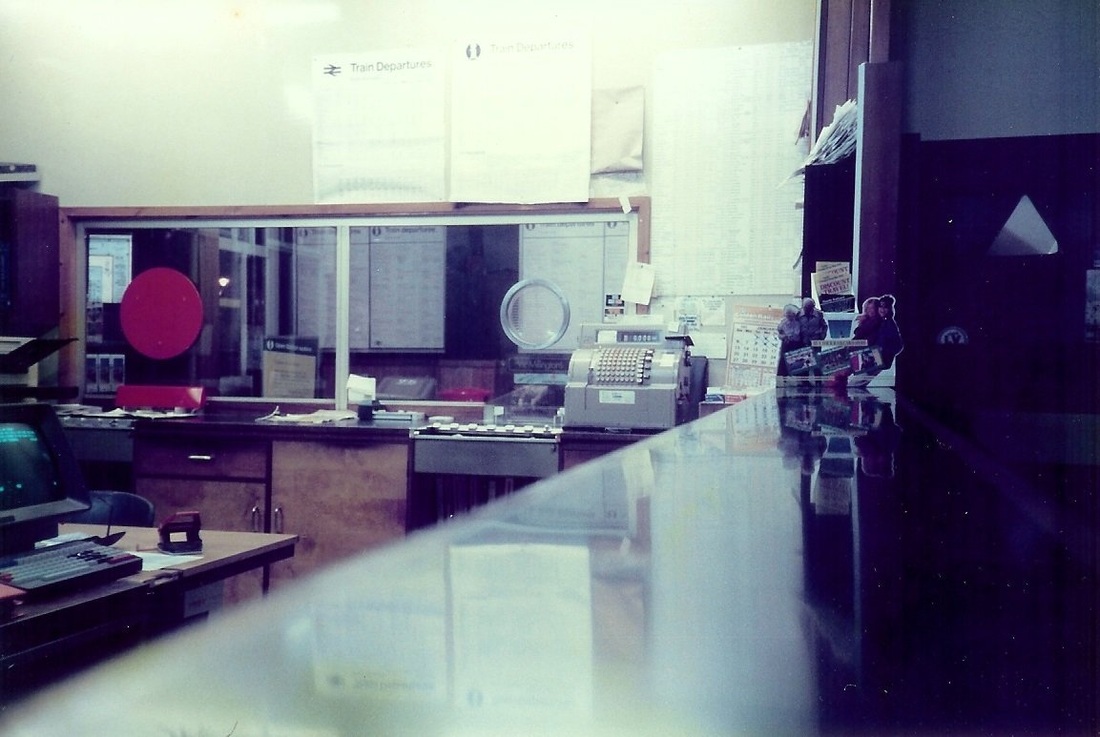
The other side of the counter where the business was generated. St Austell Station Travel Centre 1985 with NCR Ticket Machine Copyright Steve Elliott N. B. Steve was a member of the staff here at the time.
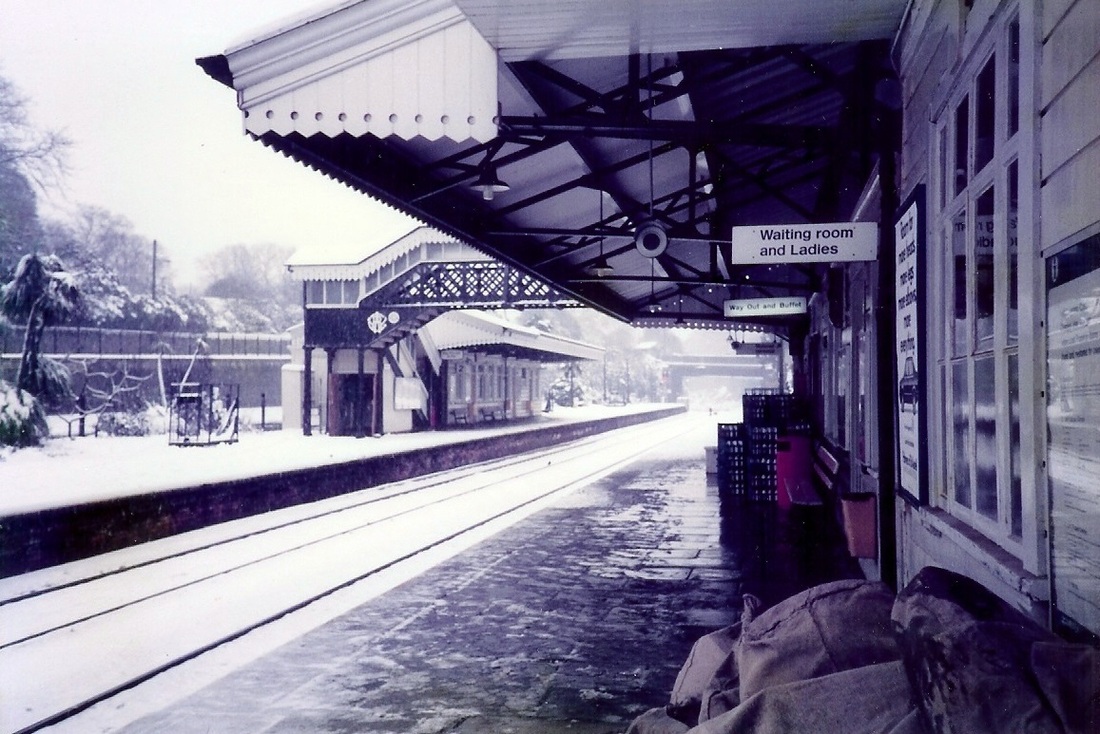
St Austell Station in the snow with milk crates on the platform c1984 Copyright Steve Elliott
An up service calls - don't those platform buildings looks good! 8th May 1979 Copyright Mike Roach
St Austell up side after a re-paint in 1987/8. Copyright Dave Antony
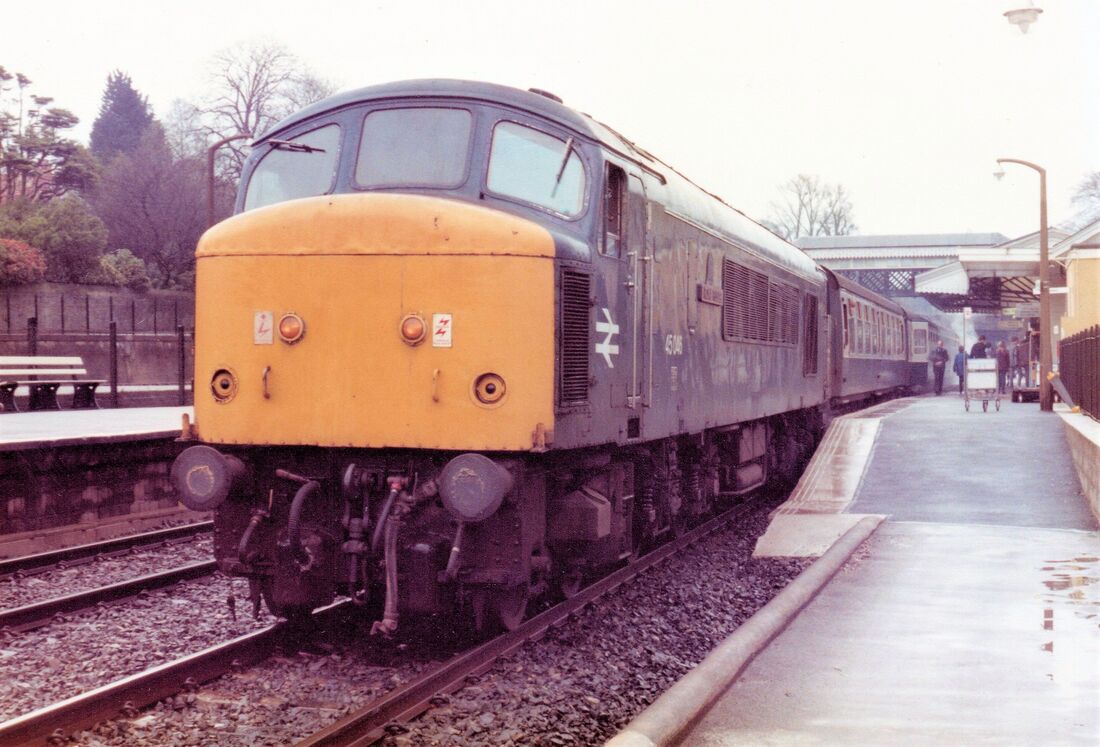
45046 stands at St Austell with the 10.20 Plymouth - Penzance on the 2nd May 1983 which was a bank holiday. No parcel vans on the train so the train was a much shorter load five. Note the steam from the loco's boiler gushing out at the rear. 45/0s were very infrequent on this train as it was a solid electric train heated (ETH) 45/1 turn.The loco off this train was booked to go back on the 13.45 Penzance - Bristol TM but for some reason 50011 was the returning loco this day which was wet and cool and I suspect the steam heating boiler was too much trouble for the secondman.. Copyright Clive Smith.
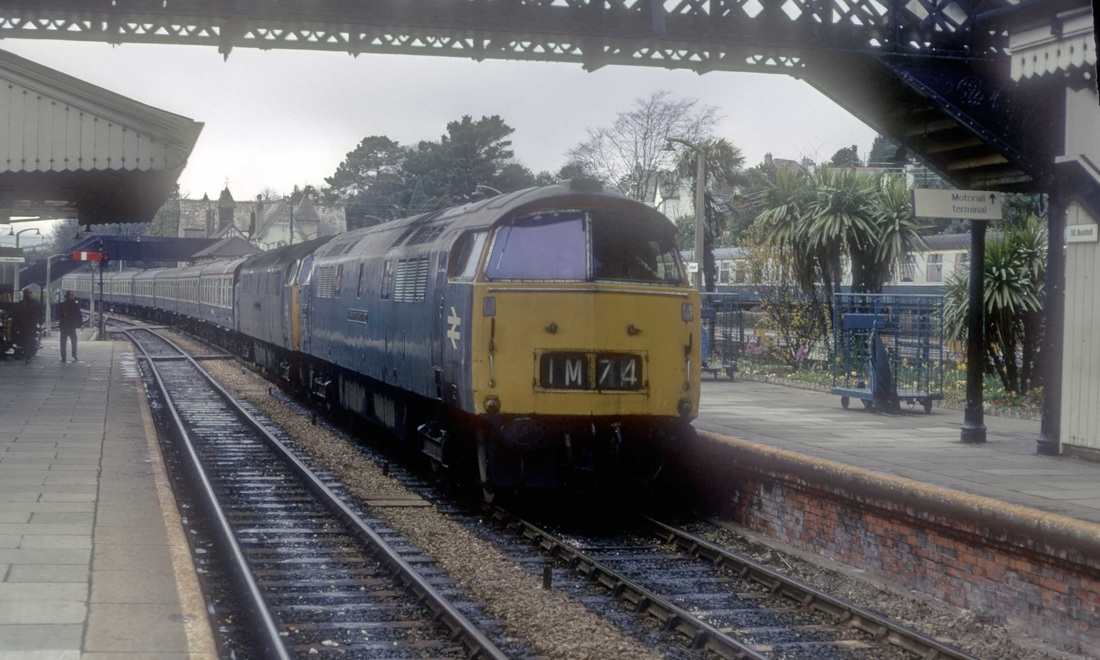

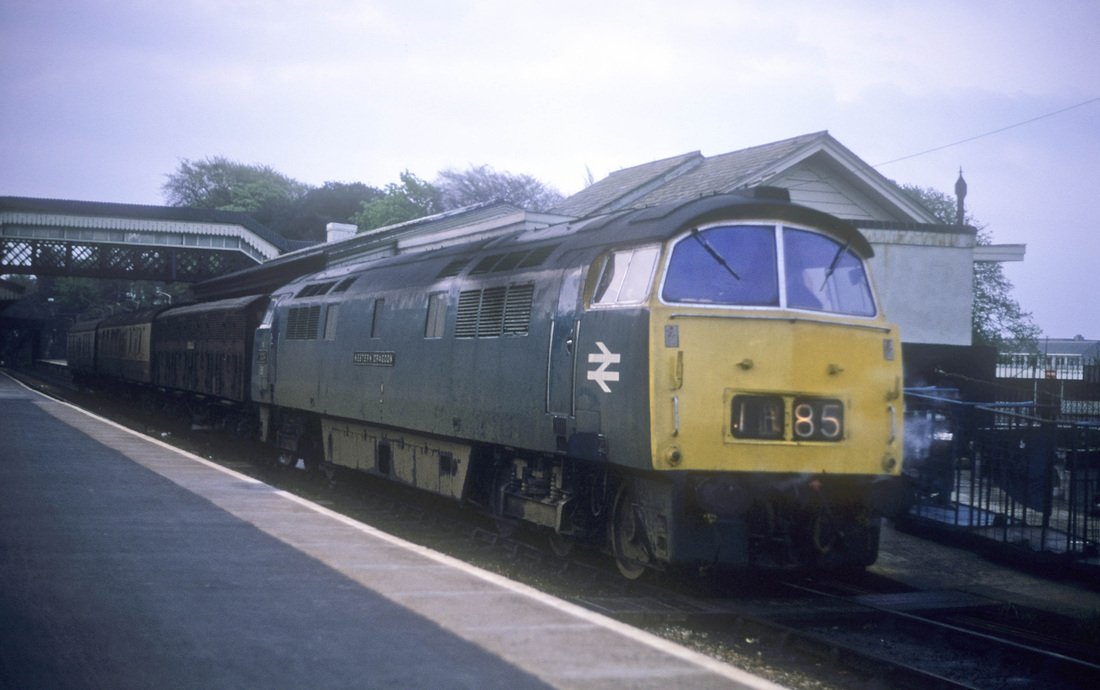
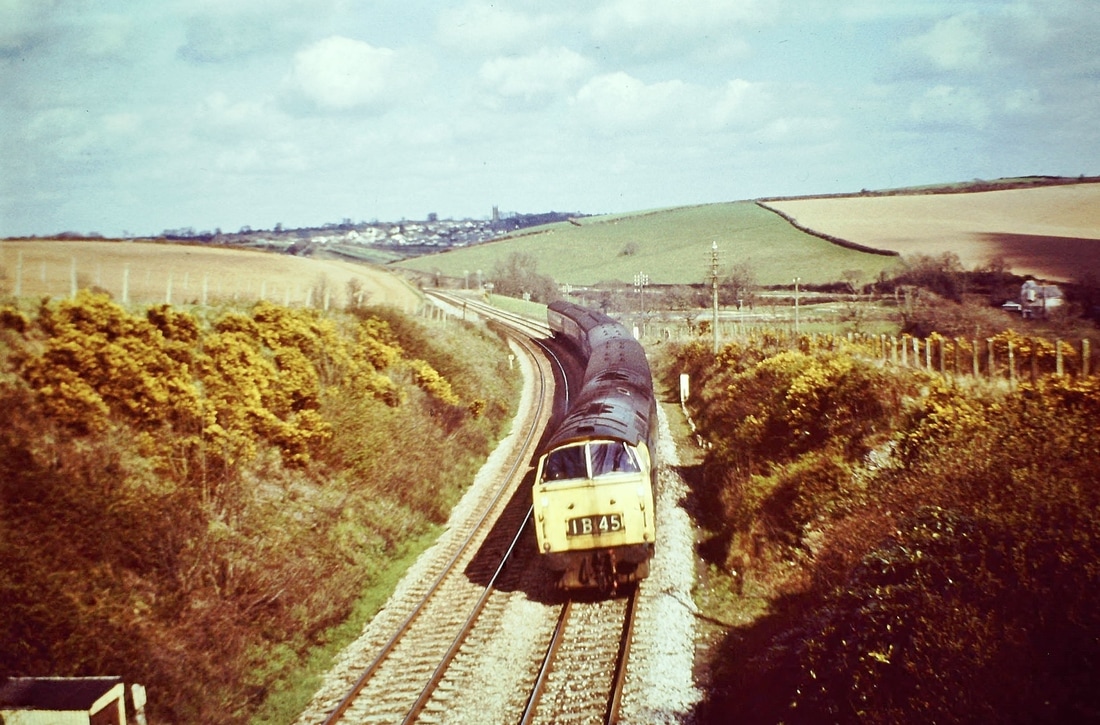
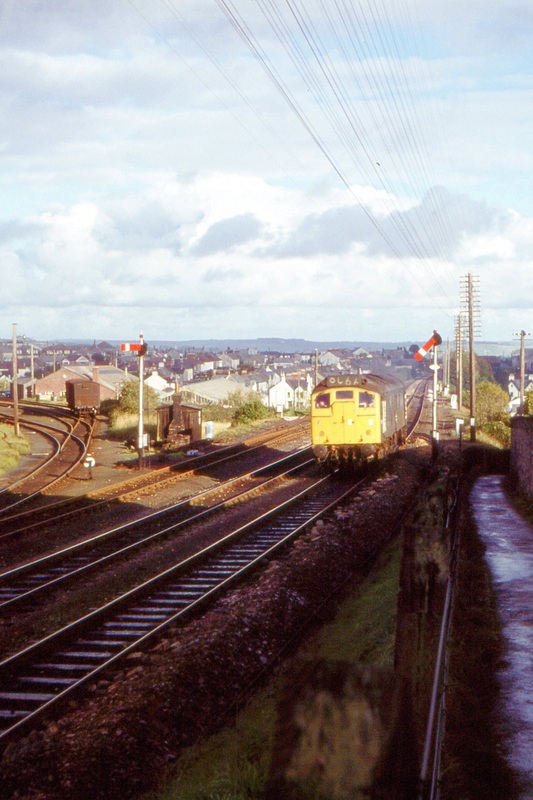
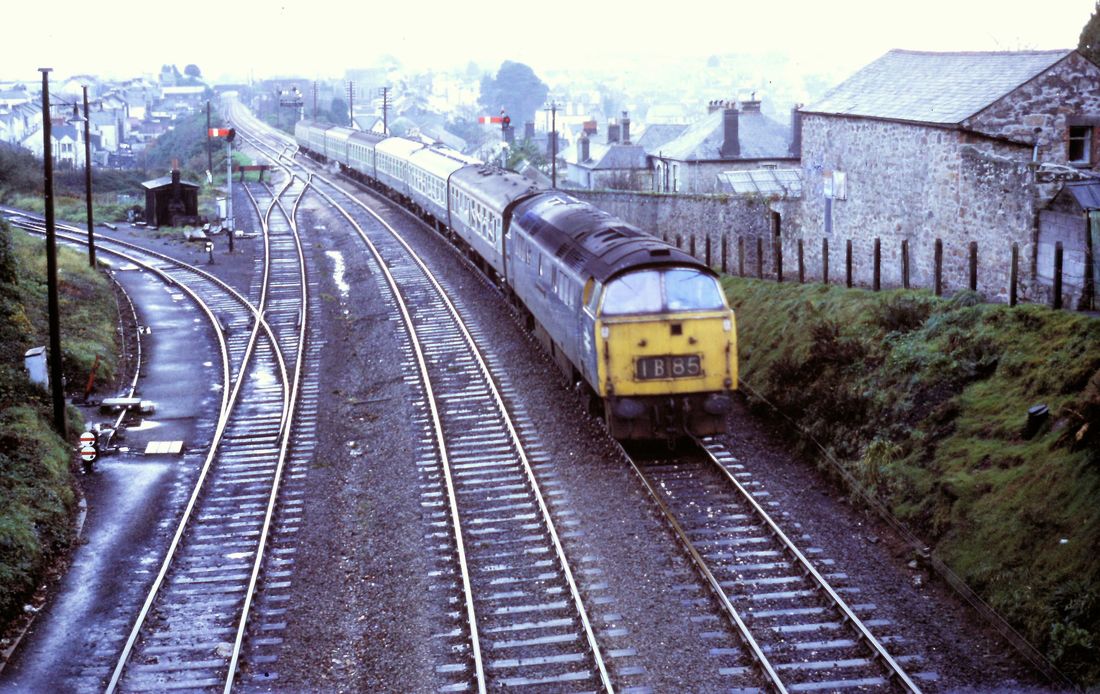
* Roger Geach writes re Picture 10 :- I have found a picture taken at 0610 in the morning which shows the down newspapers and vans at St Austell. This ran as the 1B85 00.35 Paddington to Penzance news and parcels . This service was booked to depart Plymouth at 0504 and called at the main Cornish stations dropping off the newspapers and parcels timed to arrive at Penzance at 0732. 1034 Western Dragoon was in charge on the morning of the 6th May 74 with only three vans then. Booked St Austell 0612 to 0617, these times from the 1973 WTT .
Many newsagents would await this train and take the morning papers from the station back to their stores. If the train was late then the papers were late.
This train followed the down morning TPO the 1B75 2225 Paddington to Penzance postal due off Plymouth at 0415 hours due Penzance 0633. The down line was very busy in them days as along with the freight there were also two overnight sleepers which followed the newspapers through the county.
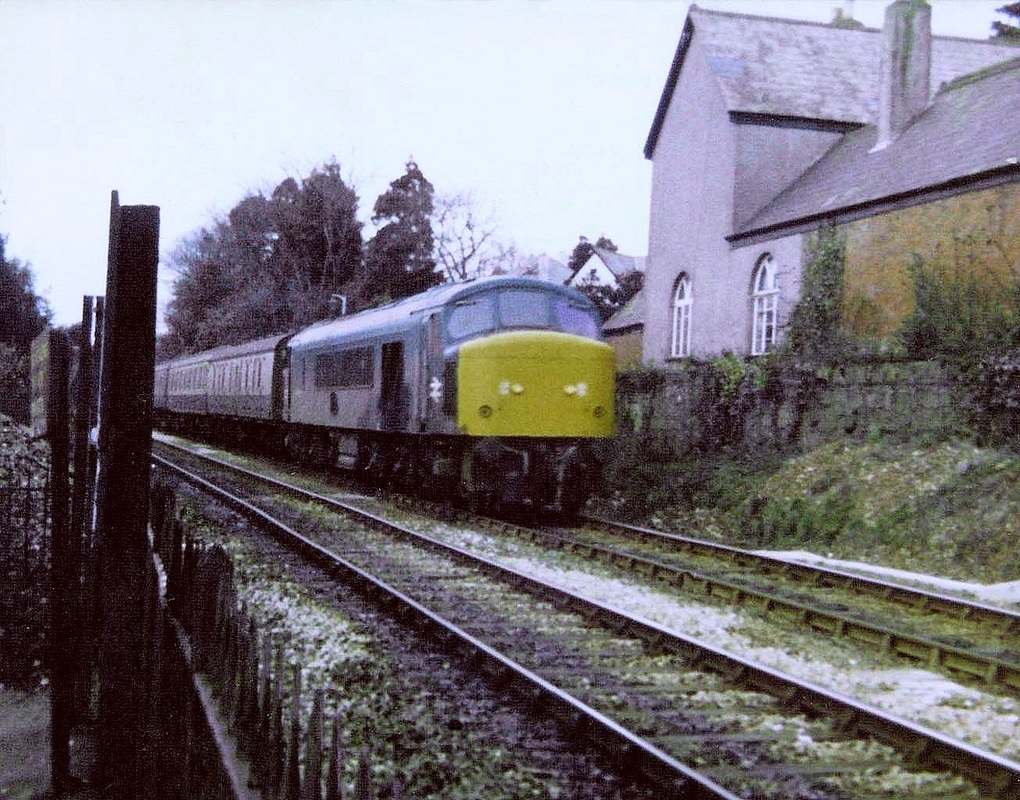
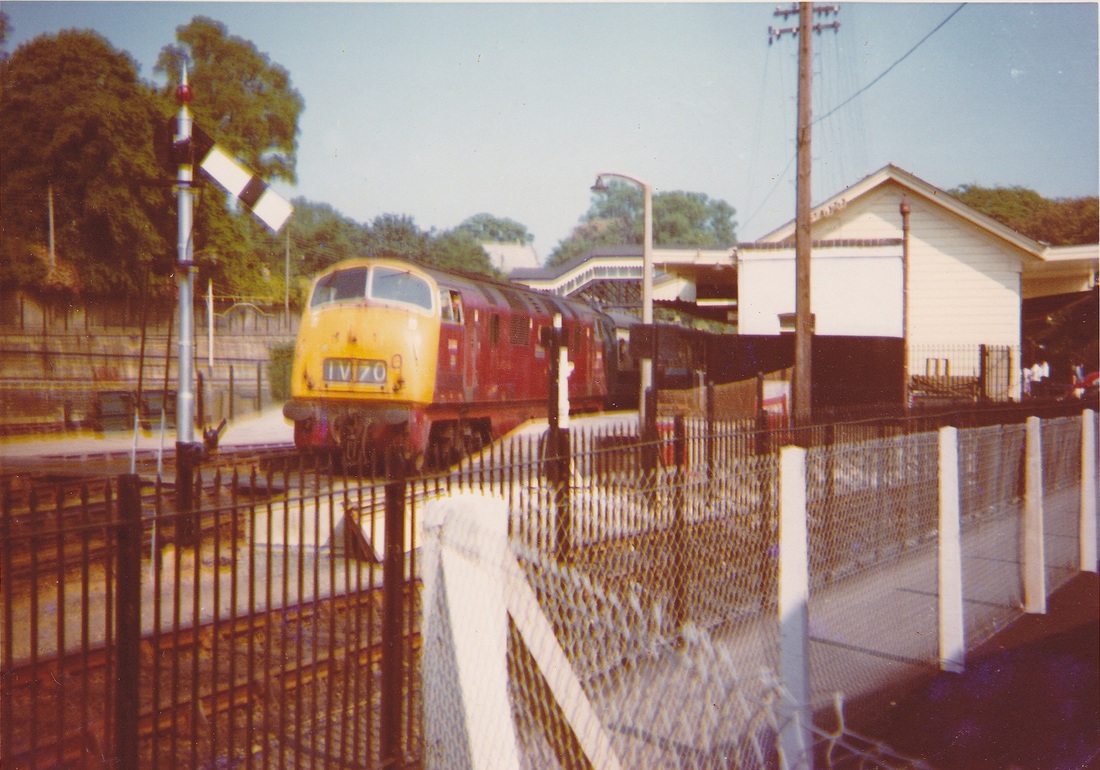
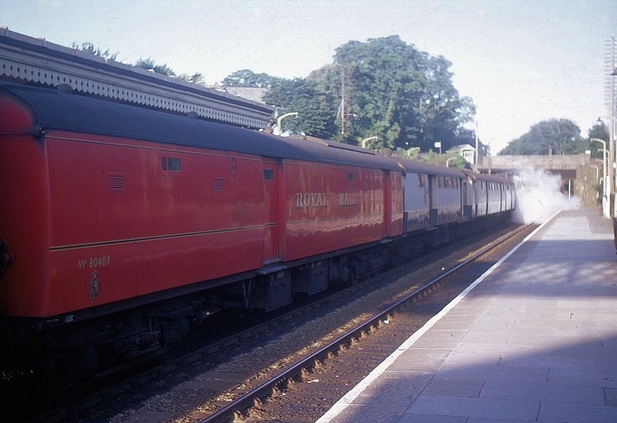 St Austell The up mail in June 1969. Sorry folks, its not steam powered but D1044 Western Duchess appears to have its train heating boiler turned on full whack - it must have been a very cool June day. Copyright Mike Roach
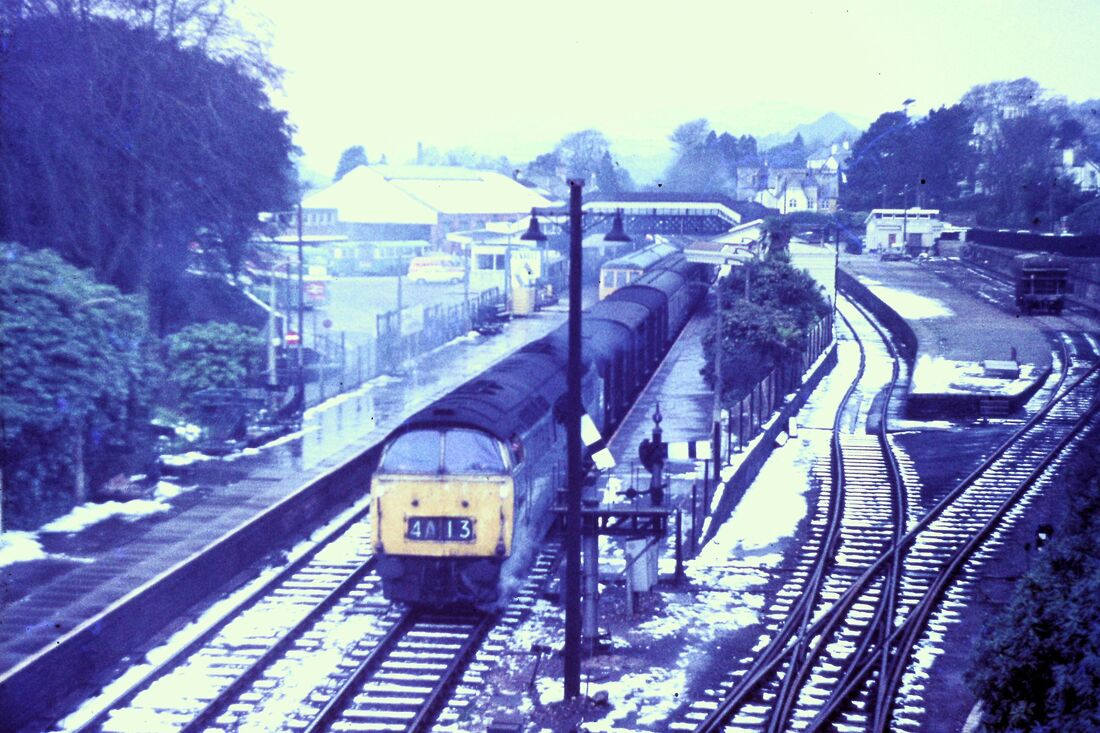
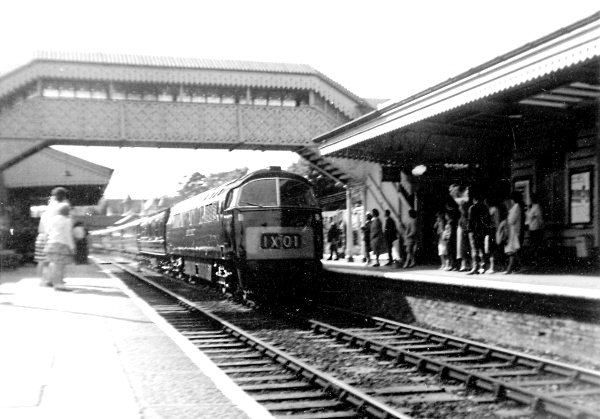
St Austell Station with snow on the ground. A wonderful picture from the past, note the glorious 'Western', the semaphore signals, the sidings still in place, and the old footbridge - enjoy. It's the 1st March 1973. Copyright Roger Winnen
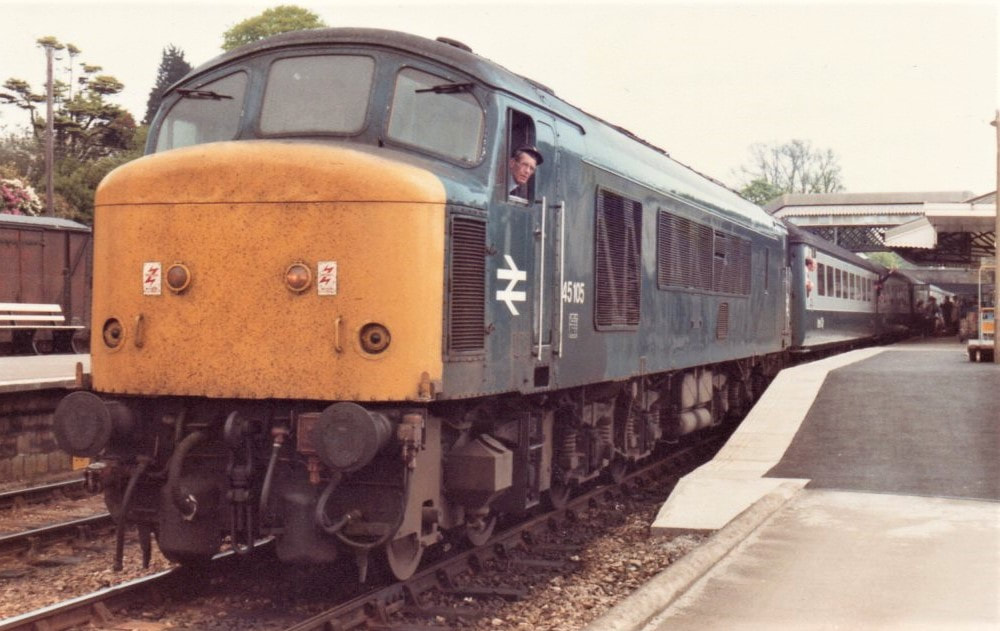
Bit of a mad dash for me as I was on board the train. The driver with his BR hat at a jaunty angle is looking at the photographer off the end of the platform . 45105 awaits departure from St Austell on Saturday 15th May 1982 with the final loco hauled Cornishman 1V71 the 06.51 from Bradford Exchange consisting of ten carriages. The following day would see the gradual introduction of HSTs on the NE/SW route. Copyright Clive Smith.
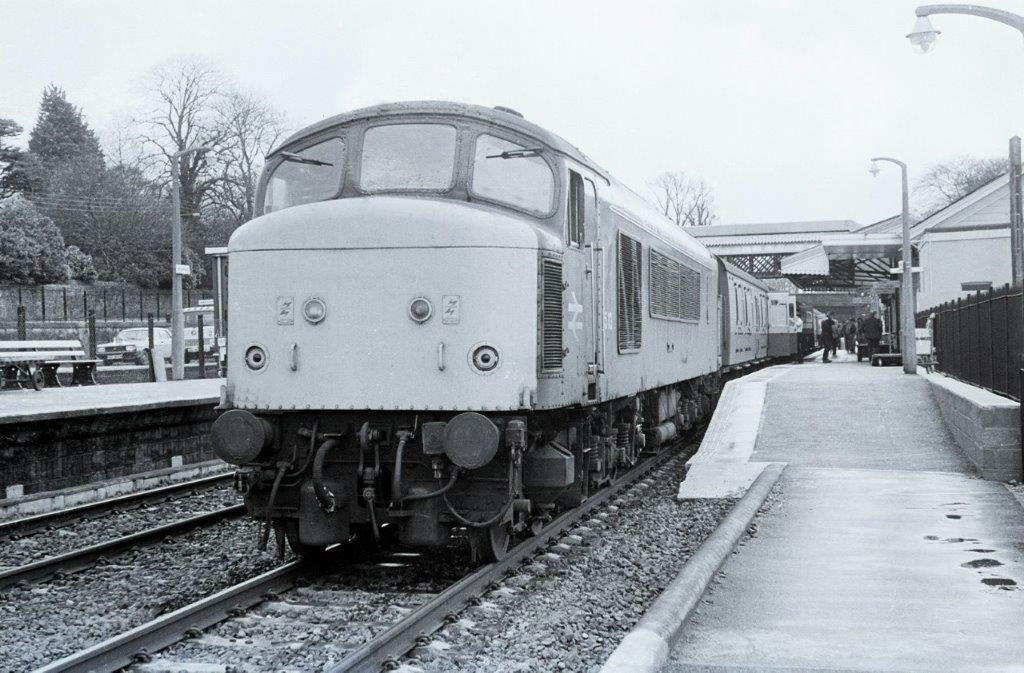
45113 waits at St Austell on the 10.20 Plymouth to Penzance on the 26 February 1983, Copyright Paul Barlow.
St Austell 50035 Ark Royal 07.50 BTM to Penzance 3rd March 1984 Copyright Clive Smith
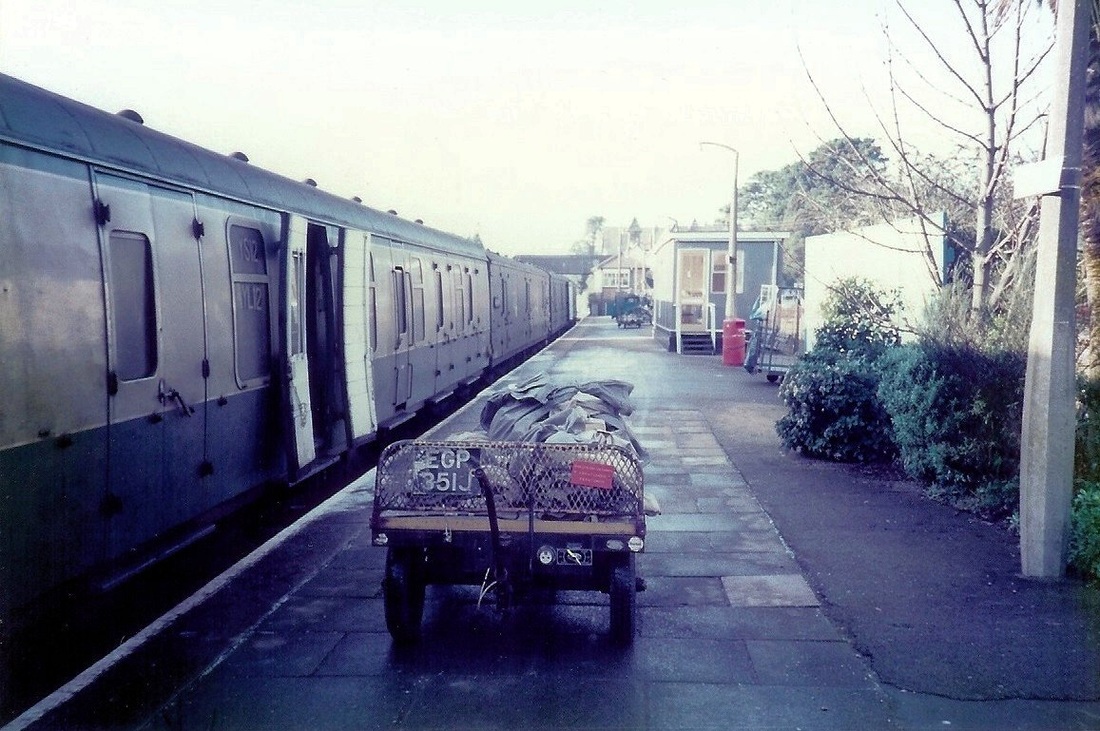
The Up Perishables at St Austell 1984 Copyright Steve Elliott Note the battery powered platform trolley.
A most interesting picture taken at St Austell during engineering works.50046 Ajax, 50025 Invincible & 47484 04Oct86 Copyright Julian Stephens Note it is interesting to observe that in August 2014 the points serving these two sidings still exist albeit serving two very short stubs.
A view from the down platform of an Exhibition train parked behind the up platform at St Austell 1984 Copyright Steve Elliott
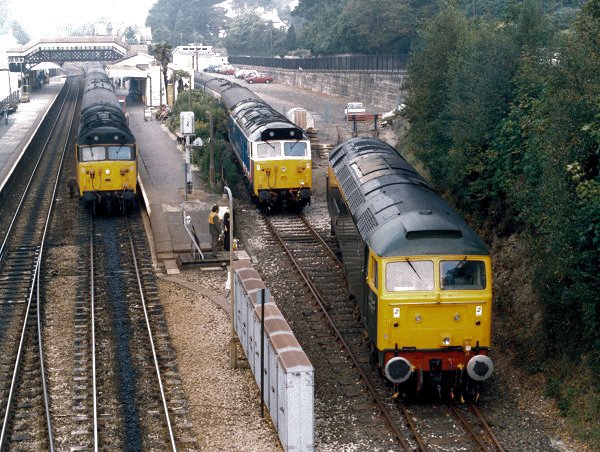
A real Gem of a picture to us locals. No longer will you be able to see a '47' at the head of a motorail at St Austell. Also many thanks to John who was rail staff at the time and able to get in position for this classic shot. Many thanks to John Cornelius. Copyright.
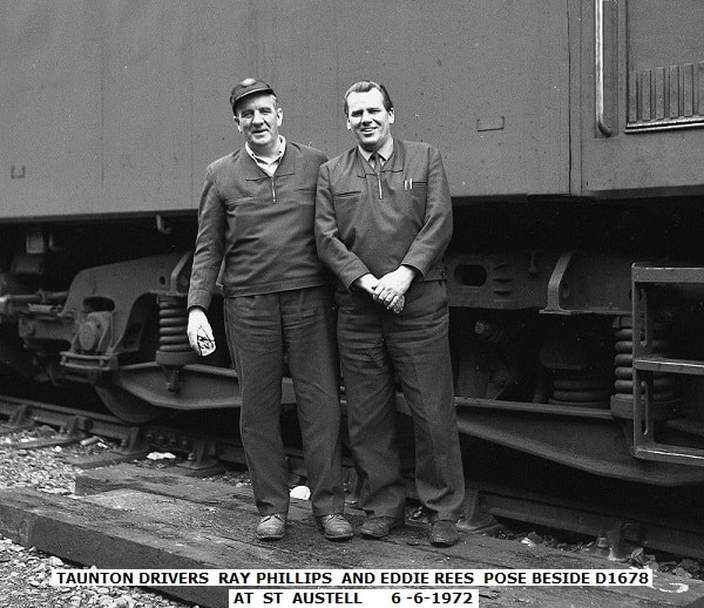
Sadly Ray died a while ago. Eddie died
in the spring of 2017 at the age of 94. Copyright John Cornelius
50038 'Formidable' arriving at St Austell at 1700 with Penzance - Worcester Shrub Hill 'picked up Motorail flats 'at St Austell' 5th August 1978 Copyright Steve Widdowson
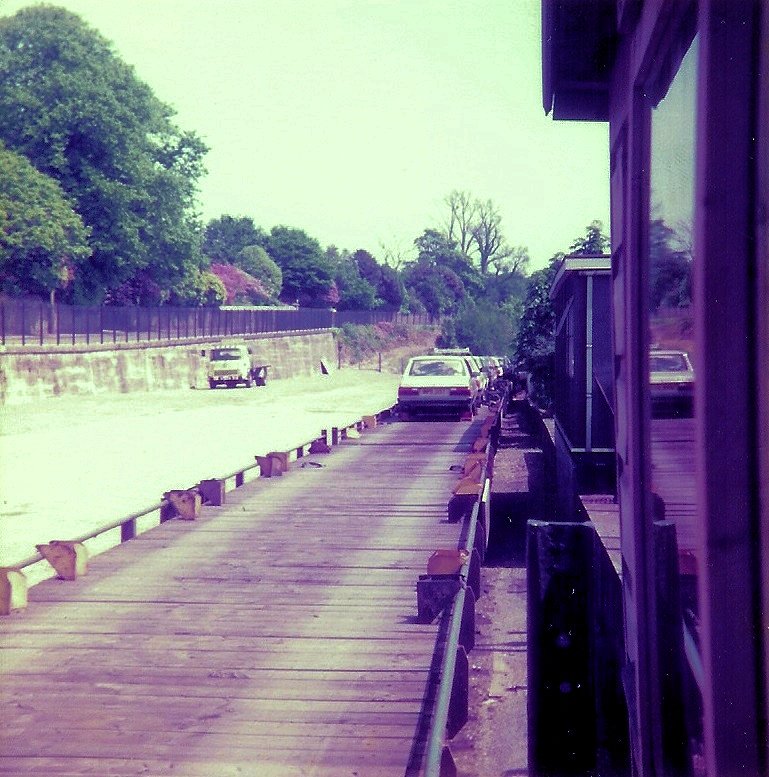
Remember these? A motorail train being loaded behind the up platform at St Austell station in 1983 Copyright Steve Elliott
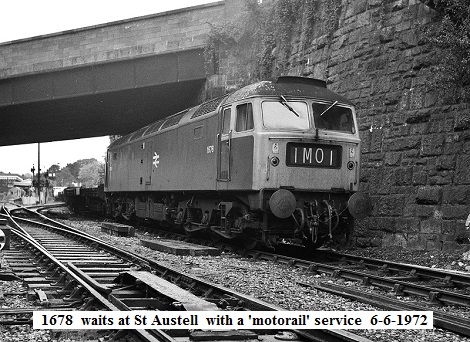
1678 became 47 534 and was eventually scrapped in June 1995. Copyright John Cornelius.
St.Austell as 50015 Valiant passes through on the 19th August 1991 Copyright Julian Stephens
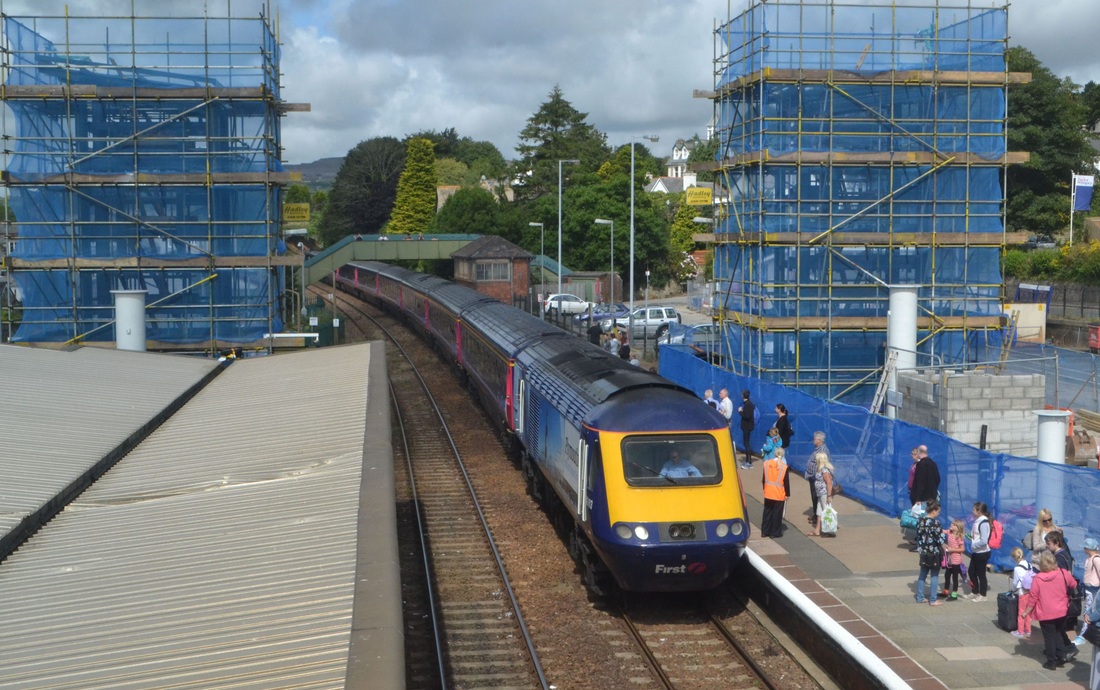
140802a Changing scenes and views at St Austell, the new footbridge takes shape - a photograph from the old footbridge. The 09.54 Pz-Paddington arrives St Austell behind 43163 advertising Plymouth. Copyright Roger Winnen

Looking down the bank towards Par. Little has changed here since the 1970's except of course the loss of the semaphore signals which add character to the picture. Copyright Julian Hanwell.
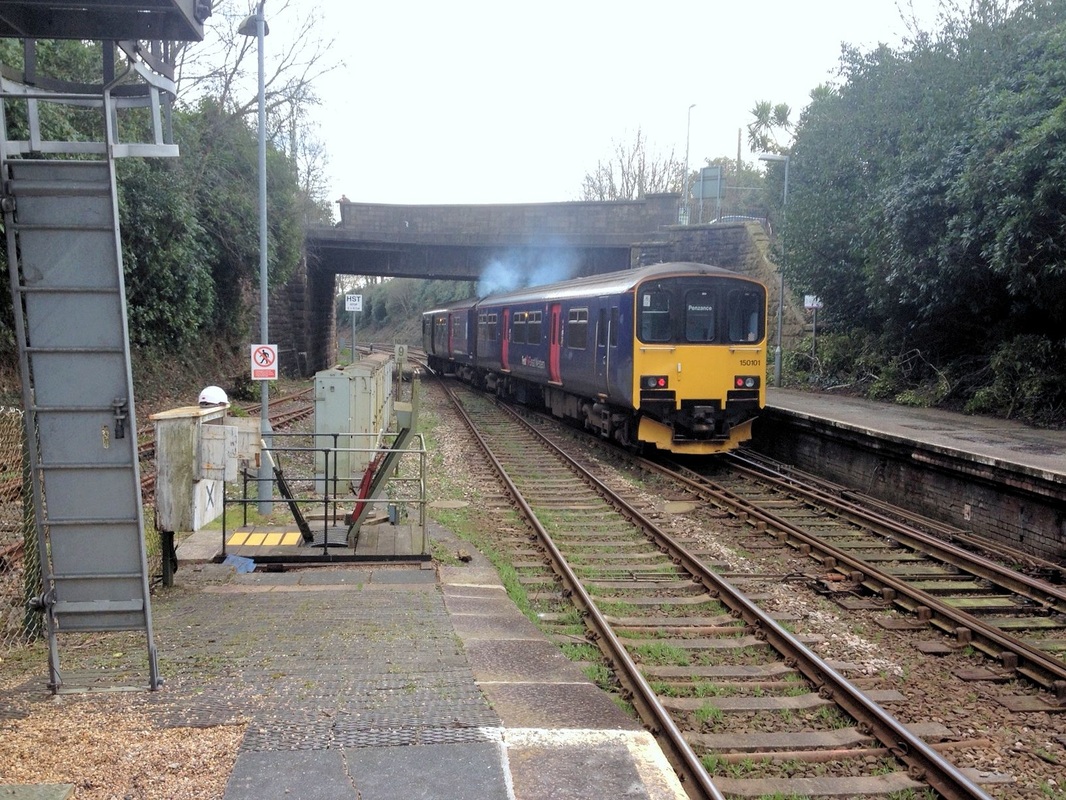
On the 24th February 2016 Class 150 150101 on a down service was declared a failure on arrival at St Austell. The train used the crossover to return to Plymouth for servicing. Note the door lights are still on. Copyright Craig Munday
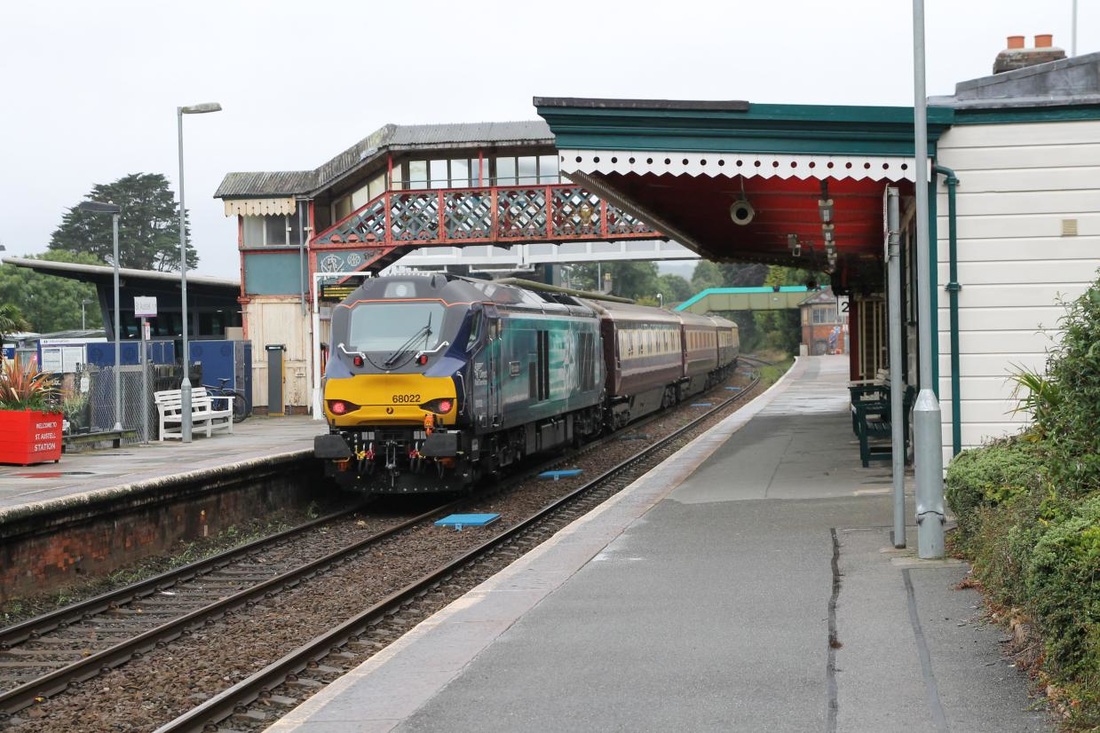
The 'Northern Belle' passes though St Austell 3rd September 2016. An interesting study with the new train passing under the old redundant footbridge, the new footbridge being just visible beyond and beyond that the footbridge that replaced a former level crossing. Note also the refurbished station building on the right and in the distance the disused signalnox completes the picture. 3rd September 2016 Copyright Craig Munday
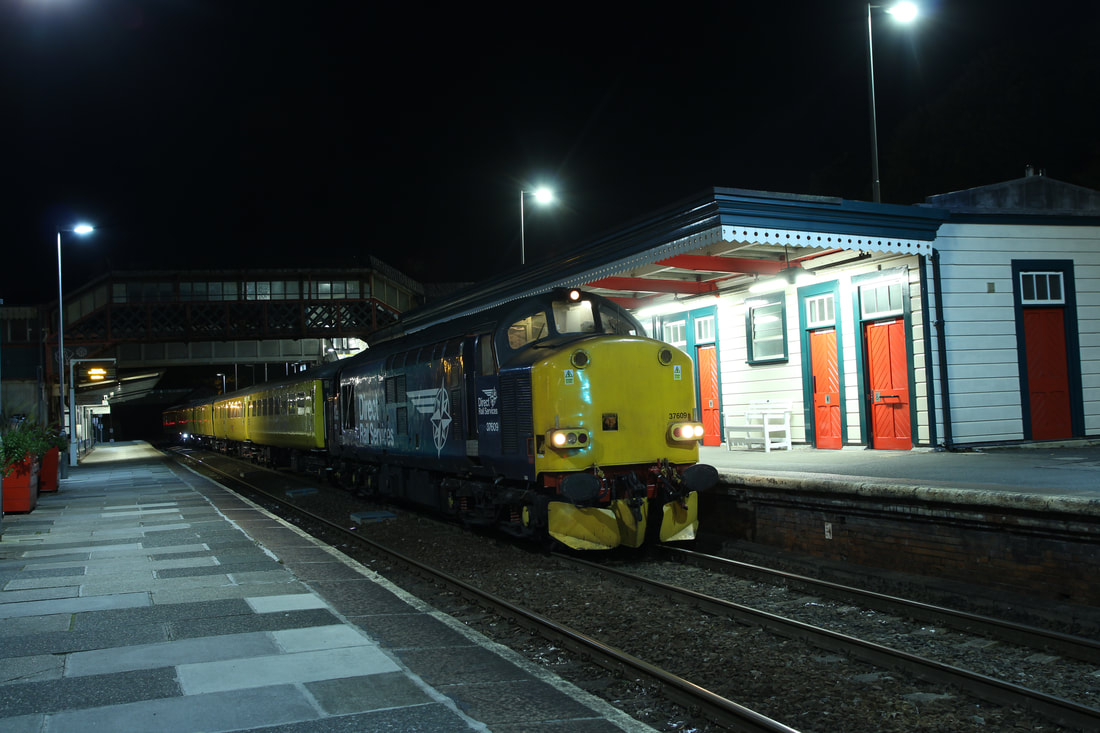
37609 with Network Rail Test Train 5th October 2017 Copyright Craig Munday
St Austell 43147 arrives with 1A93 1400 Penzance to London Paddington. - 1st March 2018. Copyright Jamie Dyke
1Q18 37099 leads the test train with 37254 bring up the rear at St Austell. 20th November 2021 Copyright Craig Munday. Apart from the test train this view is particularly interesting as the points leading to the former motorail terminal are clearly in view are scheduled to be removed in March 2021.
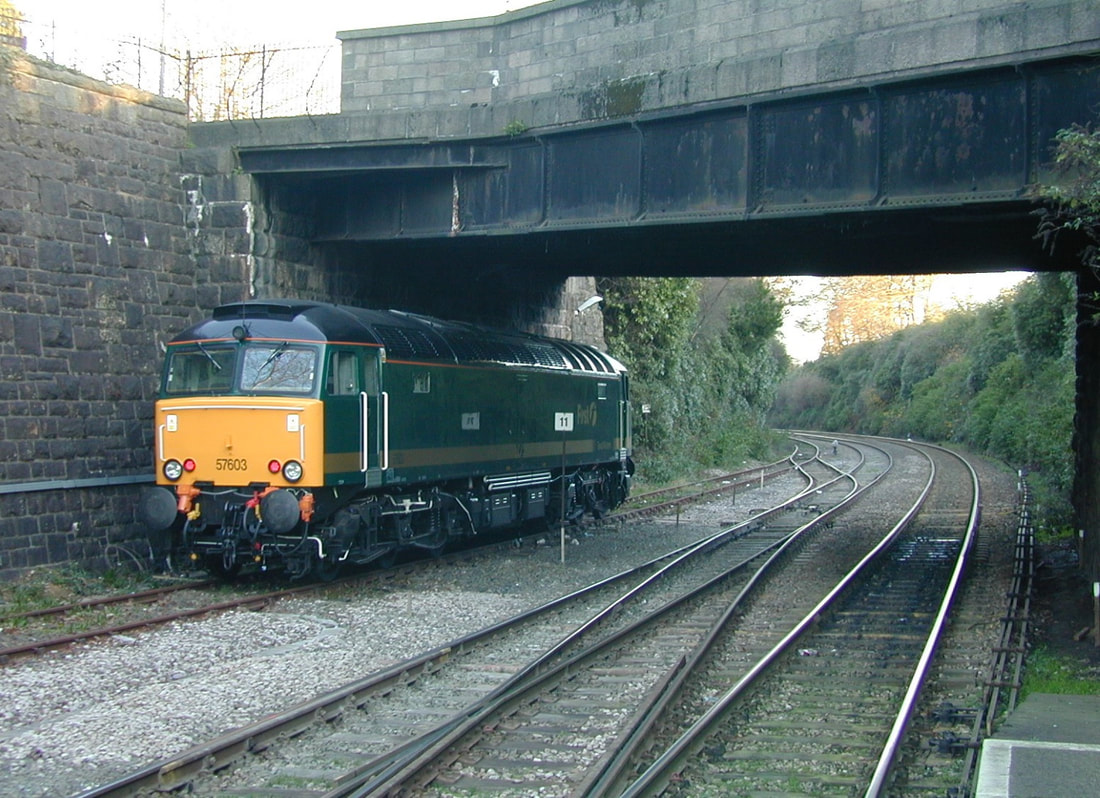
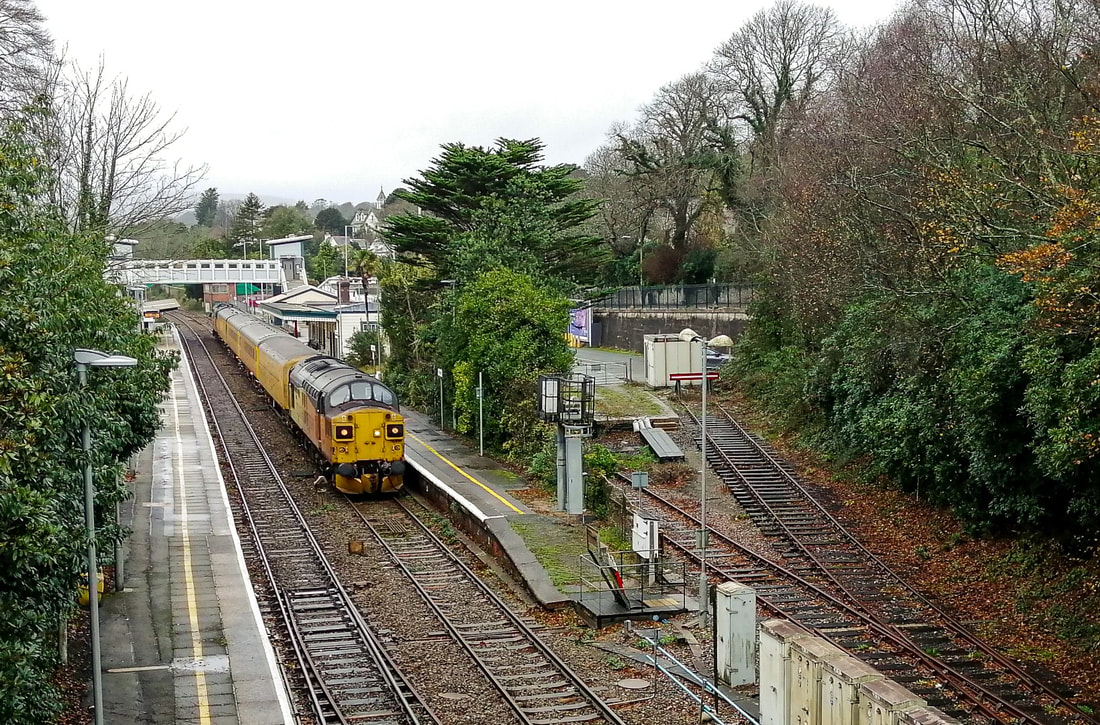
Failed 57603 off the down sleeper parked on rare track at St Austell. 16th December 2003. Copyright Julian Stephens.
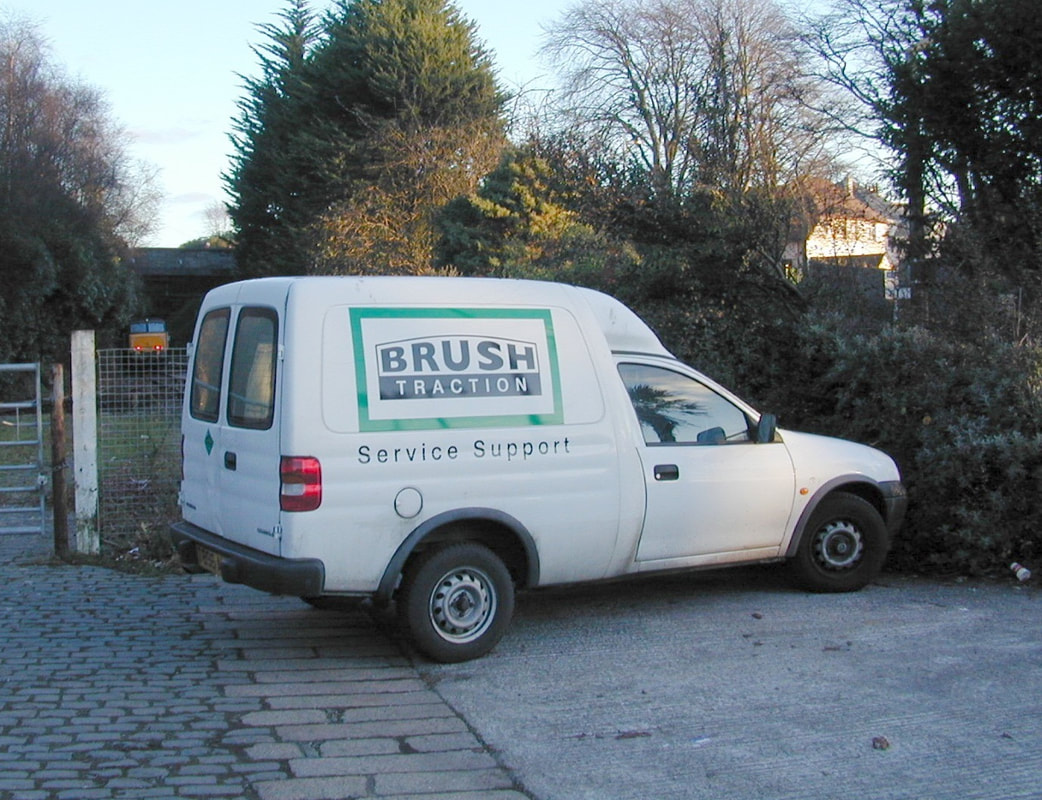
As 57603 was on hire from Brush at the time here is the rescue service. 16th December 2003. Copyright Julian Stephens.

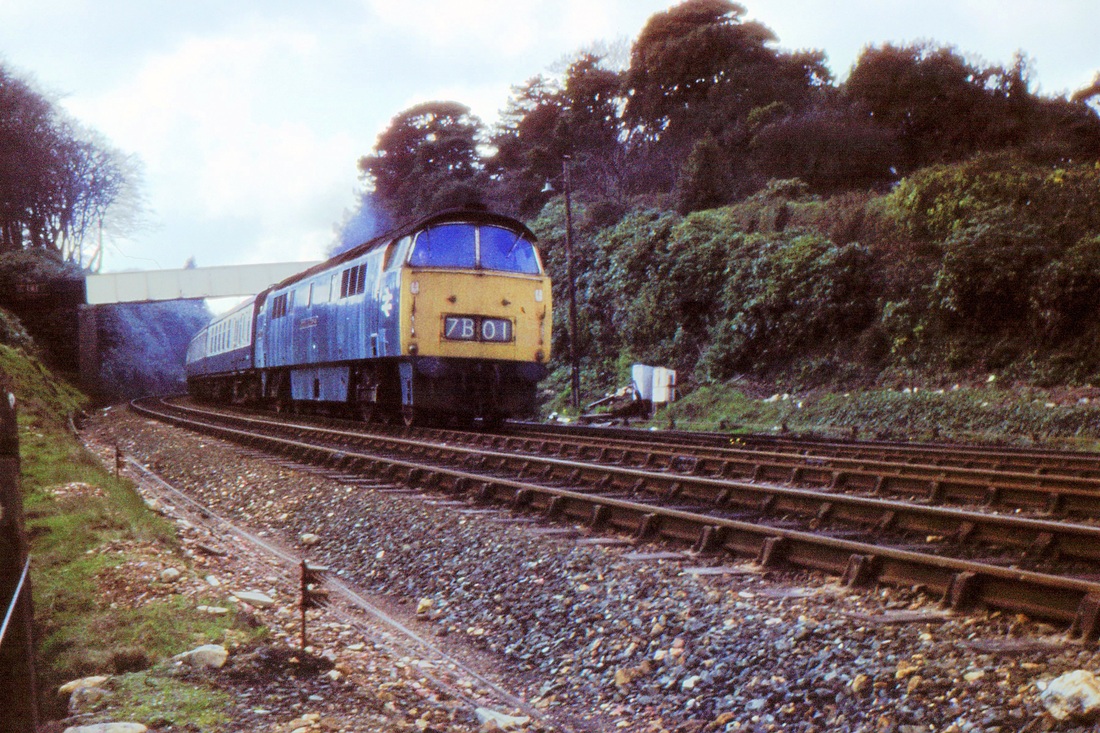
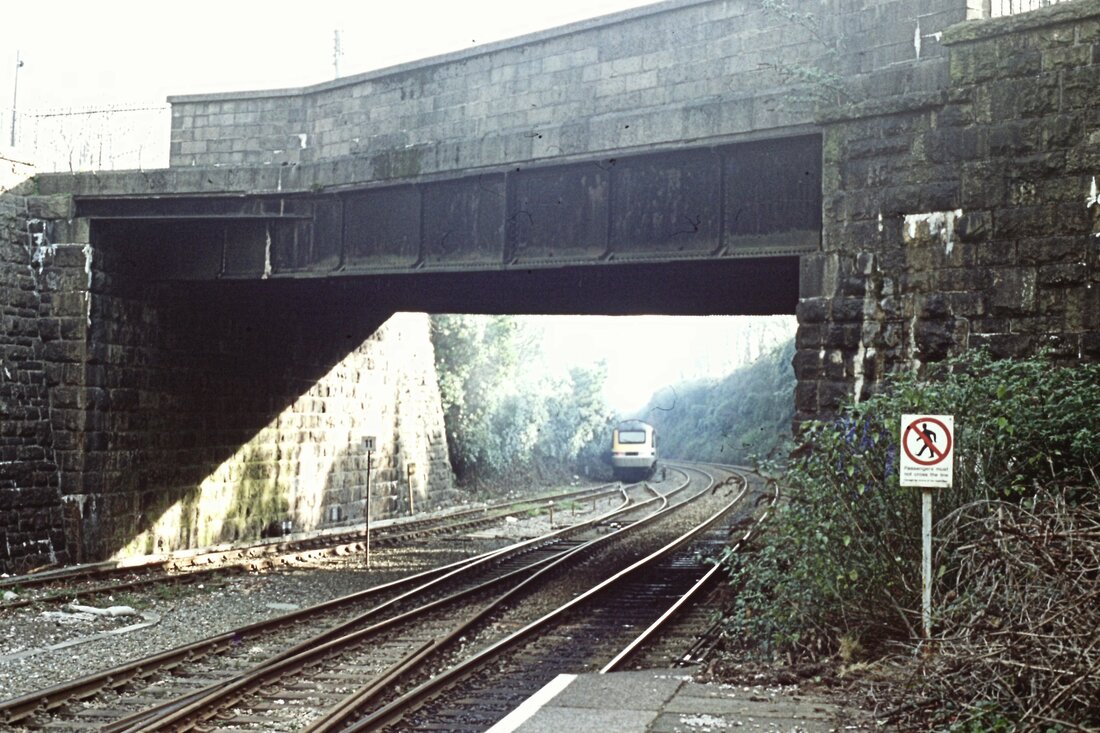
57603 broken down at St Austell. hides under the bridge. 16th December 2003. Copyright Julian Stephens.
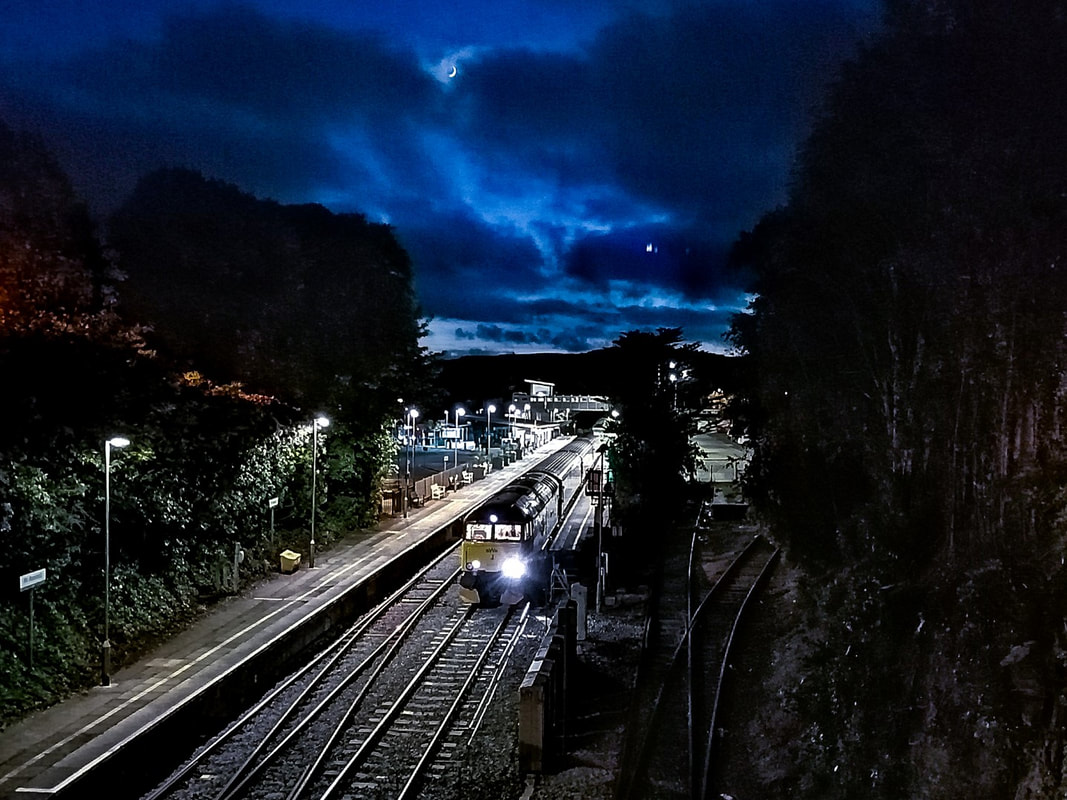
A remarkable shot by Craig. 57603 on the up sleeper the 1A50 pauses at St Austell beneath a bold sky and a waxing moon.. 14th June 2021. Copyright Craig Mumday
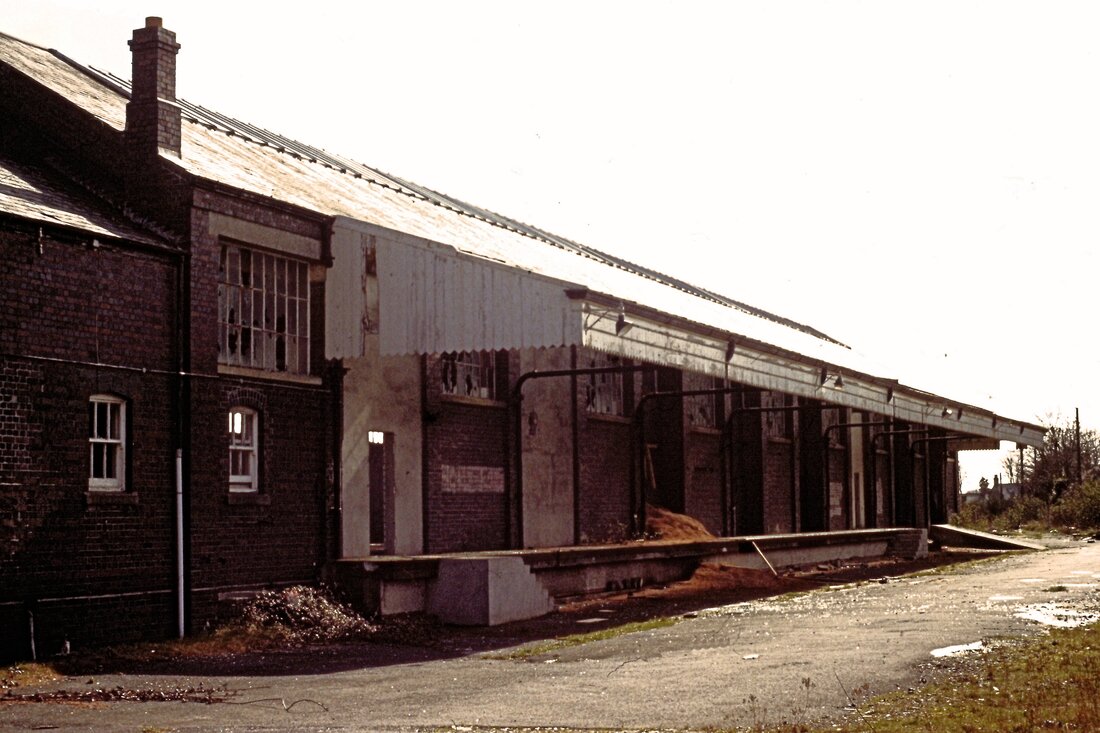
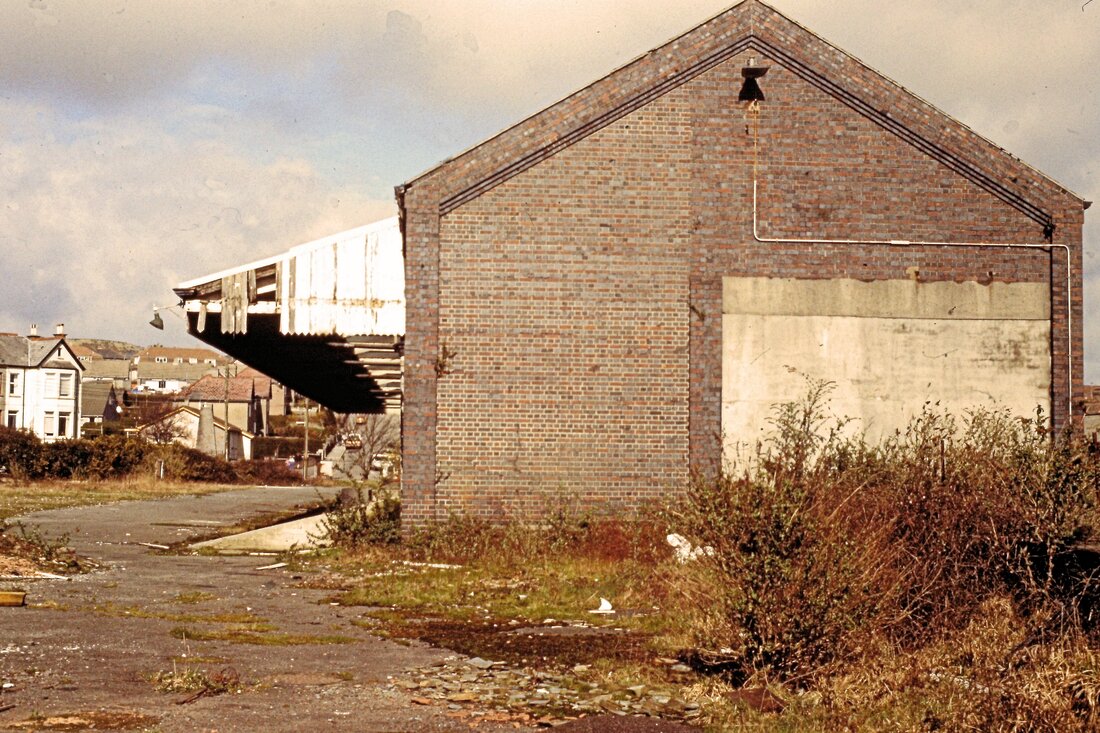
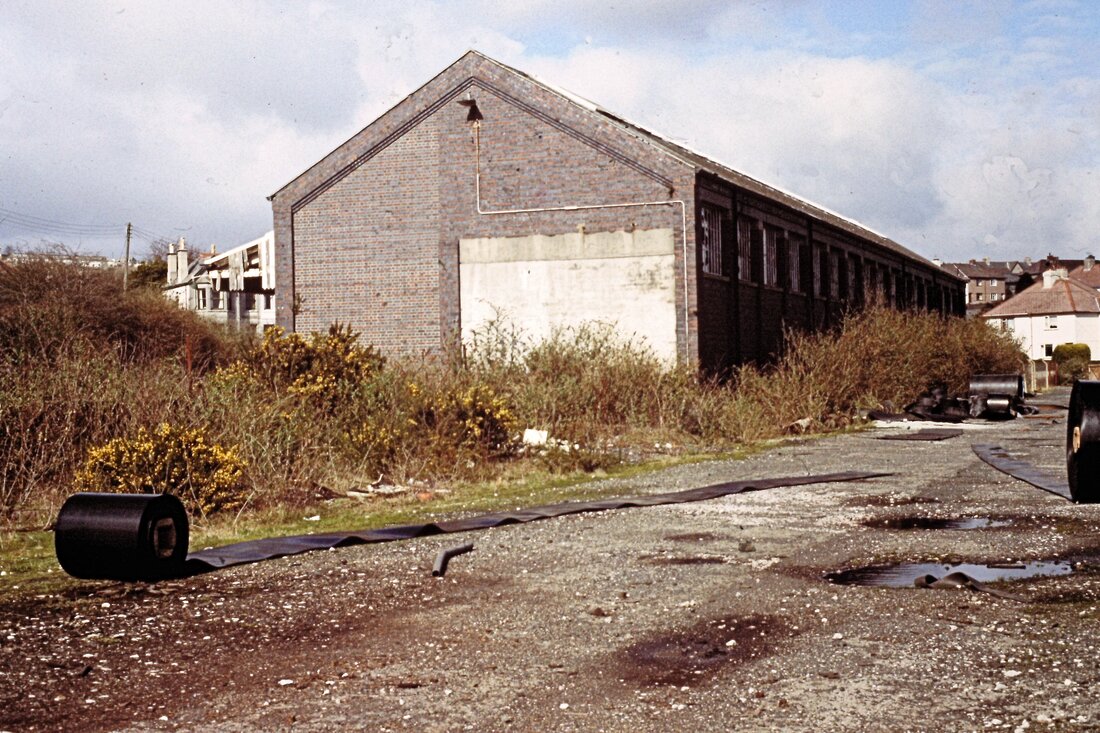
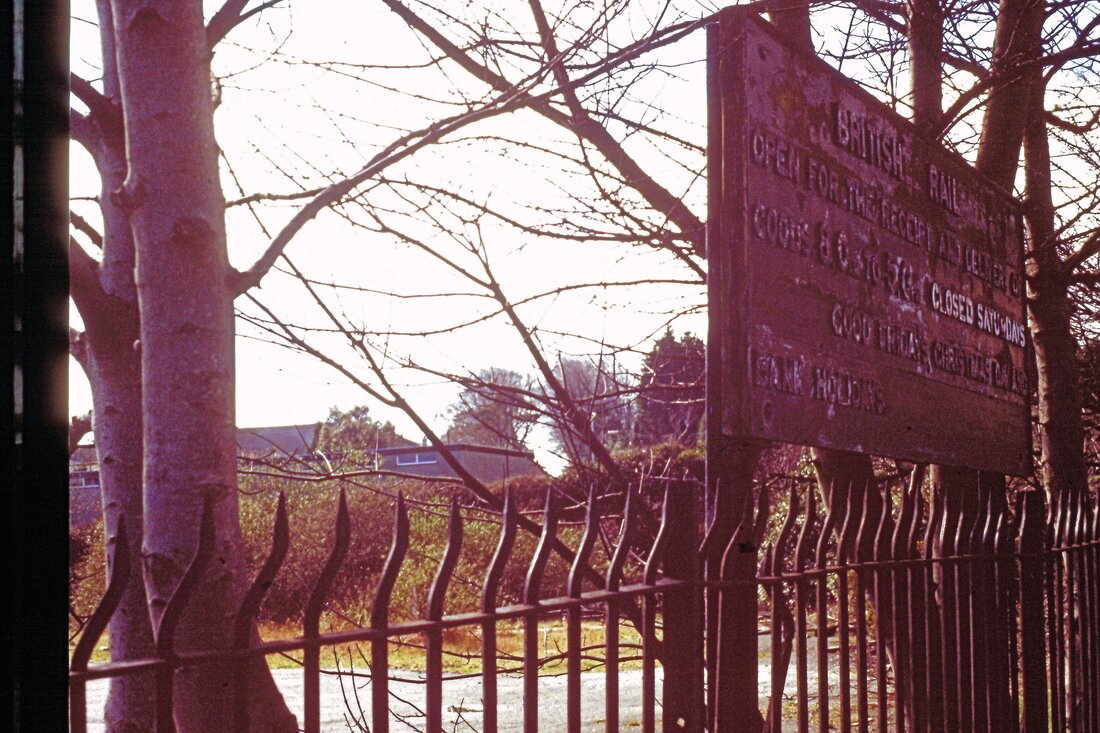
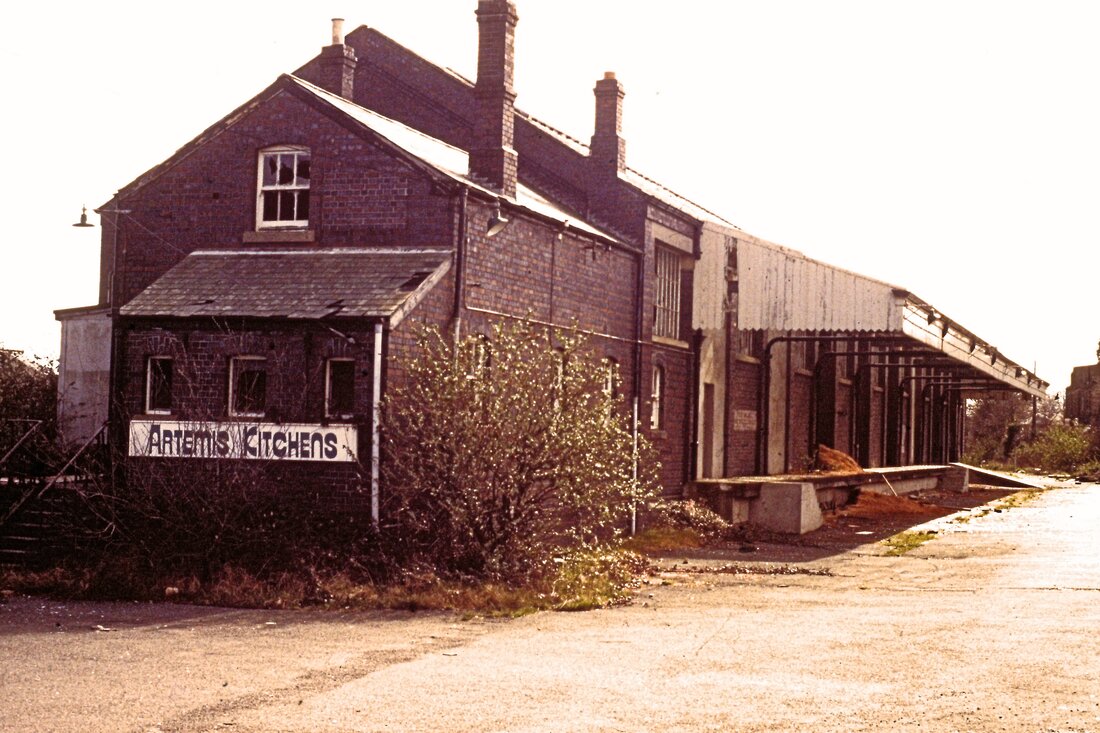
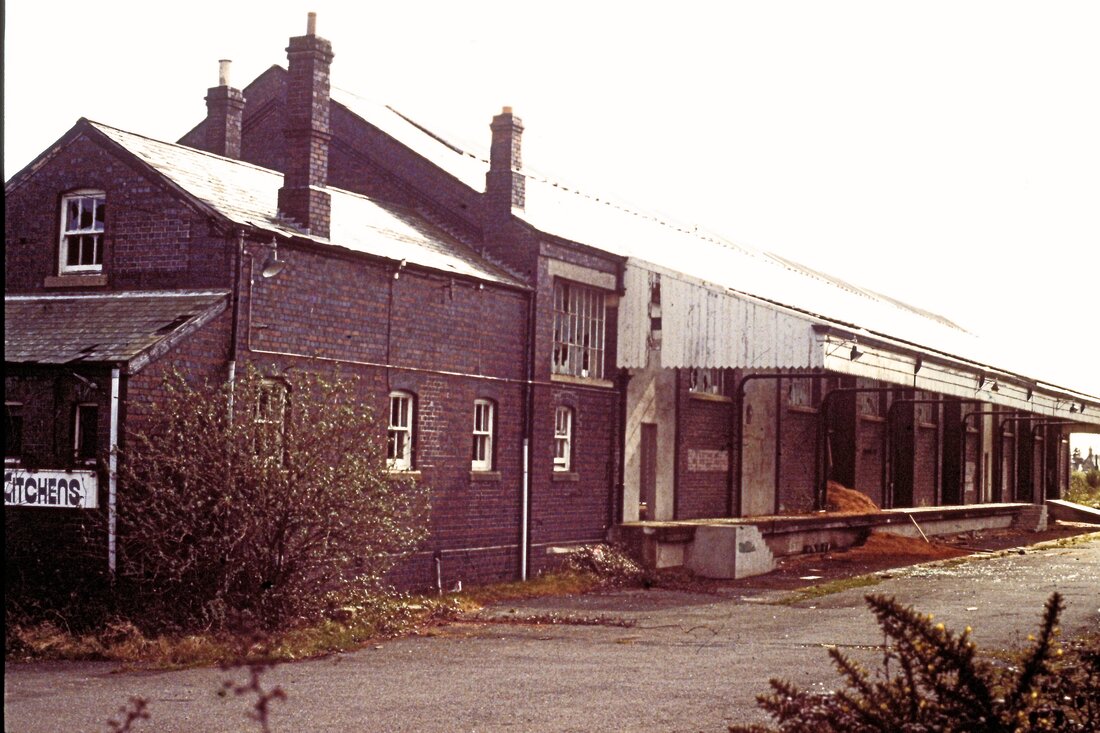
St Austell Goods yard
This dates from 1932 If anyone can advise the closure date it would appreciated. After the yard closed much of the track from the station to the yard was retained for the purpose of turning back trains at St Austell when the line was blocked east of the station. In the most recent picture by Julian Stephens it can be seen that the 50's had gone about as far as possible - this was during engineering works west of Burngullow.
This dates from 1932 If anyone can advise the closure date it would appreciated. After the yard closed much of the track from the station to the yard was retained for the purpose of turning back trains at St Austell when the line was blocked east of the station. In the most recent picture by Julian Stephens it can be seen that the 50's had gone about as far as possible - this was during engineering works west of Burngullow.
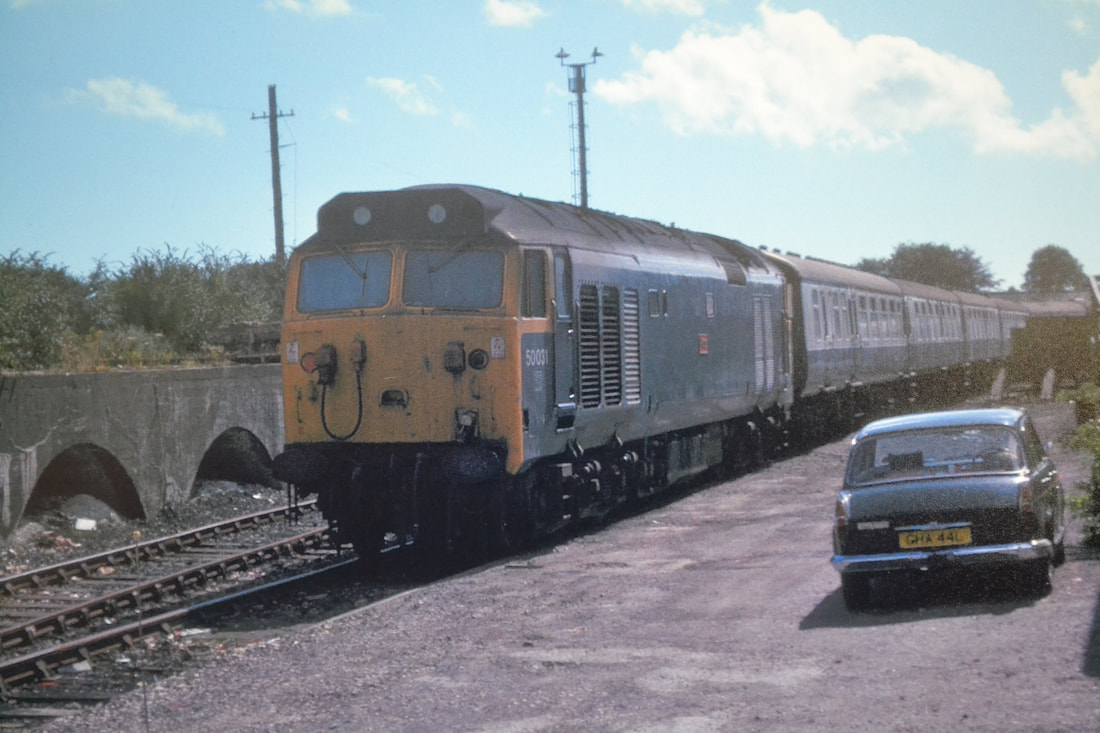
790906a 50031 Taken at St Austell Goohs Yard on 6th September 1979. Copyright Hugh Austin
790906b 50031 Taken at St Austell Goohs Yard on 6th September 1979. Copyright Hugh Austin
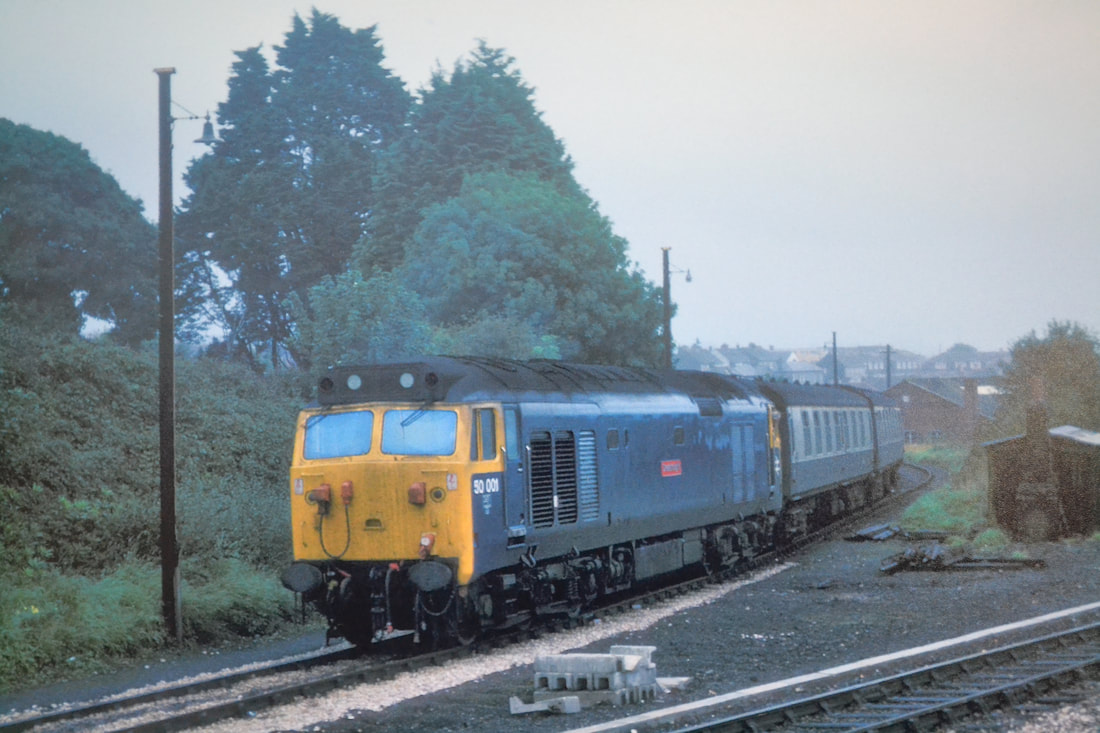
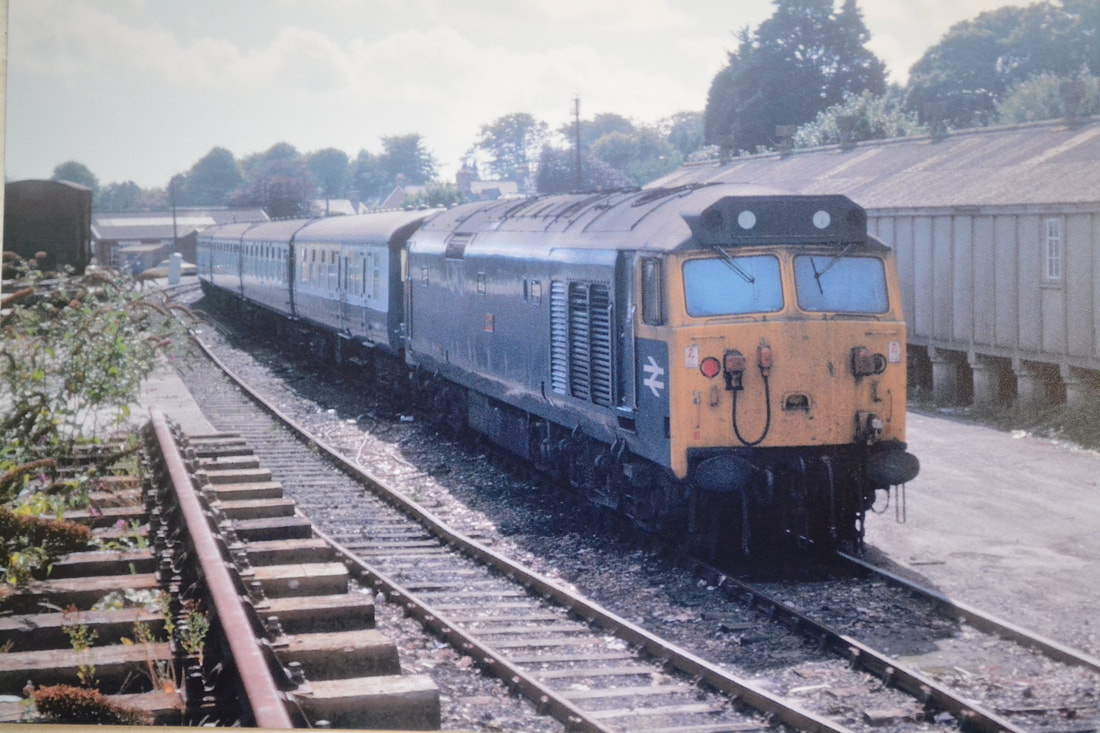
790923a 50001 Photographed at St Austell Goods Yard on 23rd September 1979. I think it may have been moving coaches from a motor rail service. Copyright Hugh Austin

210403j A closed up entrance to the Goods Depot. Copyright Roger Winnen
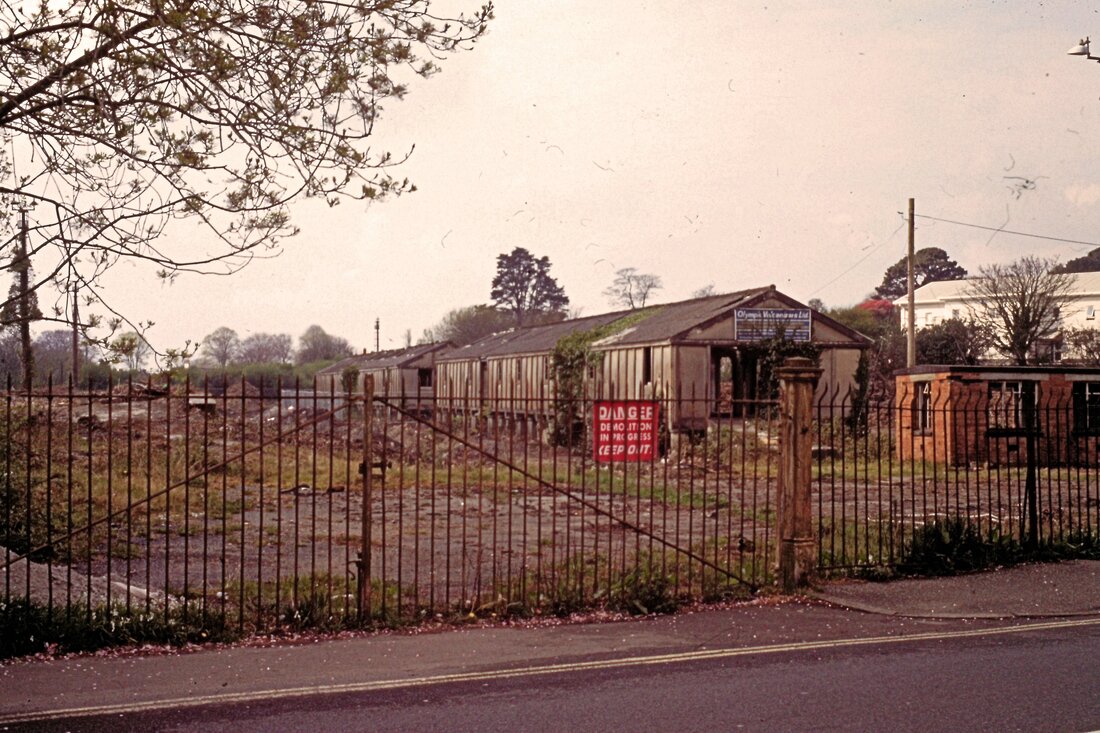
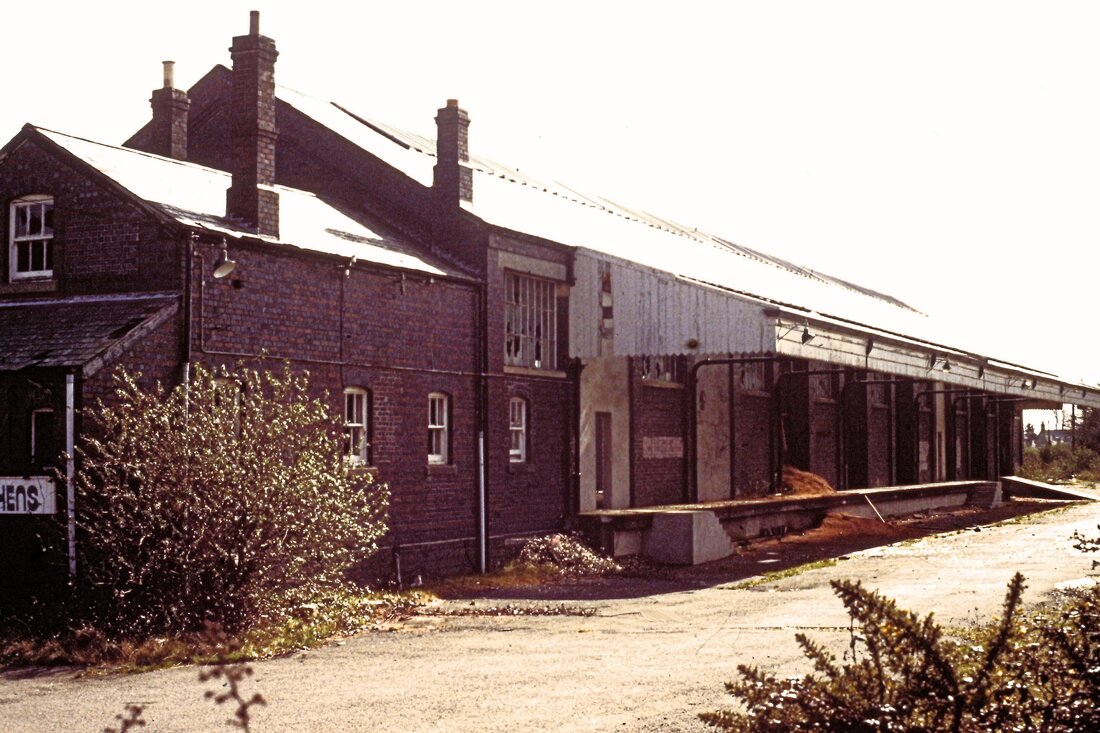
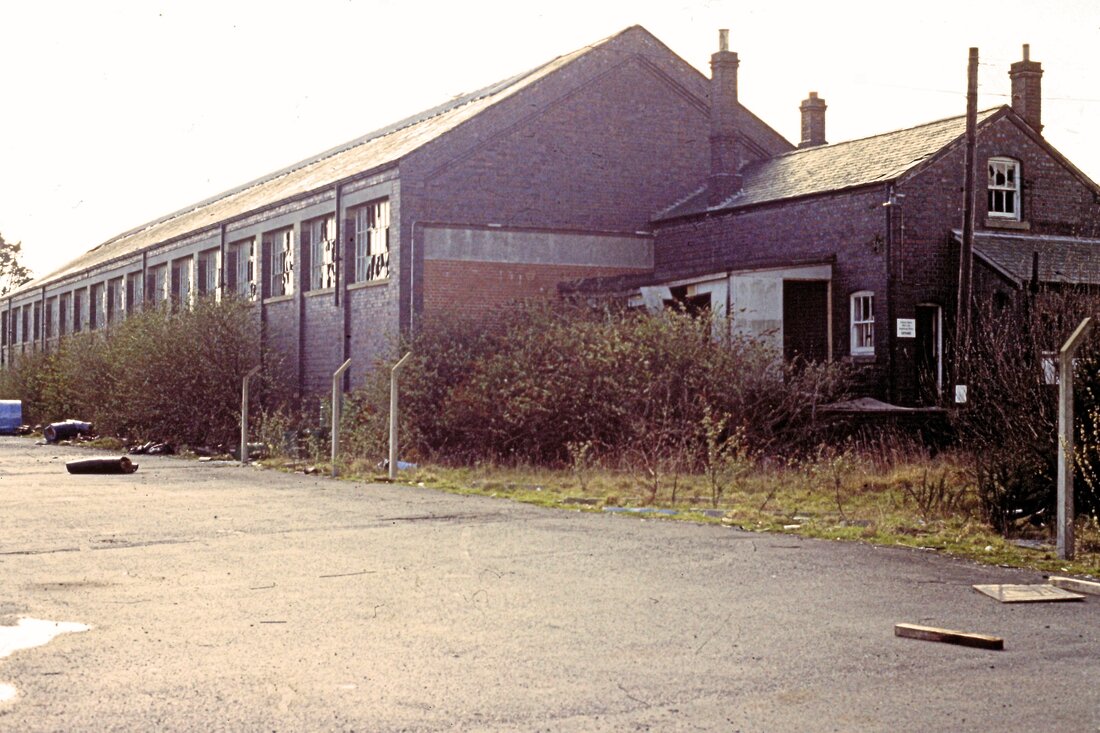
210403n Remains of St Austell Goods Depot built in the 1930s. Copyright Roger Winnen
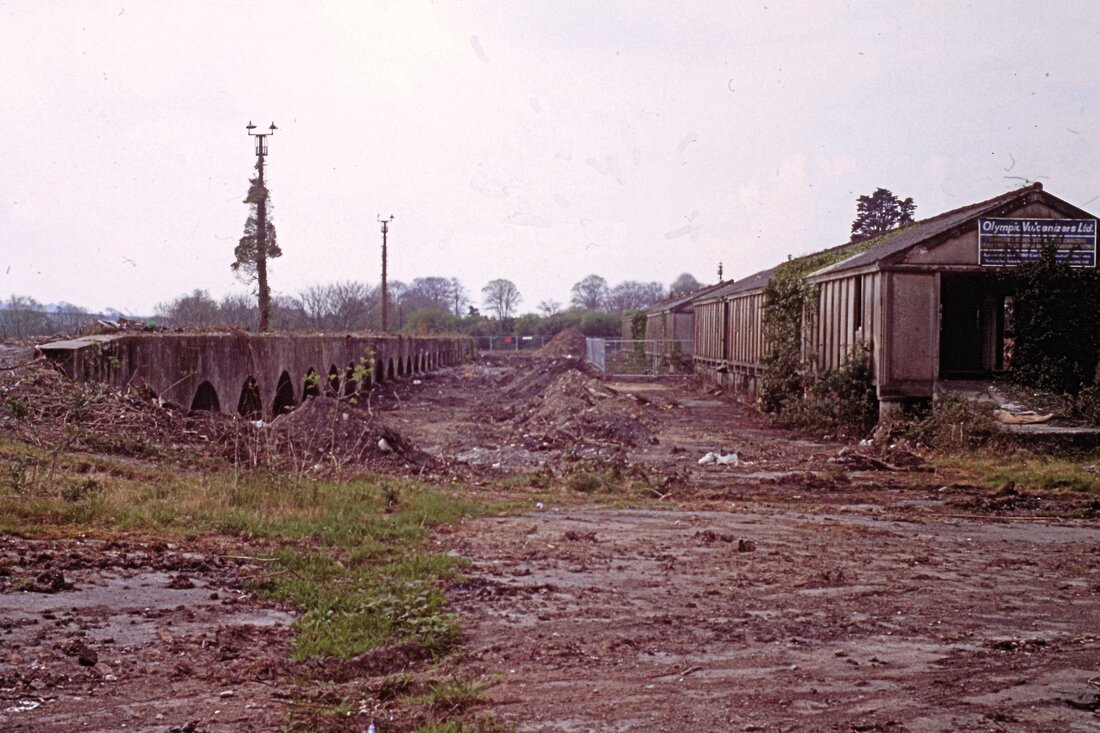
210403o Remains of St Austell Goods Depot built in the 1930s. Copyright Roger Winnen
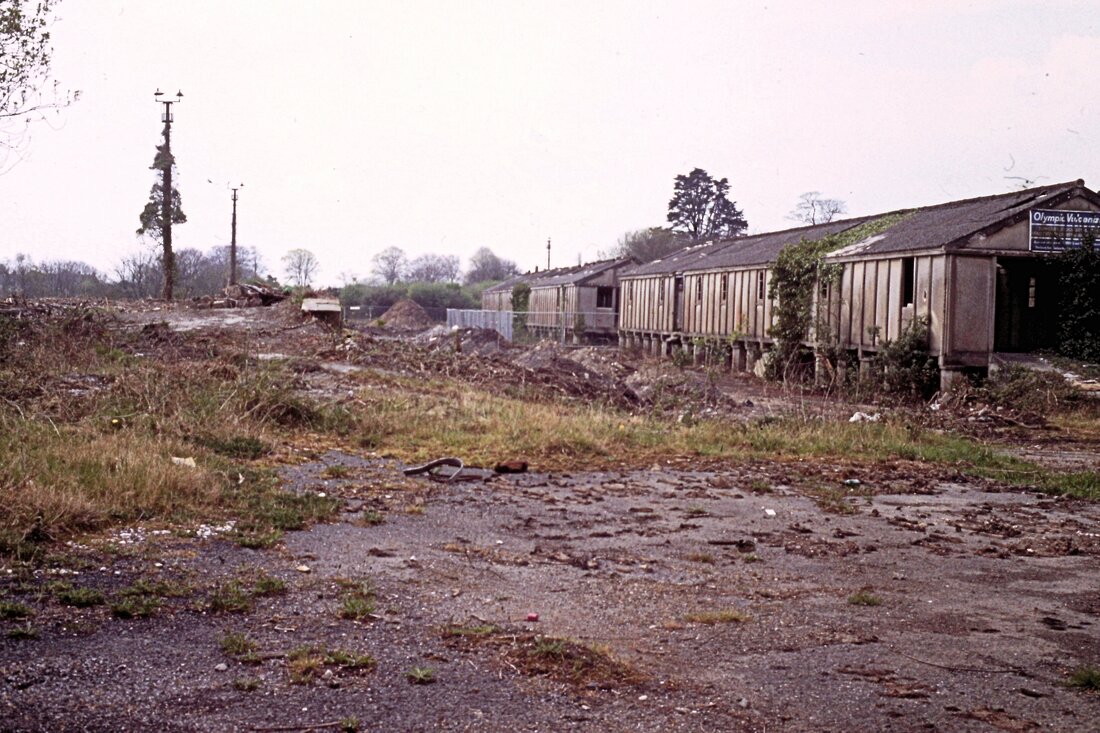
210403p Remains of St Austell Goods Depot built in the 1930s. Copyright Roger Winnen
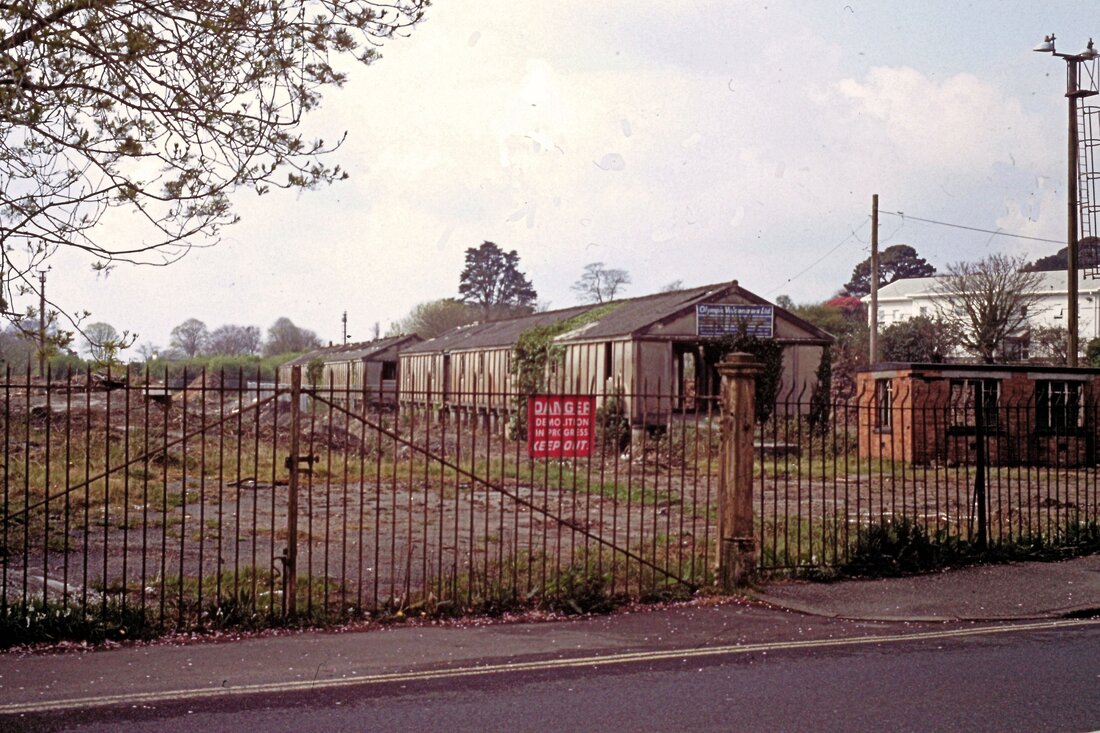
210403q Remains of St Austell Goods Depot built in the 1930s. Copyright Roger Winnen
910317a St Austell Goods Yard 17th March 1991. Copyright Roger Winnen
910317b St Austell Goods Yard 17th March 1991. Copyright Roger Winnen
910317c St Austell Goods Yard 17th March 1991. Copyright Roger Winnen
910317d St Austell Goods Yard 17th March 1991. Copyright Roger Winnen
910317e St Austell Goods Yard 17th March 1991. Copyright Roger Winnen
910317f St Austell Goods Yard 17th March 1991. Copyright Roger Winnen
910317g St Austell Goods Yard 17th March 1991. Copyright Roger Winnen
910317h St Austell Goods Yard 17th March 1991. Copyright Roger Winnen
980131i HST Awaits to depart from the siding. Copyright Roger Winnen
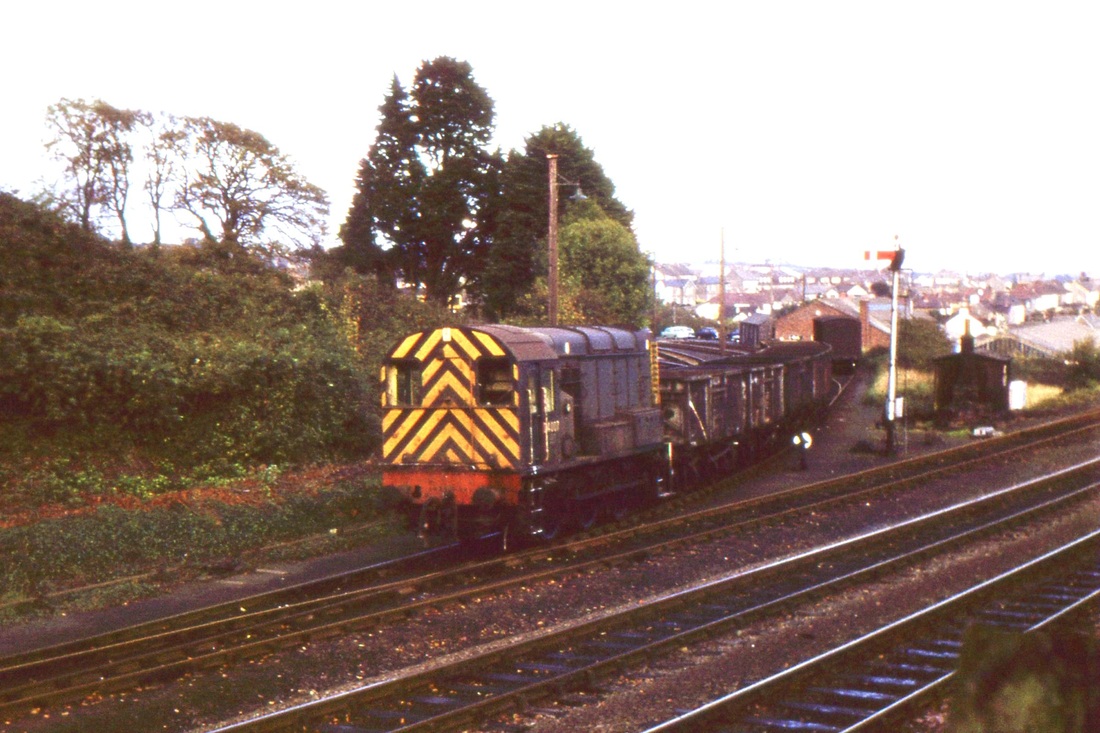
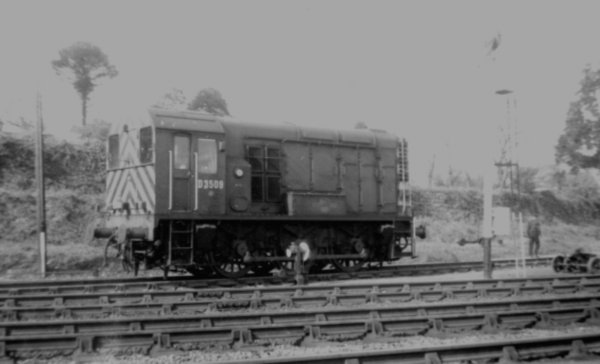
Another rare picture D4007 shunts St. Austell yard, 5Nov71Copyright Paul Cambridge
Class 25 5180 comes up the bank, we get a peep into St Austell Goods yard. The Laira 25 was the driver training loco. 5Nov71 Copyright Paul Cambridge
D1028 Western Hussar approaches St Austell with the 08.00 Bristol Penzance. The goods yard approach line is seen curving away to the left. This picture dates from the 29th November 1975. Copyright Roger Winnen. N.B. All this is almost forgotten track, from this location today (2018) all that can be seen is plain track on the bank towards Par. The goods yard approach curve is retained a s siding in case of the need to operate a service in West Cornwall between Penzance and St Austell. This siding terminates at more or less the ground disc signals.
See the next section St Austell Excl to Lostwithiel Incl to continue
For more pictures of this area and many other locations in Cornwall please click below to see a wonderful selection of Cornish railway pictures which have been made available to us by Andy Kirkham. All his pictures are, of course Copyright.
https://www.flickr.com/photos/52554553@N06/albums/72157636828119615/with/10419848883/
https://www.flickr.com/photos/52554553@N06/albums/72157636828119615/with/10419848883/